Brand Standards Manual
Cordovan Art School
Brand Standards Manual
COPYRIGHT © 2025
BY
Cordovan Arts Franchising, LLC
No part of this publication may be reproduced in any form without written permission.
Franchisees are responsible for maintaining confidentiality of all contents of this Brand Standards Manual.
Failure to do so is a violation of the Franchise Agreement.
Welcome
We’re excited to have you on the team. At Cordovan Art School, our mission is to make a positive impact—one person at a time. Every interaction matters. How will you make a difference in someone’s day today?
- Our Vision is to become the leading art education brand in the United States by delivering exceptional classroom experiences and building vibrant arts hubs within every community we serve.
- Our Mission is to enrich lives through a lifelong learning of the arts.
- Our Slogan is “We create artists!”
- Our Motto is “We are a company that builds people up and makes people better, and by doing so, we make the world better.”
Our Company Culture
We accomplish our vision, mission, slogan and motto by building the next generation of artists and leaders. It all starts as we become “servant leaders” ourselves. We build artist-leaders by how we treat our students, our teachers, and anyone we interact with at Cordovan Art School.
Cordovan is a customer service company, and our kindness comes across in the way we communicate with our customers, our teachers and our staff. We show kindness by the way that we immediately greet people when they enter our lobby, the way we talk, the way we email, the way we go the extra mile to make someone happy, and the way we create a friendly culture. We have a saying at Cordovan: “Smile/ Smile”. Whenever anyone walks through the door, they must be immediately greeted with a smile. And, when they walk out the door, they should have a smile on their face because of the experience they had while at Cordovan. Here are a few more things Cordovan stands for: Cordovan is a place where everyone can fit in and feel safe and loved; Cordovan is a place that is fun and filled with creativity; Cordovan is a place to learn art skills and leadership skills; Cordovan is a place to bond and create lasting friendships; Cordovan is a place that unites people together through a love of art; Cordovan employees give back by looking for ways to get involved with community art events. Cordovan employees and staff are friendly and happy.
The 4 Main Revenue Streams
Cordovan Art School has four main revenue streams (five if PYOP is offered):
- Weekly Art Classes
- Art Camps
- Spring Break
- Summer
- Thanksgiving
- Winter Break
- Other Holidays when school is out
- Parties
- Canvas painting
- Paint Your Own Pottery (PYOP)
- Wheel Throwing (Select Locations)
- Workshops & Events
- Customized
- Corporate
- Girl Scouts
- Paint Your Own Pottery (PYOP, select locations)
Goals & Reporting:
See Form: Franchisee Evaluation Form
Managers should work together with the studio owner to set goals aligned with the primary revenue streams. It is the managers responsibility to track performance and provide weekly reports.
- # of weekly art class students
- # of students per weekly art class*
- Free trial class conversion rate
- # of camp enrollments
- # of parties booked
- # of new 5-Star Google reviews (maintain a rating above 4.5)
- # of PYOP painters (for studios offering PYOP)
*Studios must try to maintain an average of at least 6 students per weekly class. While individual classes may vary, overall enrollment should meet or exceed this benchmark.
Classes should not run with fewer than 4 students unless approved by the studio owner. Exceptions may be made at the start of a semester or for new studios to allow time to build enrollment.
Manager, Teachers & Staff
Manager
The Studio Manager is responsible for establishing a welcoming, encouraging, and inclusive studio environment where students, families, and staff feel they belong.
The Manager oversees all staff and programming, including teachers, assistant teachers, and all studio offerings (classes, camps, parties, workshops, events, and PYOP).
The manager should take full responsibility for making sure everything runs smoothly at their studio, including sales & marketing, student retention, overseeing the student awards and recognitions program, the quality of art projects, the culture, customer service, responding quickly to customer complaints, communication, etc. If a manager doesn’t know how to handle a difficult situation, they should ask for help.
The Manager is responsible for driving student enrollment and retention by ensuring every student is known by name and receives an exceptional experience. All prospective customers must be recorded for follow-up. When a visitor enters the studio, the Manager (or designated staff member) must collect their name, email, and phone number and record it in the appropriate system. No prospective customer should leave without contact information being obtained, unless they decline.
The Manager is responsible for posting tuition, collecting payments, and applying late fees by the 7th of each month.
The Studio Manager is fully accountable for all studio operations and overall performance, including:
- Student enrollment and retention
- Hiring, training & managing staff
- Studio care
- Programming (classes, camps, parties, workshops, events, fundraisers, PYOP)
- Inventory management and supply ordering
- Jackrabbit Class system management
- Annual student art show
- Student safety
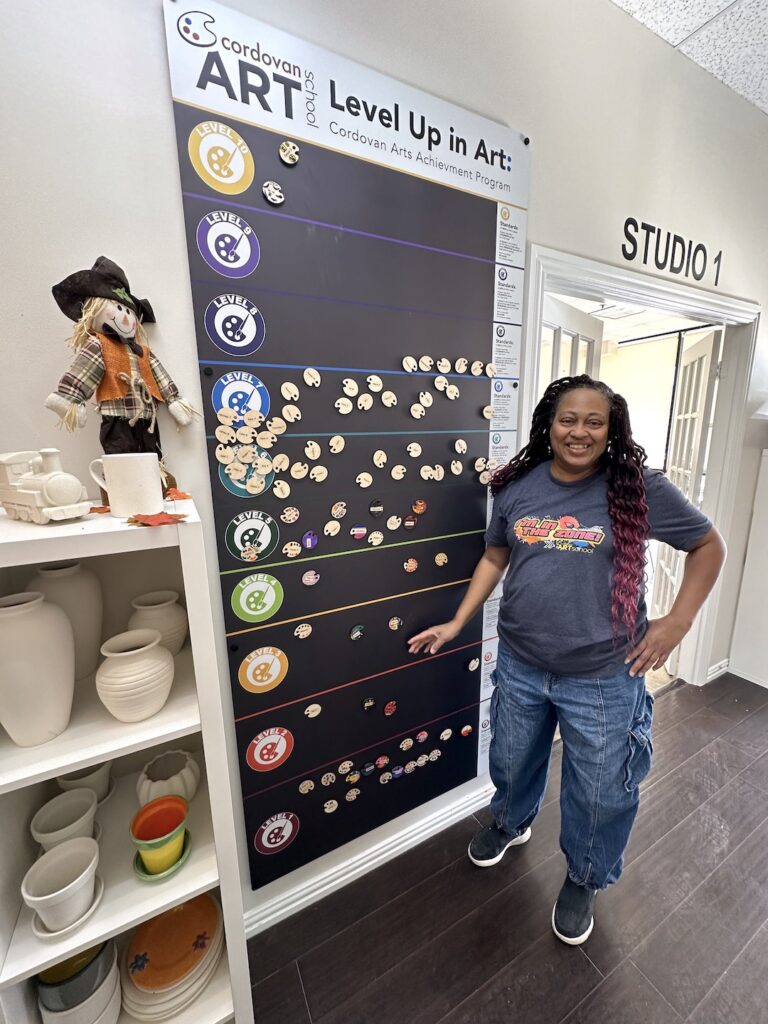
- Student awards and recognition
- Sales, marketing & community outreach
- Communication with students, parents, and staff
- Customer service
If a Manager encounters a situation they do not know how to handle, they must seek guidance immediately.
Managers must follow a daily schedule and checklist to ensure consistent studio operations. The Daily Manager Checklist outlines required tasks for both Weekly Class season and Camp season. Managers are expected to be fully familiar with this document and follow it consistently.
Download/ Print Form: Daily Checklist for Managers 1 – CLASS Season (Sept-May)
Download/ Print Form: Daily Checklist for Managers 2 – CAMP Season
Art Teachers
Teachers are responsible for delivering high-quality art instruction using approved lesson plans. All instruction must align with Cordovan Art School’s Art Principles and Techniques.
Teachers may occasionally create and teach their own “Teacher’s Choice” lesson plans. All Teacher’s Choice lessons must be submitted to the Manager in advance for approval.
While lesson plans are provided, teachers are expected to use their artistic license to adapt projects to their individual strengths in order to enhance student learning. Before teachers are hired, they must submit a portfolio that showcases a strong foundation in traditional art and design principles. Teachers are expected to teach at a high-quality so that their students learn the principles, elements and techniques of art and design. The core objective of the teacher role is reflected in the school’s mission: “We create artists.”
Teachers must also demonstrate friendliness, happiness, and provide excellent customer service at all times.
Assistant Manager
The Assistant Manager is hired by and reports directly to the Manager. This role requires a high level of maturity, sound judgment, and a strong commitment to student safety.
The Assistant Manager is responsible for overseeing studio operations in the absence of the Manager and must be capable of making effective decisions to ensure the studio runs smoothly.
The Manager may delegate operational responsibilities to the Assistant Manager as needed; however, the Manager retains full accountability for overall studio performance.
During camp sessions, the Assistant Manager is typically assigned to the afternoon shift, while the Manager oversees the morning shift.
Assistant Teachers
Assistant Teachers support Art Teachers during camps, primarily for ages 5–7 and 8–12. They are typically hired when additional classroom support is needed, such as when enrollment reaches approximately 15 students or when younger students require more hands-on assistance.
Assistant Teachers are often current or former Cordovan Art School students seeking a summer position.Managers must review the “Assistant Teacher Responsibilities” form with both the Assistant Teacher and the Lead Teacher upon hiring to ensure clear expectations and effective collaboration. The form should also be posted in each classroom as a daily reference.
PYOP Staff
As the studio’s paint-your-own-pottery (PYOP) business grows, additional staff may be needed to support daily operations. PYOP Staff report to the Manager or Assistant Manager and are responsible for assigned tasks which include assisting customers, cleaning and organizing the studio, glazing pottery, supporting parties, and loading or unloading the kiln. Staffing levels should be based on studio demand.
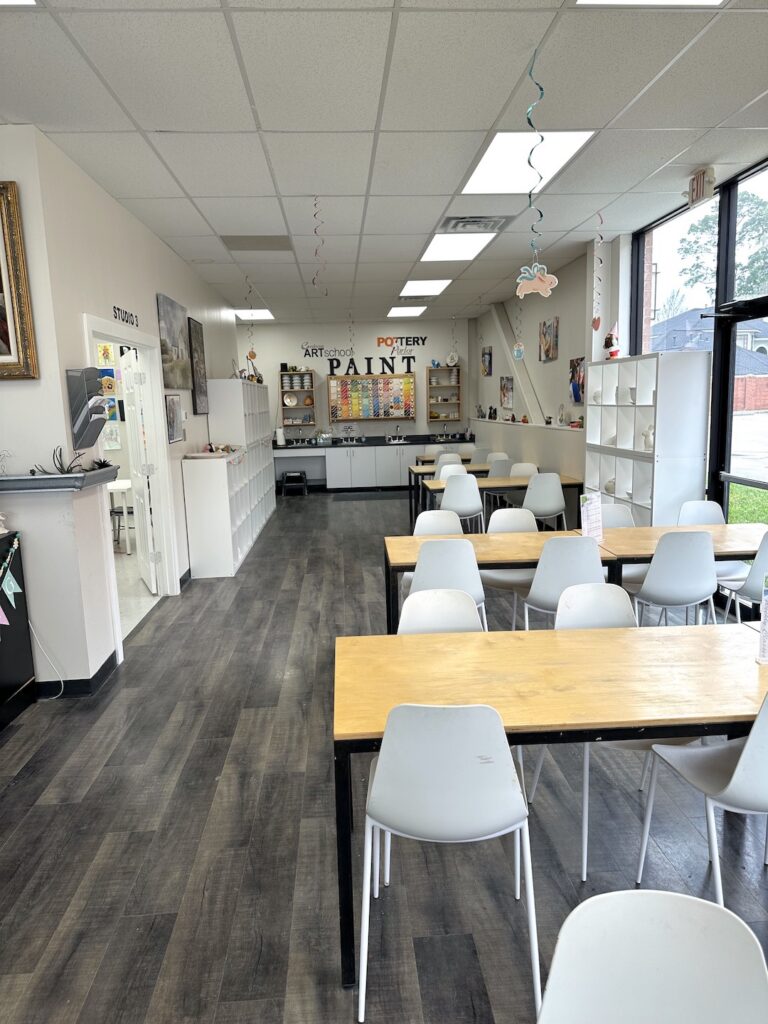
Setting Up Your Studio
Signage


Pylon or Monument Sign on Street
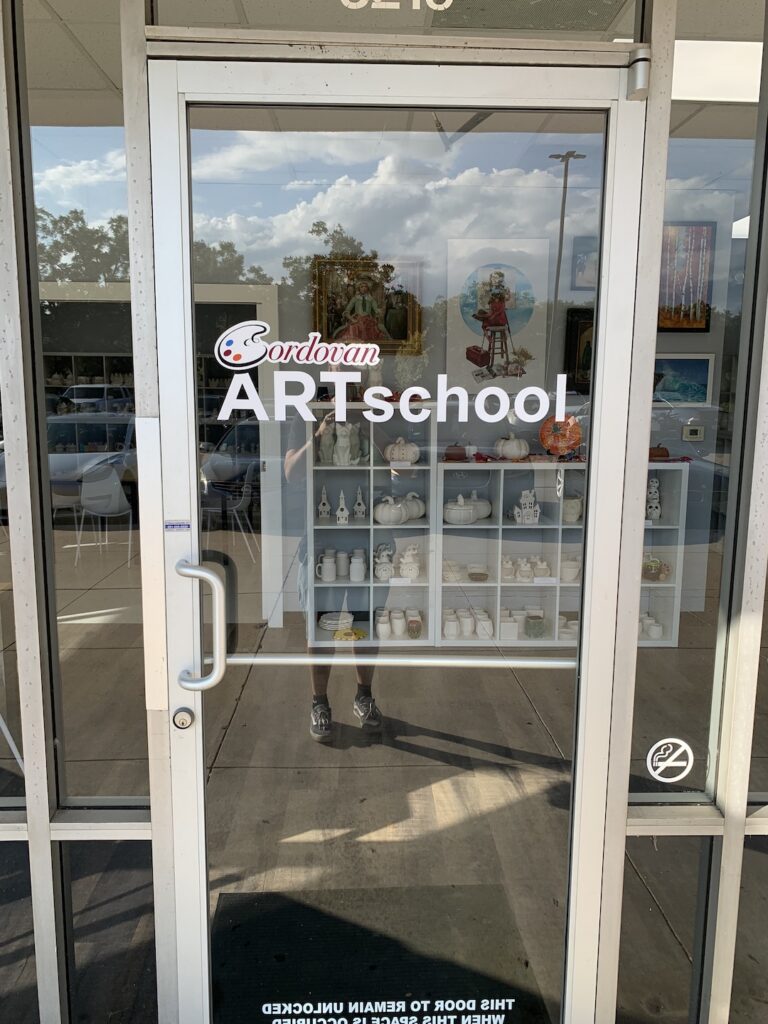
Door Signs
Sandwich Board
Camp Wall Signage
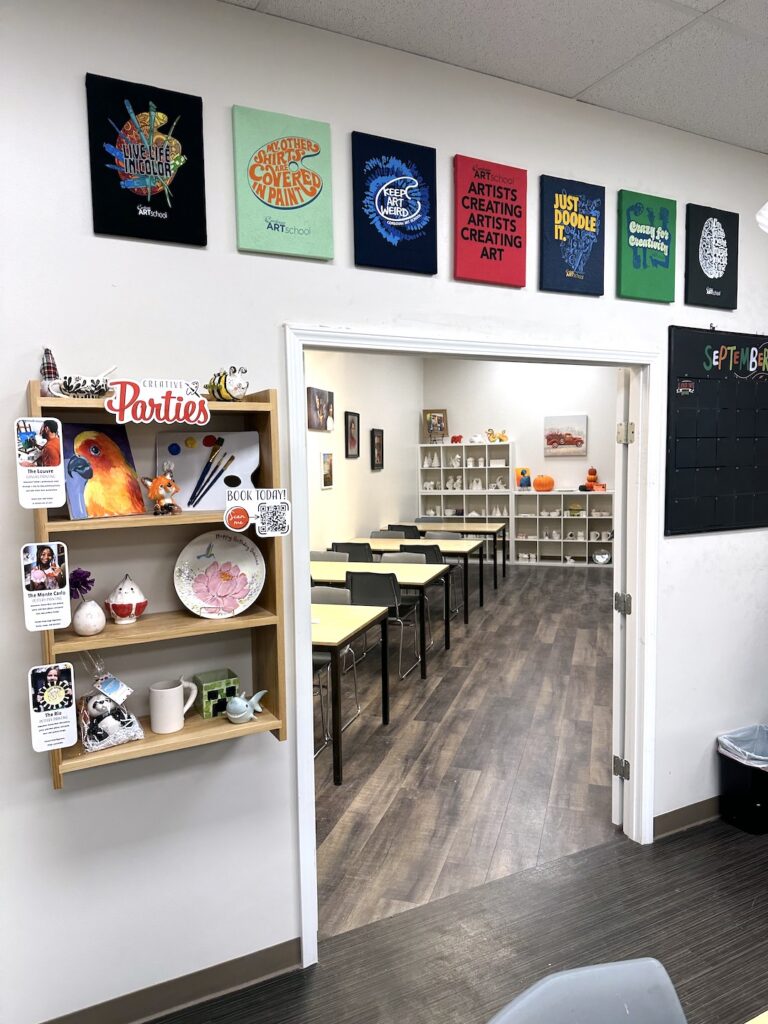
Lobby Signage
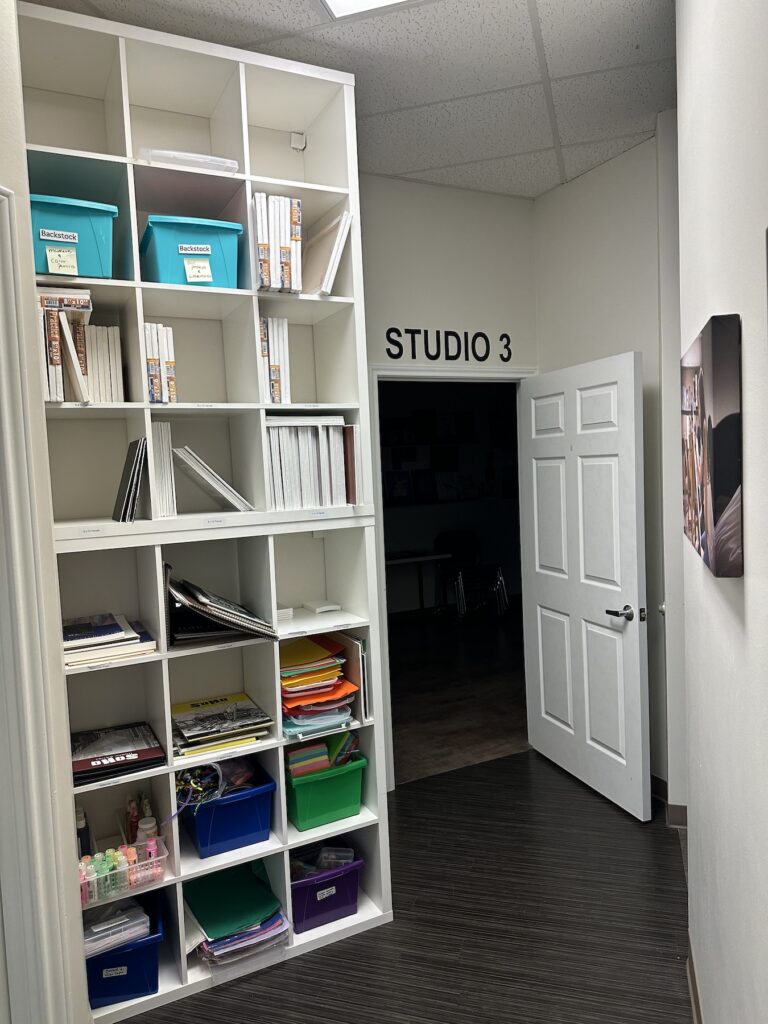
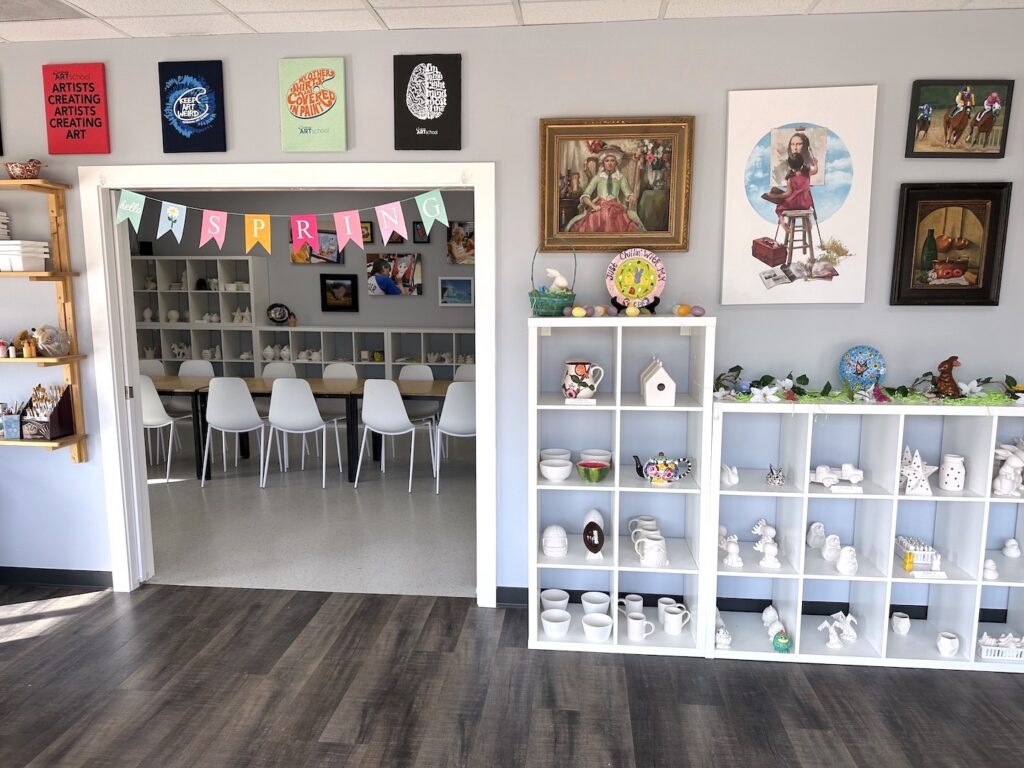
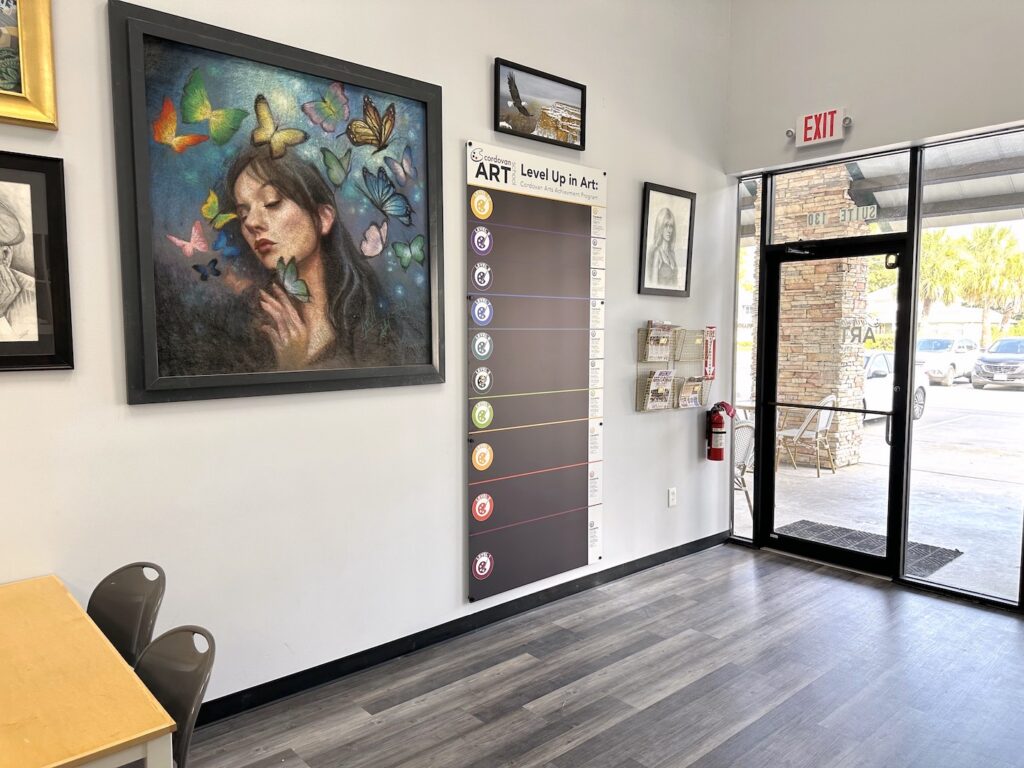
Lobby

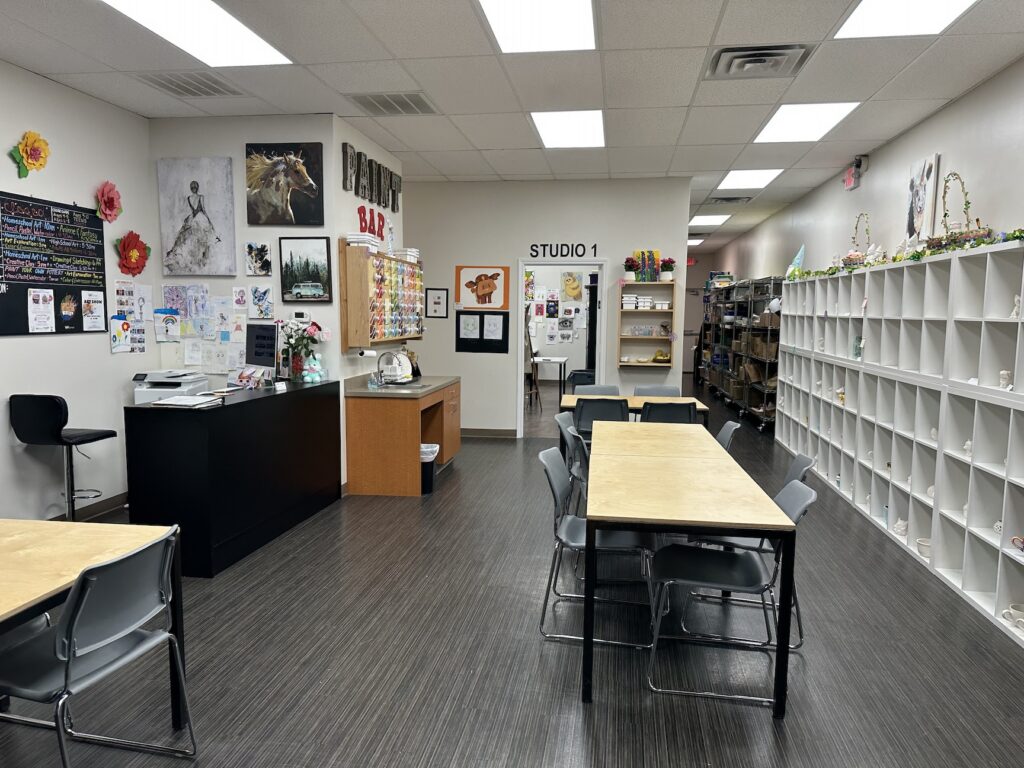

Front Desk
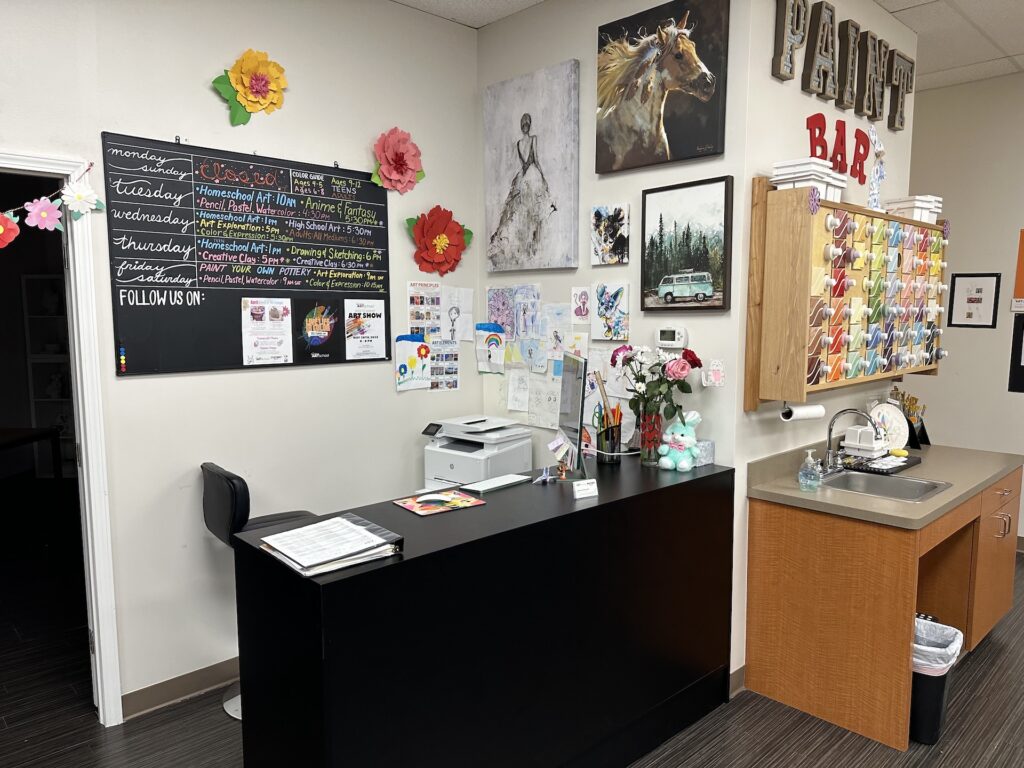
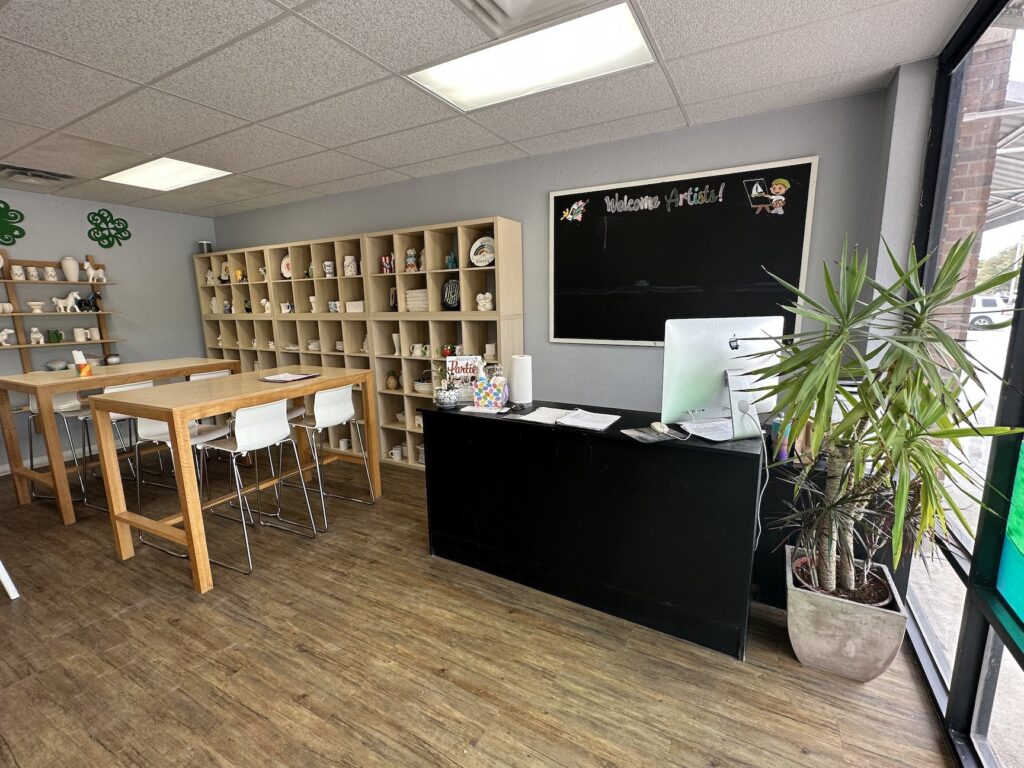

Chalkboard
Party Display
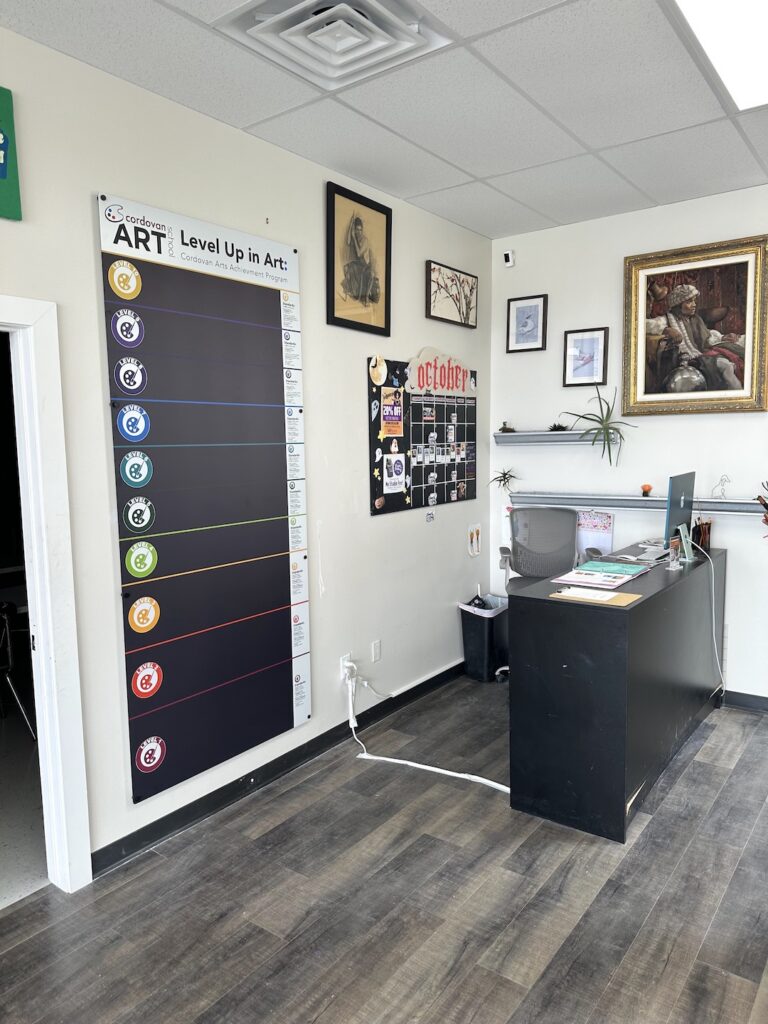
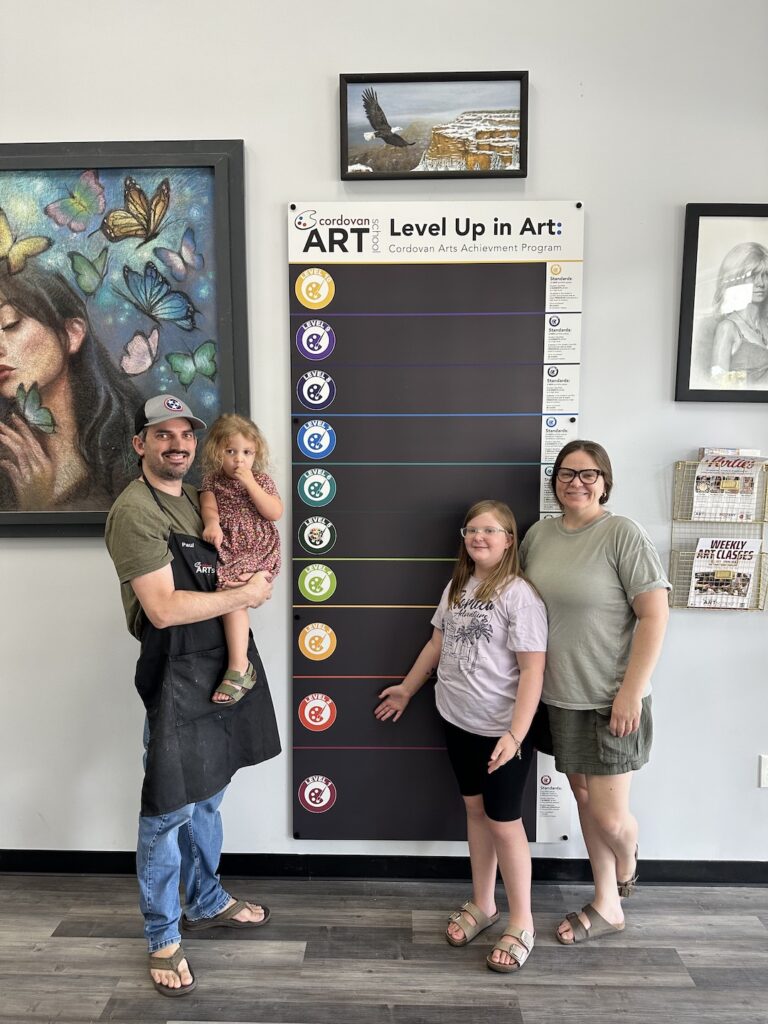
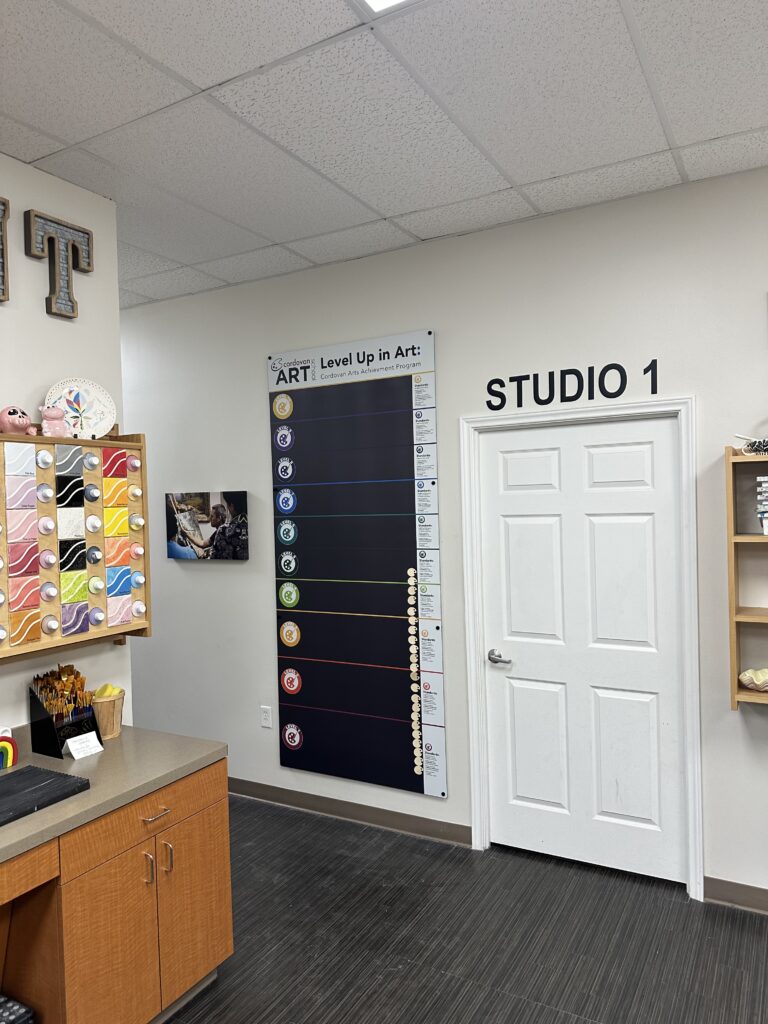
Level Up Display
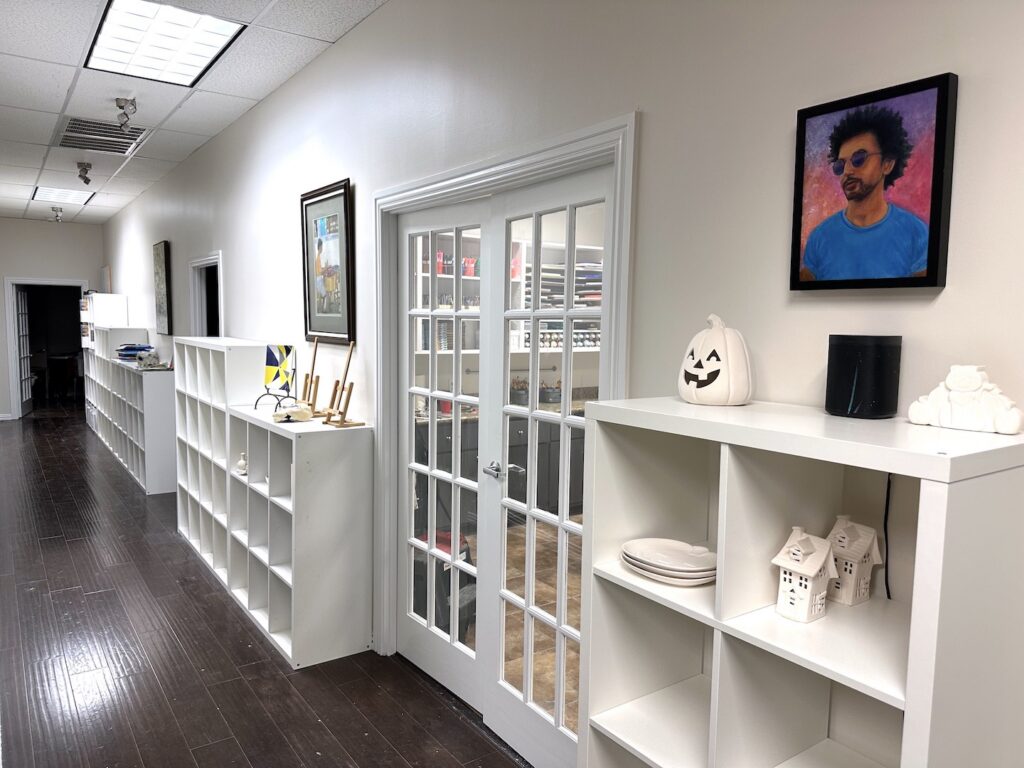
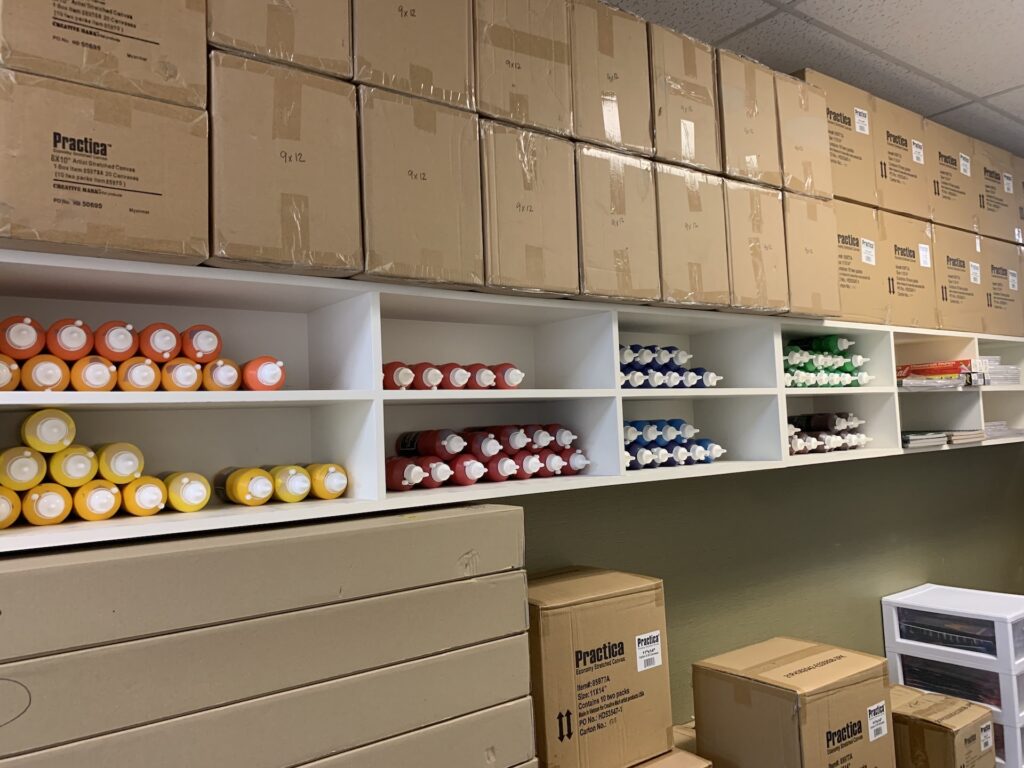
Paper & Canvas Shelf (Lobby/ Hallway)
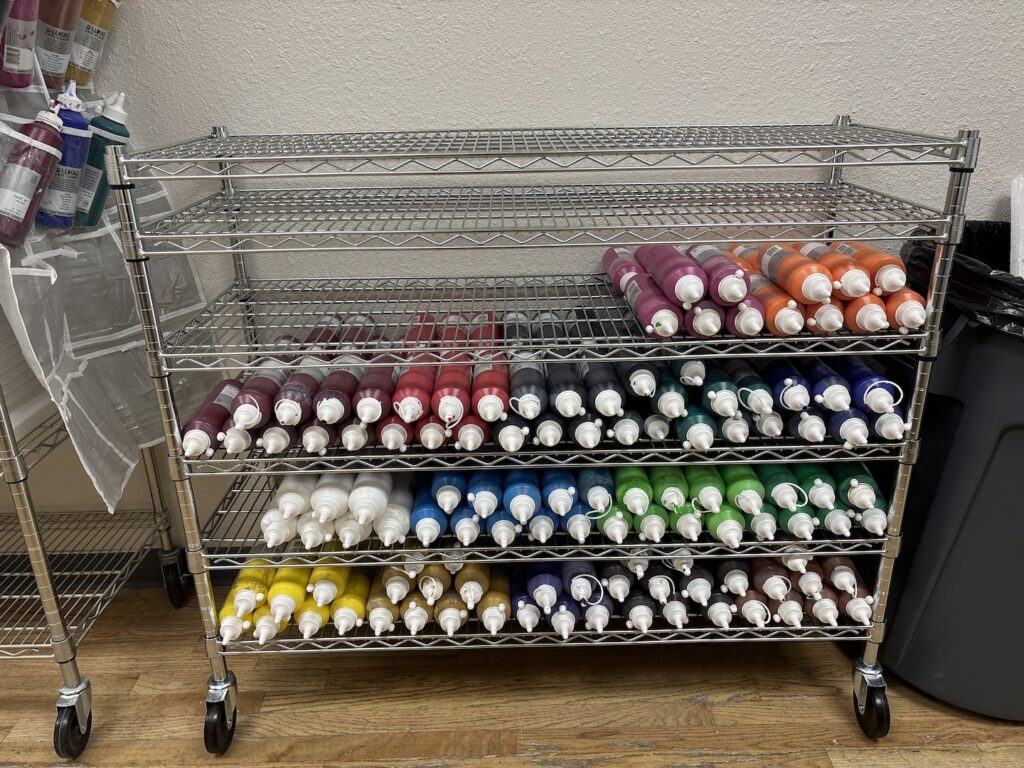
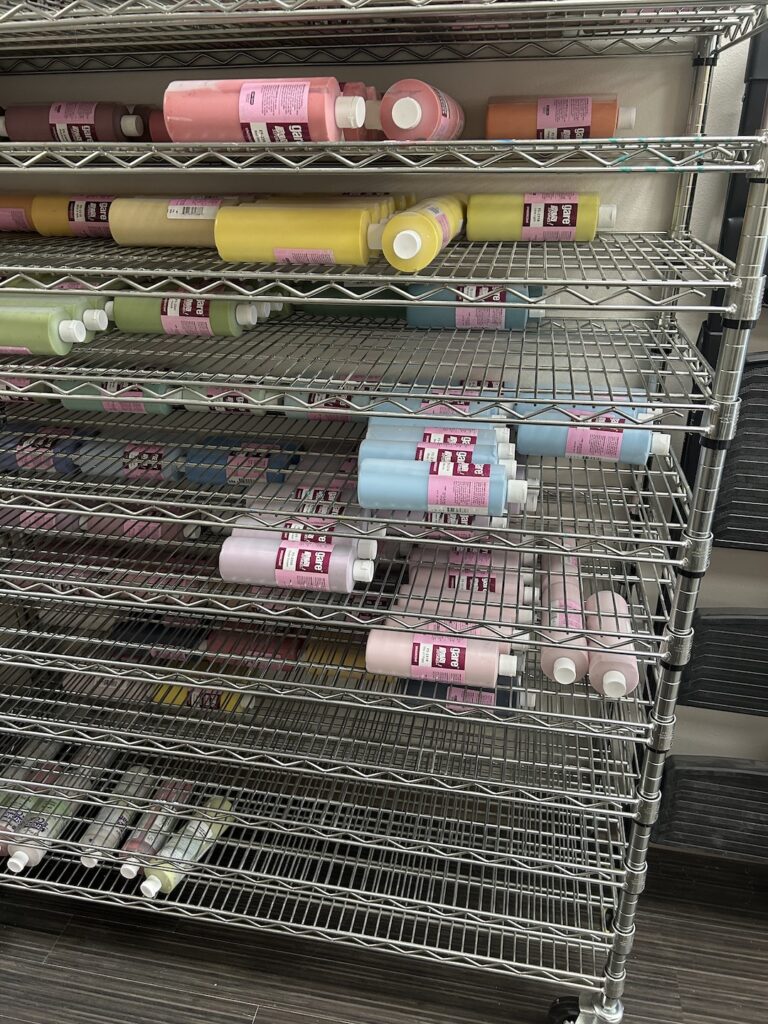
Art Supplies Racks (in Classrooms)

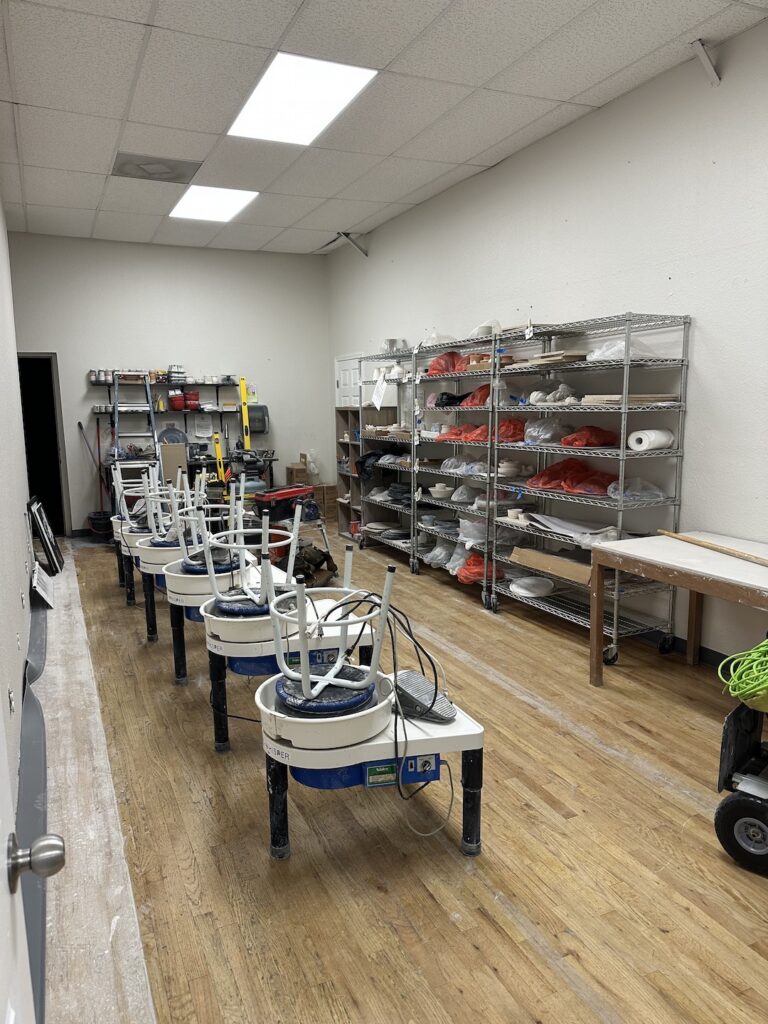
Pottery Supply Racks (in Wheel Classrooms)

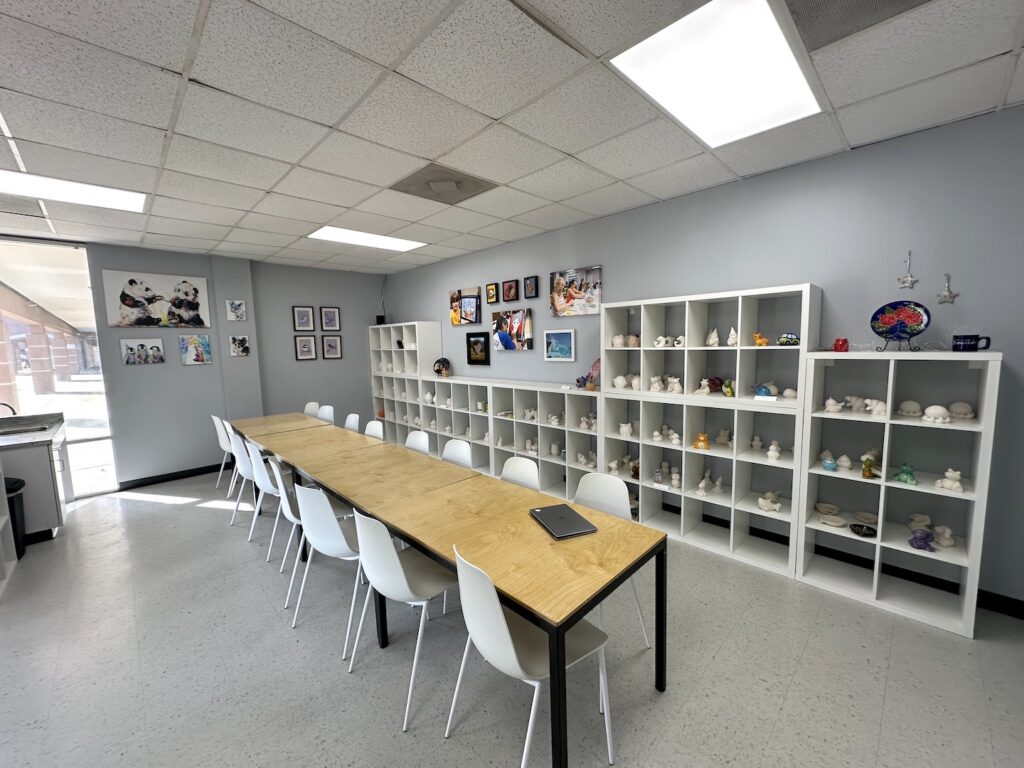
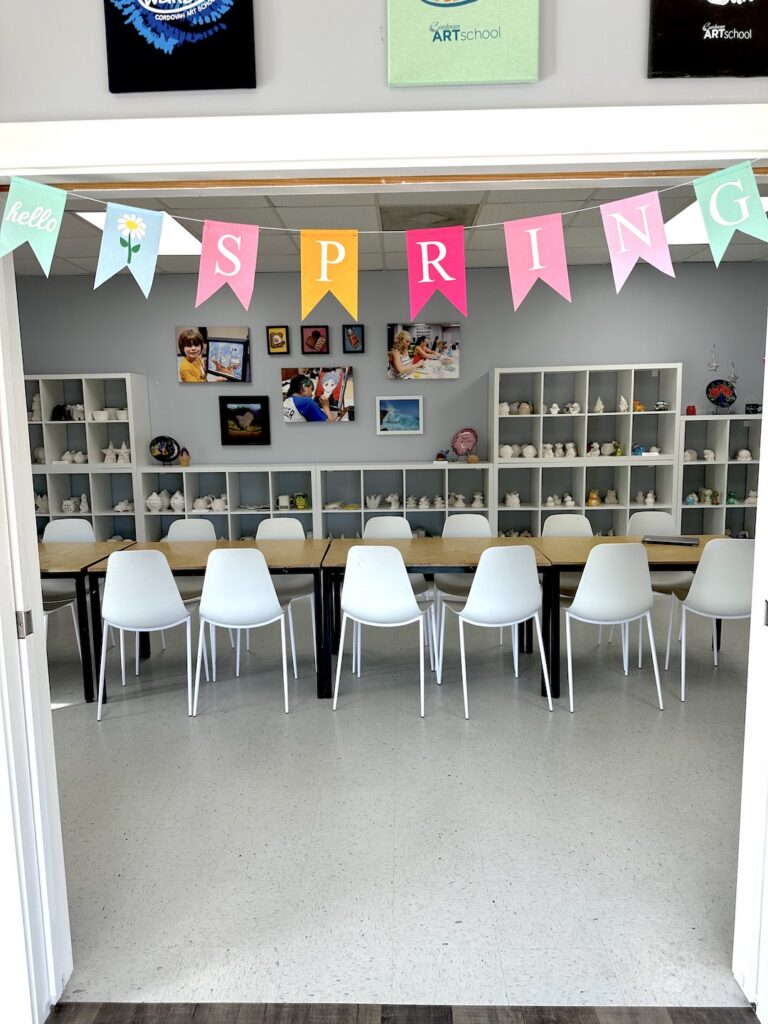
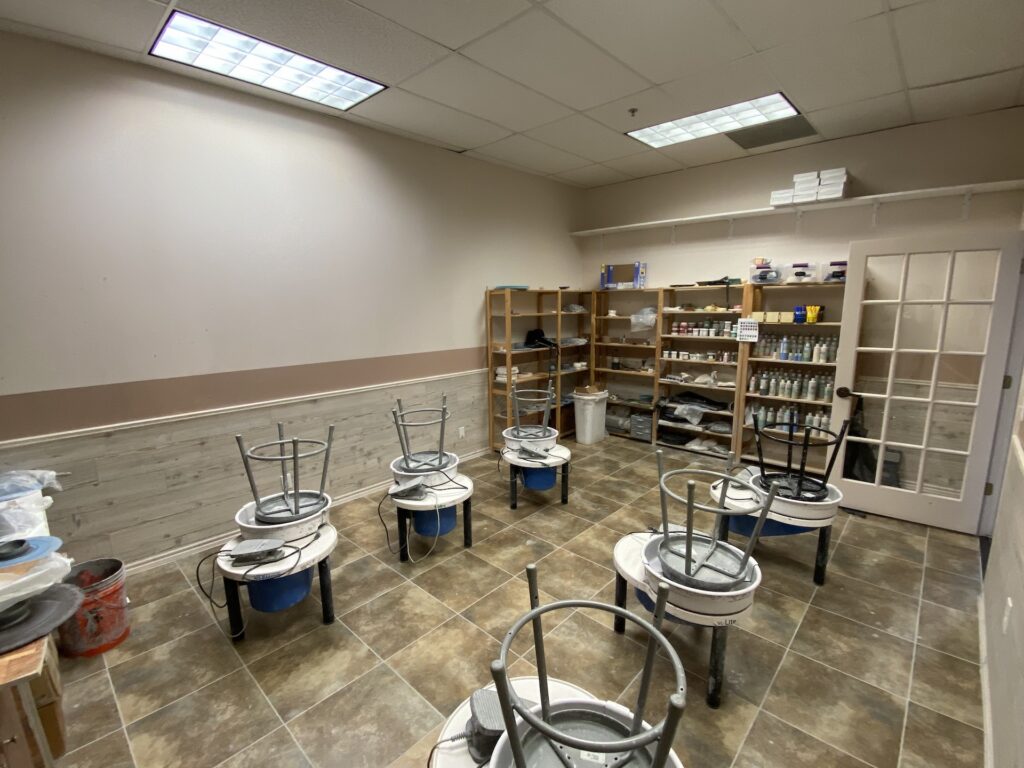
Art Classrooms
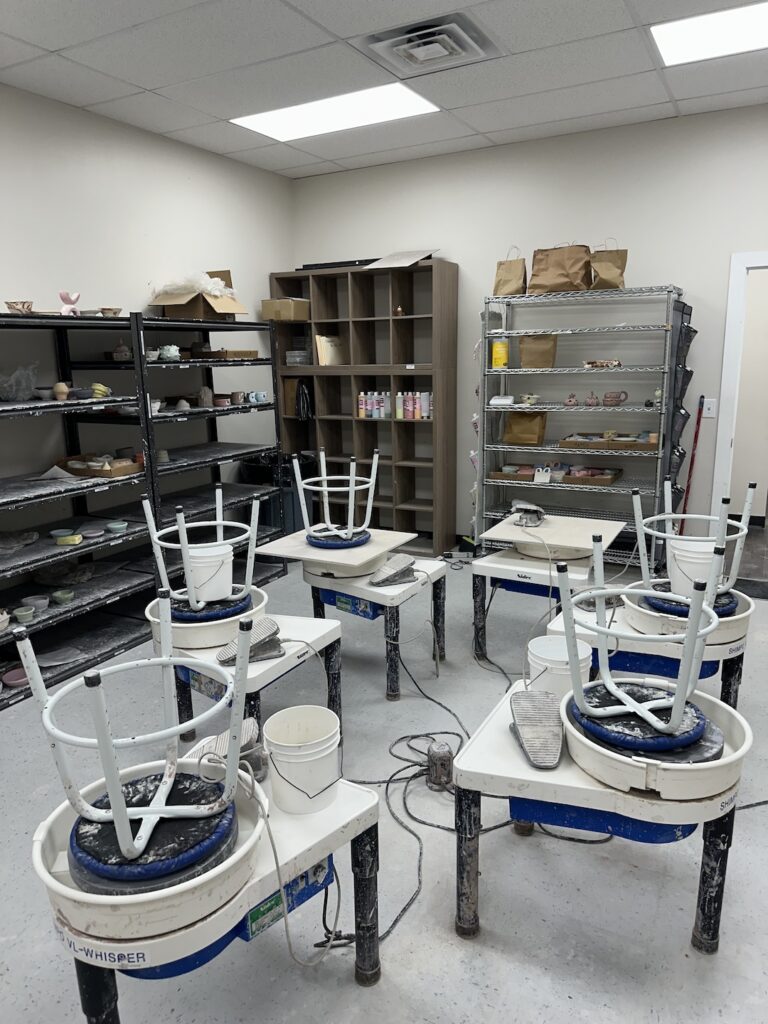
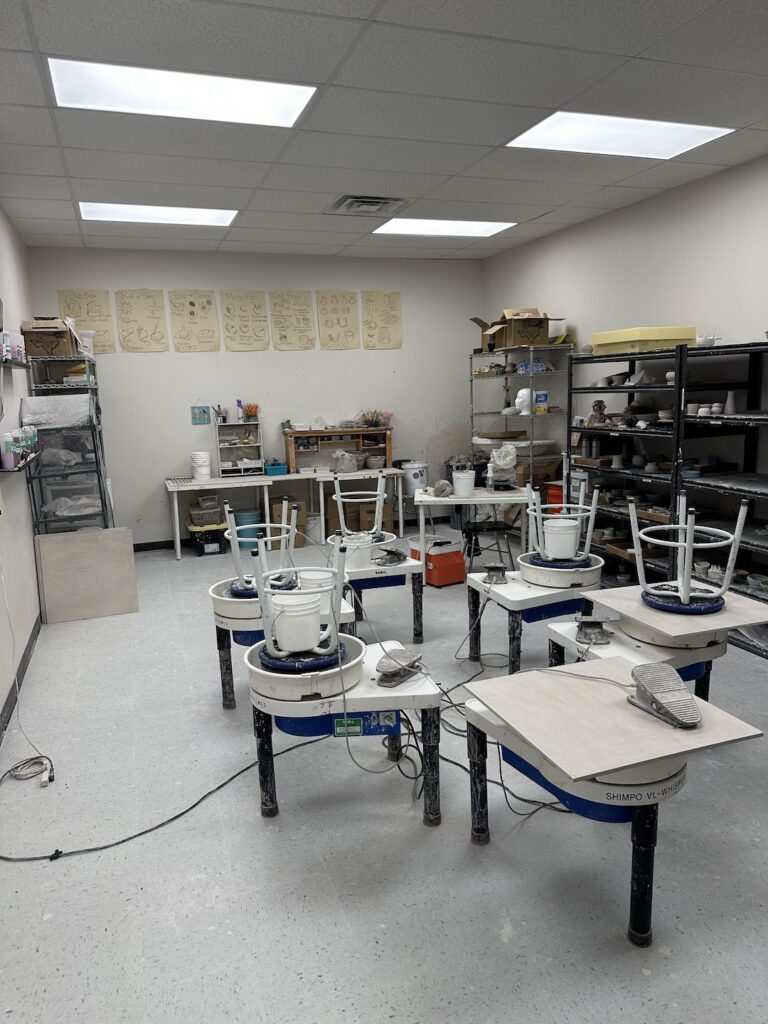
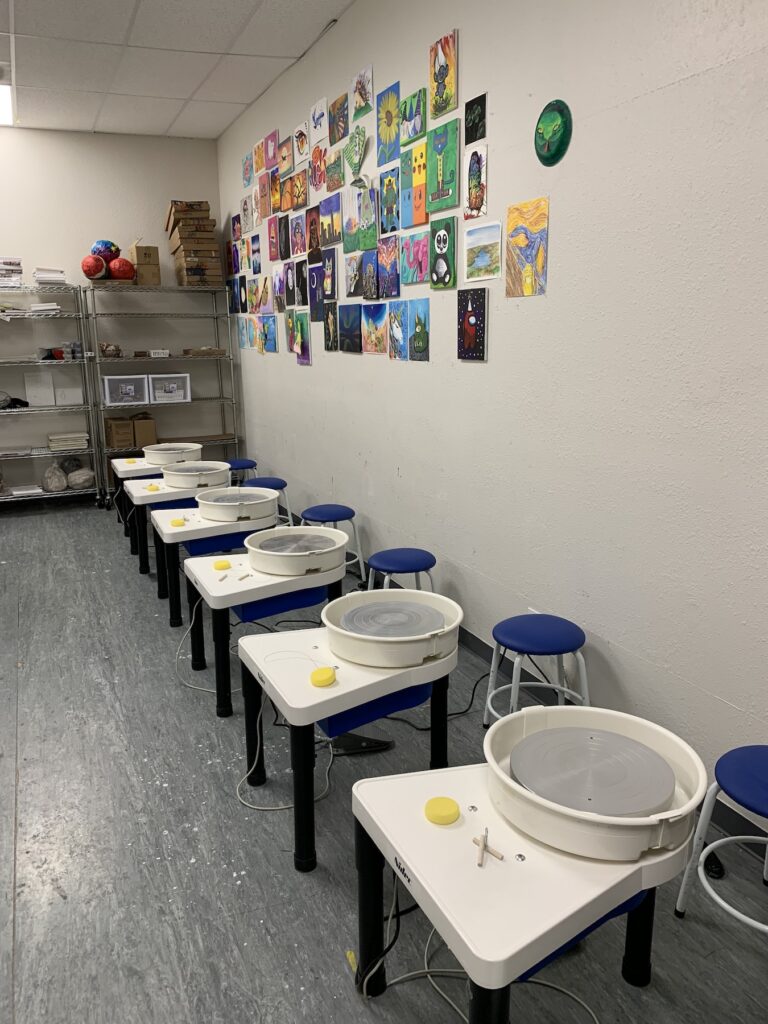
Wheel Classrooms (Optional)
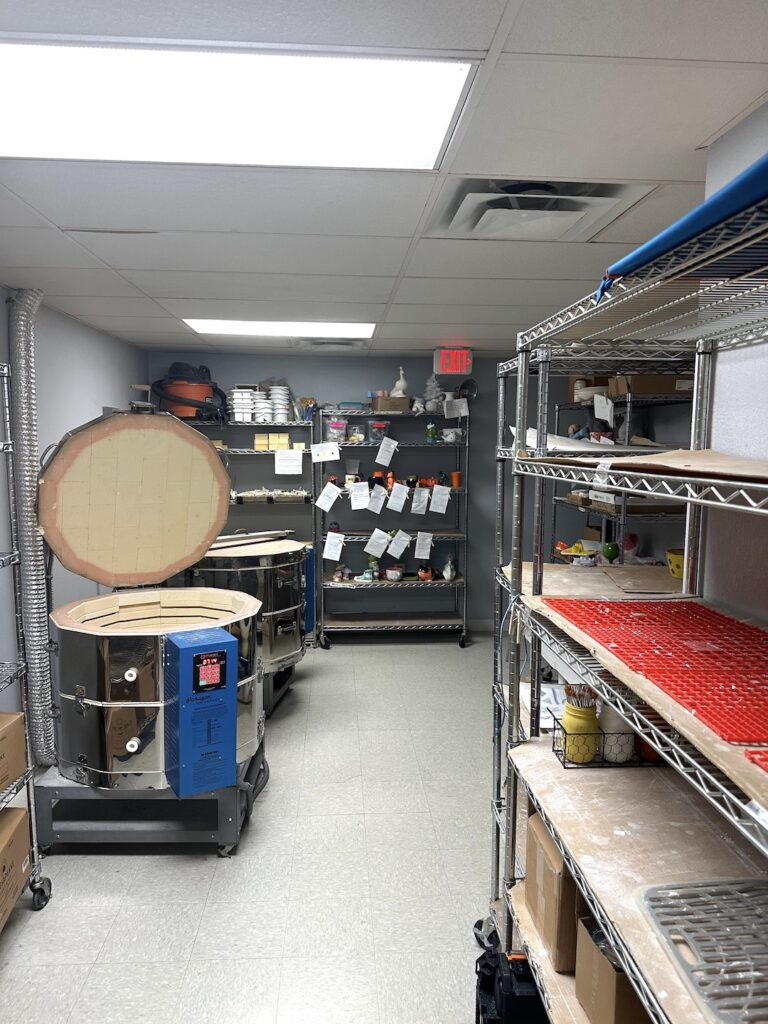
Kiln Room
Installing Your Kiln: Order your kiln early, as it can take more than 3 months from the time you place your order for the kiln to be shipped to your studio. You will need to work with an electrician to ensure the installation is completed successfully. Download the Contractors & Electricians Kiln Installation Guide and give a copy to your electrician, along with your kiln order, so the electrician knows what type of power is required.
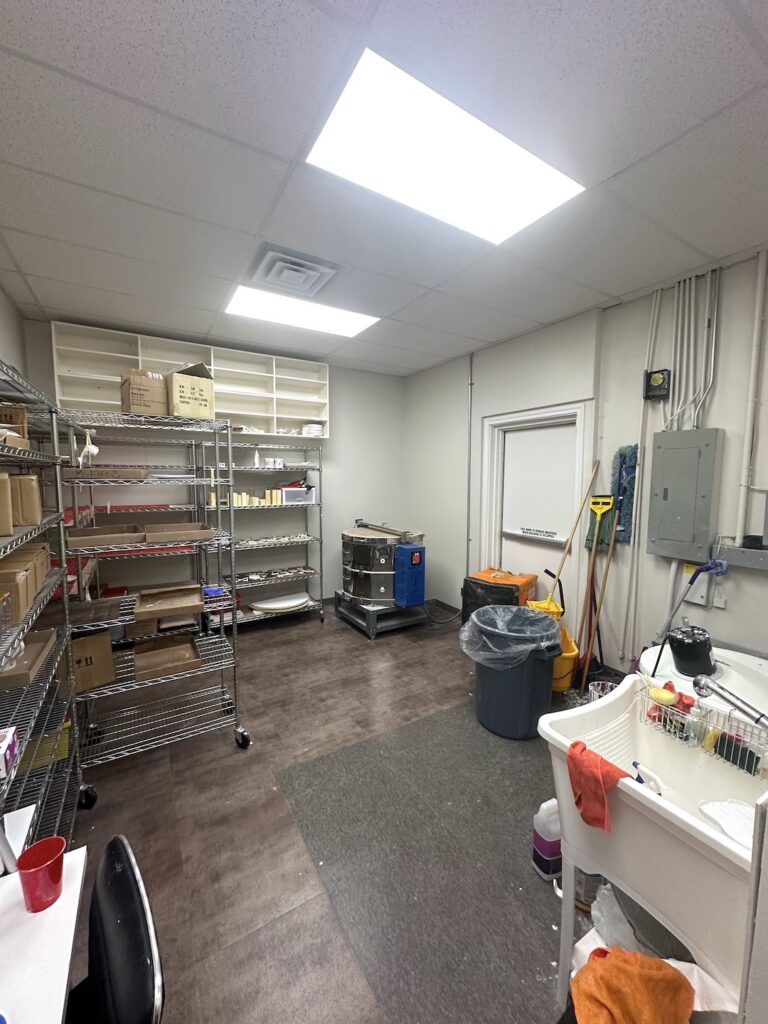
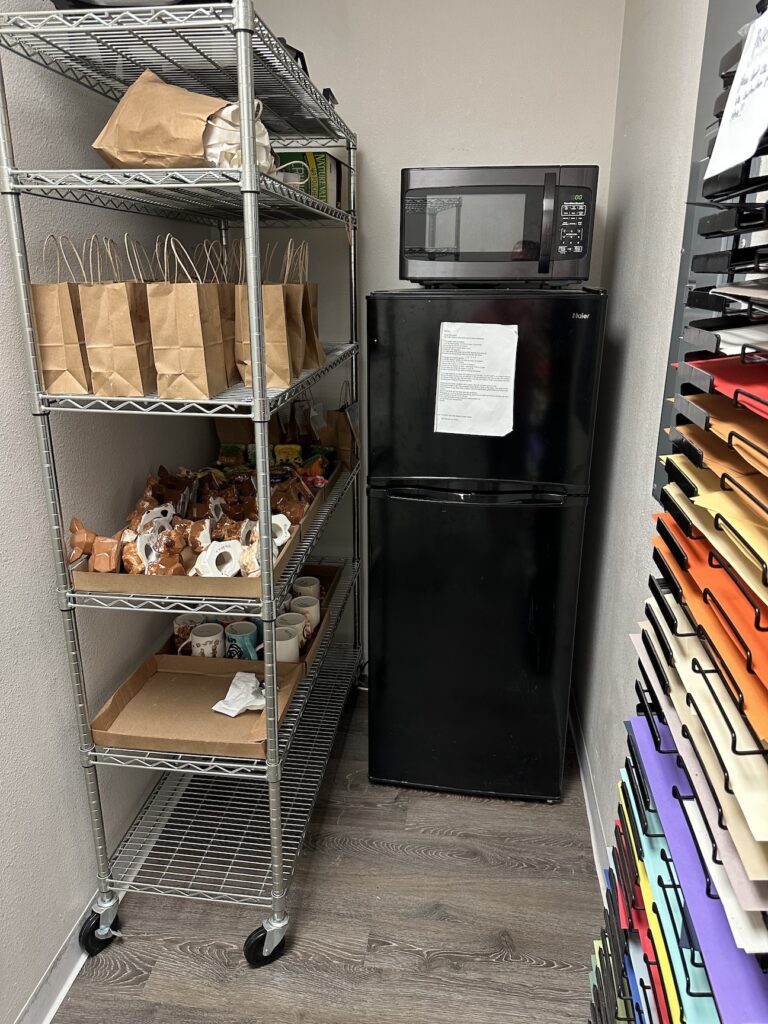
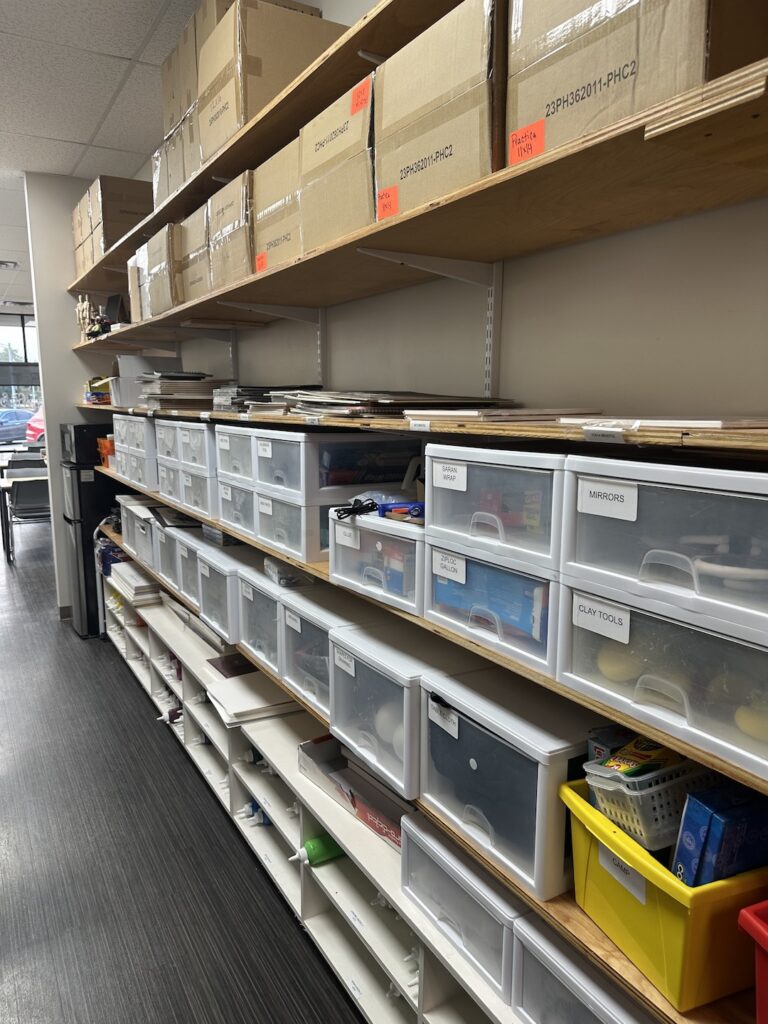
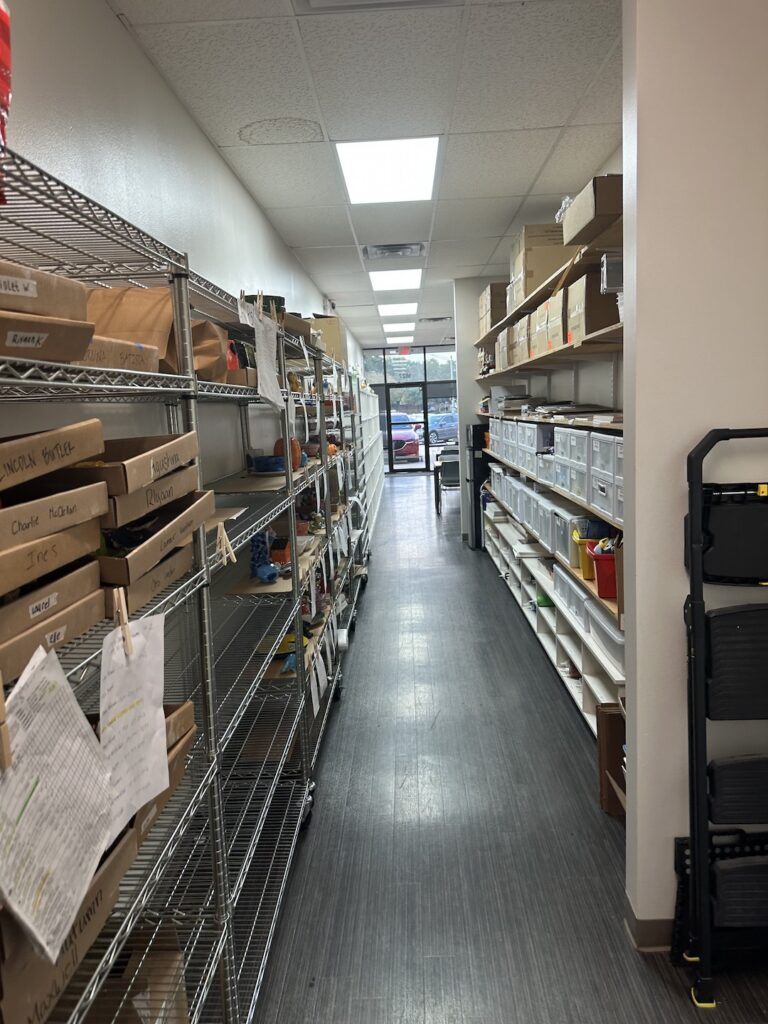
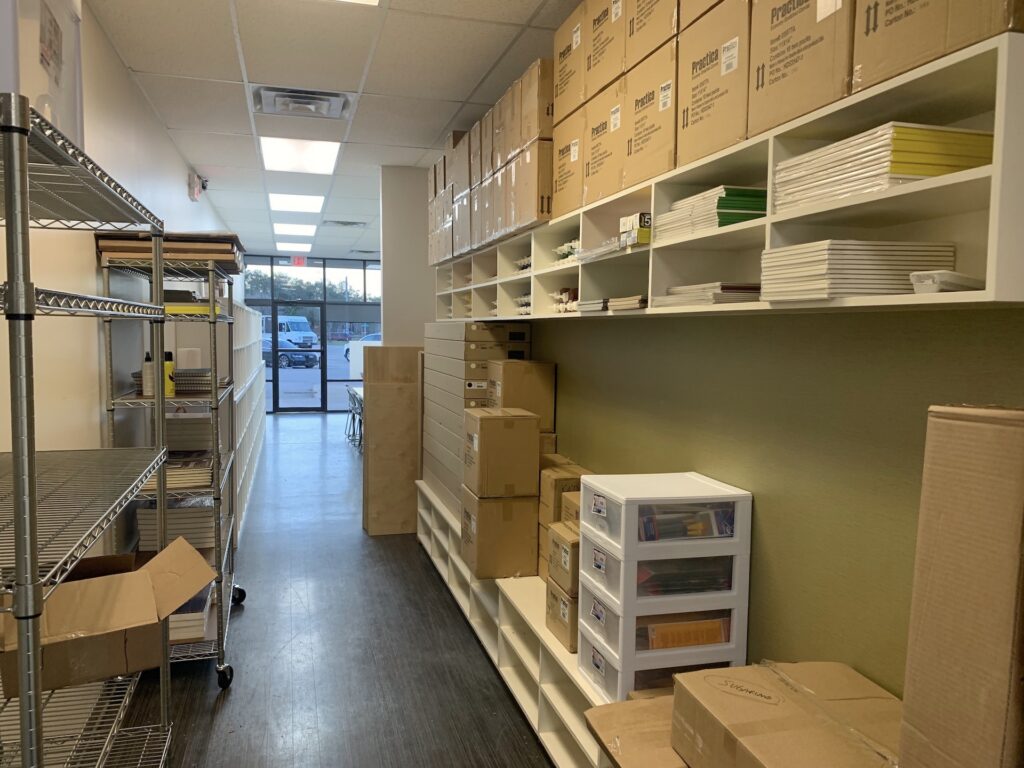
Art Supply/ Storage Room
PYOP
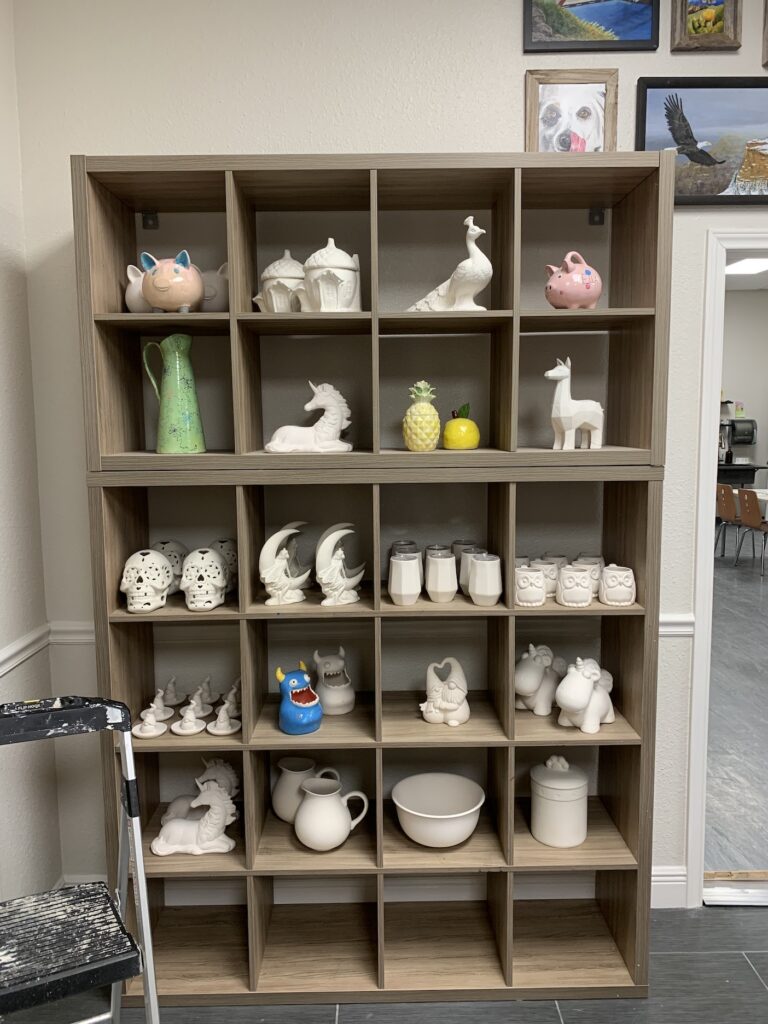
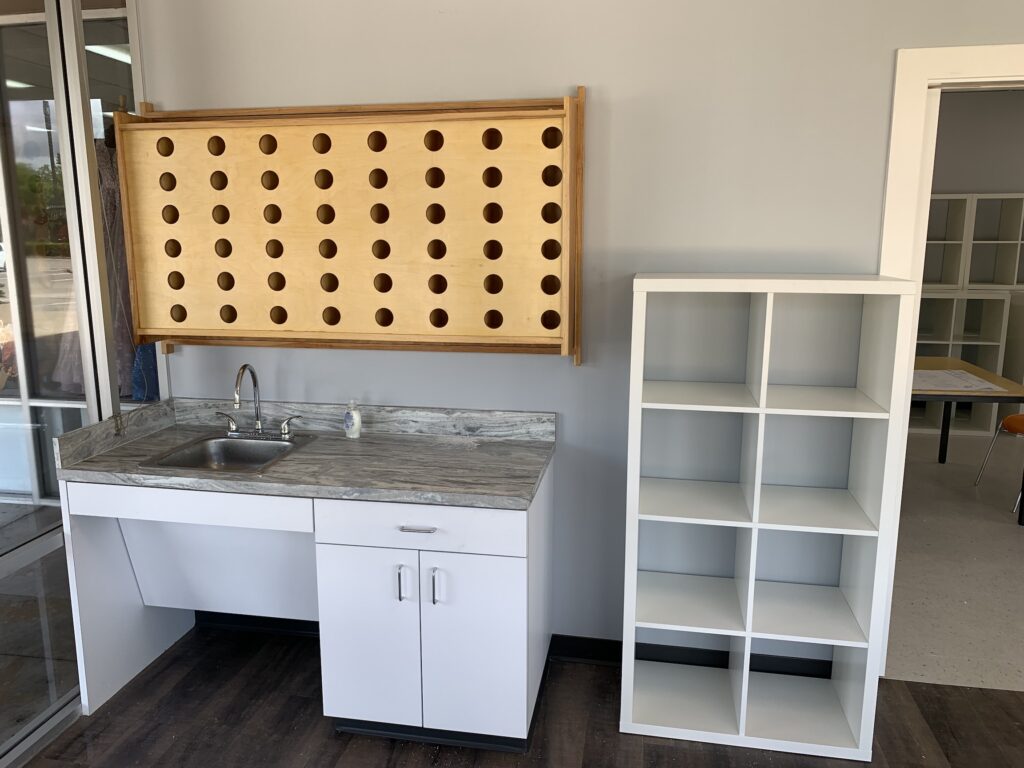
PYOP Shelves
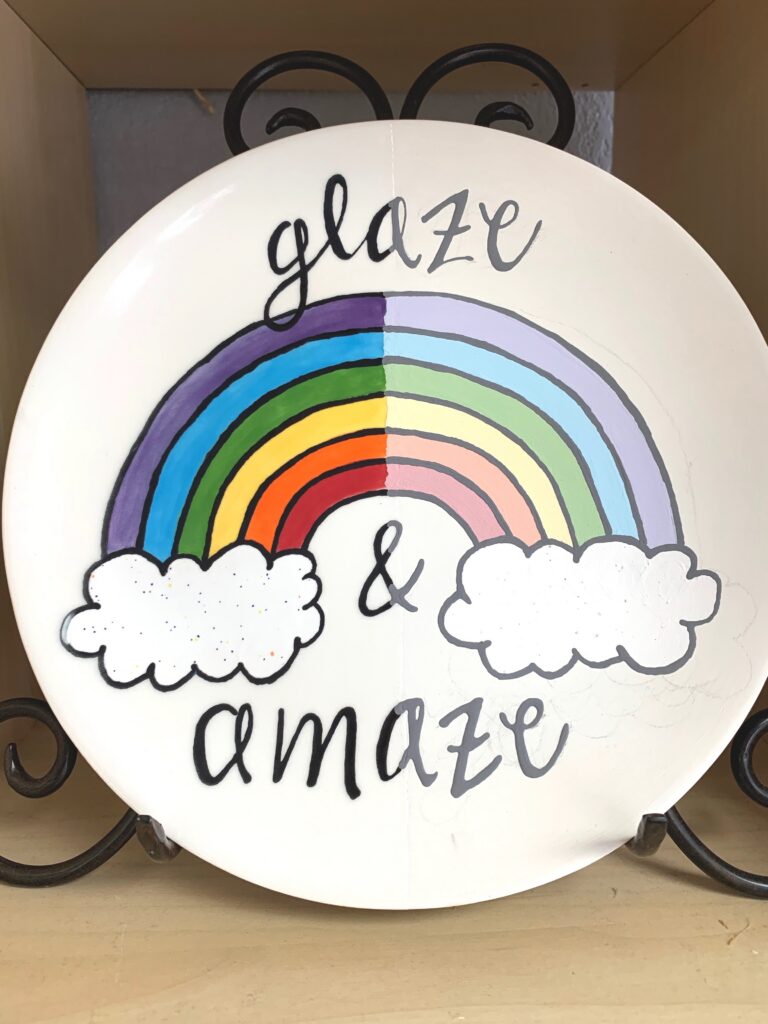
Before/ After Plate
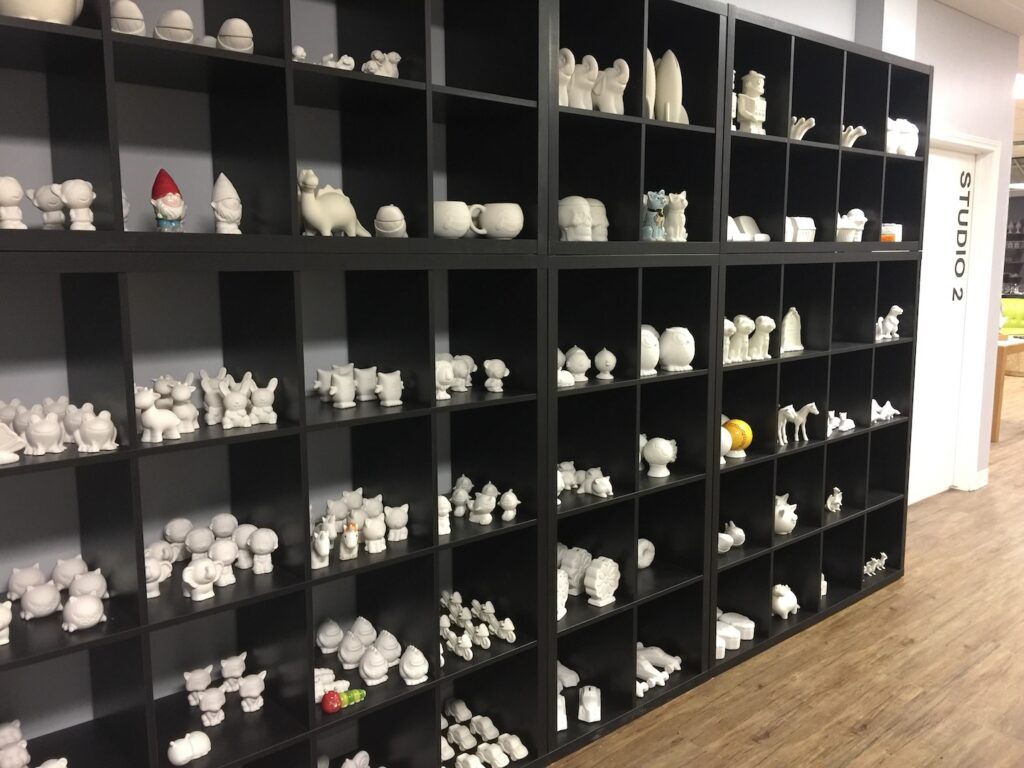
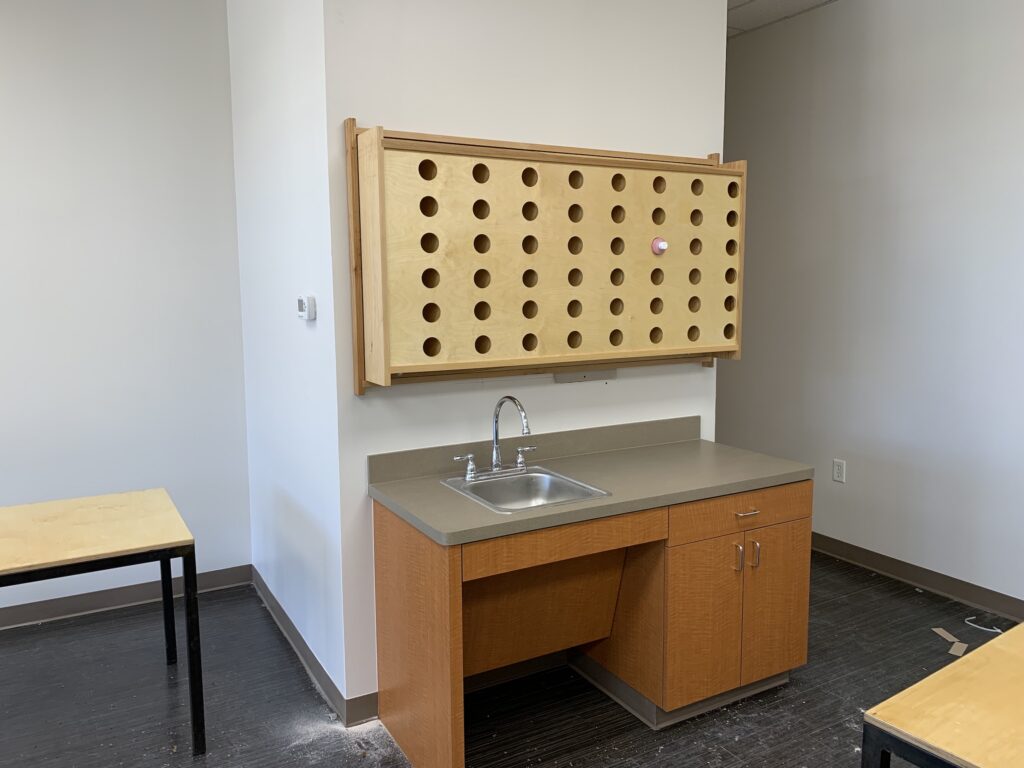
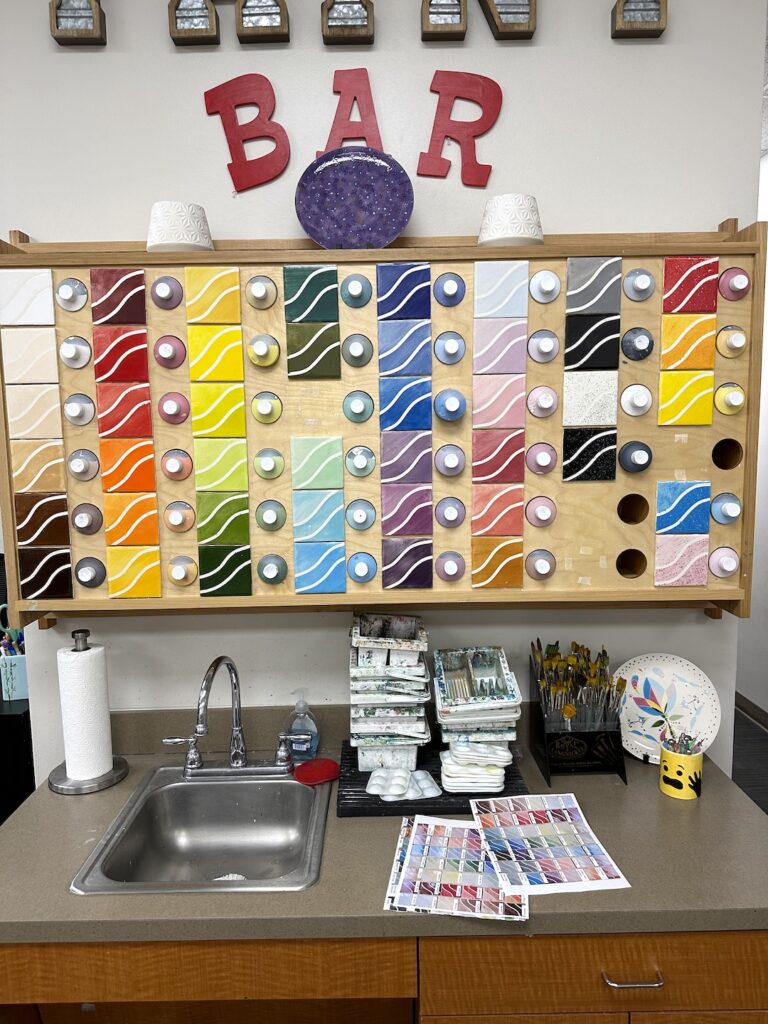
Paint Bar


PYOP Pick Up

Give your Studio Personality!
Marketing & Community Outreach
Becoming a part of the Cordovan Art School franchise network allows for access to marketing tools created to generate interest in the Cordovan Art School brand. Our marketing infrastructure provides a variety of resources composed for advertising all services provided. By following the outlined marketing and business development model, you can expand your franchise and business in a way that is manageable and sustainable. Franchisees must abide by all Franchise Marketing Contribution requirements as stated in the Franchise Agreement.
Marketing Contributions
Local Advertising
Franchisees are required to invest up to 5% of gross revenue in local advertising, marketing, and brand development efforts. Consistent local marketing is essential for increasing awareness, generating leads, and growing enrollments.
Marketing investments should include a mix of community outreach, relationship building, digital marketing, events, referrals, and other approved promotional activities. Franchisees should also dedicate an appropriate portion of their marketing budget and efforts toward web-based marketing and business development to ensure a strong online presence and continued growth.
Corporate Marketing Fund
The Franchisor collects a 1% Corporate Marketing Fund contribution from gross revenue. These funds are held in a separate account and are used exclusively for brand development, advertising, and marketing initiatives that benefit the franchise system on a regional or national level.
To ensure transparency, the Corporate Marketing Fund account may be audited, and franchisees may be provided information regarding how marketing funds are being used to support the growth of the brand.
The Corporate Marketing Fund is intended to provide additional marketing resources, strengthen brand awareness, and create value for all franchisees. This system-wide marketing support is an important benefit of being part of the Cordovan Art School franchise network.
Managing Marketing Activity
Within 30 days after the end of each month, franchisees must submit a Marketing Activity Report (sample follows). The report should summarize local marketing activities and provide an accurate accounting of advertising, marketing, and community outreach expenditures incurred during the previous month.
The purpose of the report is to help franchisees track marketing effectiveness, ensure compliance with marketing requirements, and identify opportunities for improvement.
All approval requests must be submitted in writing and approved before advertising begins.
Marketing Overview
One of the most important responsibilities of a manager is to actively participate in marketing and community outreach. Without ongoing relationship-building and community engagement, there would be no students to teach.
Managers should participate in local networking, community events, outreach efforts, and marketing activities on a regular basis. The goal of marketing is to increase awareness of Cordovan Art School, build relationships within the community, and promote the programs and services offered by the studio. Franchisees are encouraged to brainstorm their own ideas for marketing their business – discuss these possibilities and suggestions with your Field Consultant to gain approval for implementation.
Managers, teachers, and staff should strive to be friendly, welcoming, professional, and helpful at all times. By creating positive experiences and building strong relationships, they help foster trust, encourage referrals, and strengthen the studio’s reputation within the community.
Word-Of Mouth
Happy customers are our best advertisement. When customers have a positive experience, they naturally share it with their friends, family, neighbors, and coworkers.
Word-of-mouth referrals are one of the most effective forms of marketing and play an important role in the growth of Cordovan Art School. Every interaction with a student or parent is an opportunity to create a positive experience that encourages future referrals.
Managers, teachers, and staff should strive to provide exceptional customer service and create memorable classroom experiences that inspire families to recommend Cordovan Art School to others.
Setting Goals
Managers should create goals and a marketing plan to help them increase the number of students or customers for
- Weekly Classes
- Camps (Thanksgiving, Winter Break, Spring Break, Summer, etc)
- Parties
- Workshops & Events
- PYOP Painters
Managers are encouraged to work with the Cordovan Art School Marketing Team to develop an individualized marketing plan for their studio location. Marketing plans should incorporate the Monthly Marketing Initiatives and be adapted to the needs of the local community.
All marketing budgets, advertising expenses, sponsorships, donations, and promotional expenditures must be reviewed and approved by the studio owner before any funds are spent.
See Form: Monthly Marketing Initiatives click here
Marketing Strategy
All marketing efforts are important. There is no single marketing strategy or “silver bullet” that will consistently generate all of the studio’s enrollments.
Successful marketing comes from consistently implementing a variety of marketing activities over time. Managers should use a combination of digital marketing, community outreach, relationship building, events, partnerships, referrals, and in-studio promotions to increase awareness and grow enrollment.
The more marketing channels that are working together, the greater the overall impact. Consistency is key. Managers should actively implement as many of the recommended marketing ideas as possible to help spread the word about Cordovan Art School and build long-term relationships within the community.
Digital Marketing
- Google
- Google My Business: keep your business profile up to date with hours, address, photos, and important information.
- Google Ads: this is the most important Advertising avenue. Allocate ad spend.
- Yelp
- Yelp Business Page: keep your business profile up to date with hours, address, photos, and important information.
- Constant Contact
- Send customer emails and newsletters at least 3 times per month or more depending on the season.
- Highlight teachers, students, events, and studio activities. (see teacher spotlight form below)
- Grow your database
- Send customer emails and newsletters at least 3 times per month or more depending on the season.
- Email your customers through Jackrabbit Class
- Most marketing emails should be sent through Constant Contact. However, there are times when managers may strategically send emails through Jackrabbit to promote important studio initiatives and registration opportunities. Examples include: Fall registration now open, Summer camp registration now open, Art Show Entry Deadlines, Customer Reward Program, and other major studio events.
- We Miss You Emails: Managers are encouraged to reach out to students who have dropped a class with a friendly “We Miss You” email. Personalized emails to individual students may be sent at any time and can be an effective way to reconnect with former students and encourage them to return to the studio.
- Social Media
- Paid Ads:
- Facebook, Instagram, and more
- Join local Facebook groups: post studio promotions when allowed.
- Create and update Facebook Events.
- Nextdoor business page: Be a part of the community and post when allowed.
- General Tips: Encourage customers to follow, like, comment, share, and tag Cordovan Art School on social media. Post photos, videos, student artwork, promotions, events, and other engaging content regularly. Ask teachers and staff to contribute photos and videos from classes, camps, and PYOP activities. Share quality content with the Cordovan Social Media Team for possible posting on the main Cordovan Art School social media accounts. Be creative and showcase the fun happening in your studio
- Paid Ads:
- Local Online Mom’s groups and Influencers
- Paid Ads
- Before paying for advertising or sponsorships, make sure the audience is a good fit for your business and that the expected value justifies the cost. Some influencers can be highly effective, while others may charge more than the exposure they provide is worth for a local business.
- Free Exchange of Service
- Reach out to local mom groups and influencers and invite them to experience the studio with their friends. Give them a free class, party, camp for their kids, or PYOP session. In return, ask them to share their experience on social media and give them flyers or coupons for their followers and friends! This can be an effective way to increase awareness and generate referrals within the community.
- Influencer Giveaways
- Consider providing free classes, camps, PYOP sessions, or gift certificates for local influencers to give away on their social media platforms. Giveaways can help increase brand awareness, grow your audience, and introduce new families to the studio. Be sure to partner with influencers whose audience aligns with your target customer base.
- Paid Ads
- Newspaper & Magazine Advertising
- Before purchasing newspaper, magazine, or print advertising, verify that the publication has strong readership and reaches your target audience. Many publishers also offer digital advertising, email newsletters, and social media promotions. Some companies are good and some are not. Research each opportunity carefully to ensure your marketing dollars are being spent effectively. Summer camp guides and camp-focused newsletters can be especially effective for promoting camps directly to families.
- Summer Camp Guides
- Search Google for “summer camps” in your area and identify the camp guides, directories, and websites that appear at the top of the search results. These sites often receive significant traffic from parents actively looking for camps and can be effective advertising opportunities. Before purchasing advertising, evaluate the audience, pricing, and expected reach to ensure it is a good fit for your studio and marketing budget.
- Community Listings
- Post your studio, classes, camps, workshops, and events on free local business directories, community calendars, and neighborhood websites. Many community websites allow businesses to promote events at no cost, making them an easy way to increase local visibility and reach potential customers.
- Nextdoor
- Patch
- Community Calendars and Newsletters: Remember to keep them up to date.
- Post your studio, classes, camps, workshops, and events on free local business directories, community calendars, and neighborhood websites. Many community websites allow businesses to promote events at no cost, making them an easy way to increase local visibility and reach potential customers.
Community
- Summer Camp Fairs
- Actively research and participate in local summer camp fairs, school-sponsored camp events, and community events where families are looking for summer activities. These events provide valuable opportunities to promote camps, meet prospective families, collect contact information, and increase awareness of the studio’s summer programs.
- Silent Auctions/ Donations
- Free Class & Camp Giveaways:
- Offer free giveaways, raffles, and fundraiser opportunities for art classes and art camps.
- Distribute through local PTA’s, elementary school art teachers, charitable organizations in the community. (Keep track for tax purposes).
- New Studio Growth Strategy: During the first two (2) years of operation, studios are encouraged to give away a significant number of free classes, camps, scholarships, and gift certificates as a marketing investment. Some studios have had success by giving away 50 or more free summer camps their first year in business. The goal is to build awareness, generate word-of-mouth referrals, and introduce new families to the studio. When awarding giveaways, try to reach a variety of schools, organizations, and social circles to maximize exposure throughout the community.
- Free Class & Camp Giveaways:
- Elementary school partnerships
- Look for opportunities to partner with local elementary schools by offering after-school art classes, booths at school events, carnivals, STEAM nights, and other community activities.
- Many after-school programs are coordinated through the school district, so building relationships with district leaders can create opportunities across multiple campuses. Whenever attending an event, set up an engaging art display, distribute flyers, and collect contact information so families can be added to your marketing database and informed about future programs.
- PTA & PTO Relationships:
- Build relationships with PTAs and PTOs at local schools. Support their programs through scholarships, fundraisers, teacher appreciation gifts, raffle items, sponsorships, gift certificates, and special school discounts. Keep a spreadsheet to track all donations, giveaways, and community contributions.
- Collect email addresses at events
- Add them to the marketing database (GHL, constant contact).
- School Art Teachers & Administrators
- Build long-term relationships with local art teachers and school administrators. As trust develops, these relationships can become a valuable source of student referrals and community partnerships. Consider providing art teachers with flyers, coupons, or promotional materials to share with their students and families.
- Strong relationships with local schools can also help create a pipeline of qualified art teachers for camps, classes, and substitute teaching opportunities when school is out of session. Great art teachers are one of the studio’s most valuable assets, and investing time in these relationships can provide long-term benefits for the studio.
- Local Business Partnerships
- Build relationships with neighboring businesses and other organizations in your community. Explore opportunities for fundraisers, corporate events, team-building activities, and special art experiences. Consider offering canvas painting, pottery painting, or other art events at their location or in your studio. Look for ways to cross-promote one another through referrals, flyers, coupons, social media, sponsorships, and other collaborative marketing efforts.
- Community Arts Organizations
- Become involved with local arts boards, arts councils, and community arts organizations. Active participation helps build relationships, increase community visibility, support the arts, and create opportunities to promote Cordovan Art School within the local community.
- Library Partnerships
- Build relationships with local libraries and explore opportunities to distribute flyers, promote events, or host art classes, workshops, and demonstrations at the library. Libraries can be valuable community partners and a great way to introduce new families to Cordovan Art School.
- Girl Scout Partnerships
- Reach out to local Girl Scout troops and invite them to participate in pottery badge programs, art workshops, and special events at the studio. These partnerships can introduce new families to Cordovan Art School while helping scouts complete badge requirements in a fun and creative environment.
- HOA Partnerships
- Build relationships with local HOA’s and offer special events such as canvas painting workshops, pottery classes, Paint Your Own Pottery (PYOP) events, family art nights, and community parties. HOA events can be an effective way to introduce new families to the studio and increase community awareness.
- Chamber of Commerce
- Join your local Chamber of Commerce and become an active member. Attend networking events, build relationships with local business leaders, and look for opportunities to be featured in Chamber newsletters, community calendars, and other promotional channels.
In studio
- Free Trial Class Requests
- Respond to all free trial class inquiries the same day. Track all leads, communications, and follow-up activities in Go High Level (GHL) to ensure consistent follow-up and maximize enrollment opportunities.
- This is one of the most important actions for growing enrollments. Families looking for classes often contact multiple businesses at the same time. If they do not receive a prompt response, they may enroll with a competitor or choose another activity before you have the opportunity to connect with them. Fast follow-up significantly increases the likelihood that a prospective student will schedule a trial class and ultimately enroll.
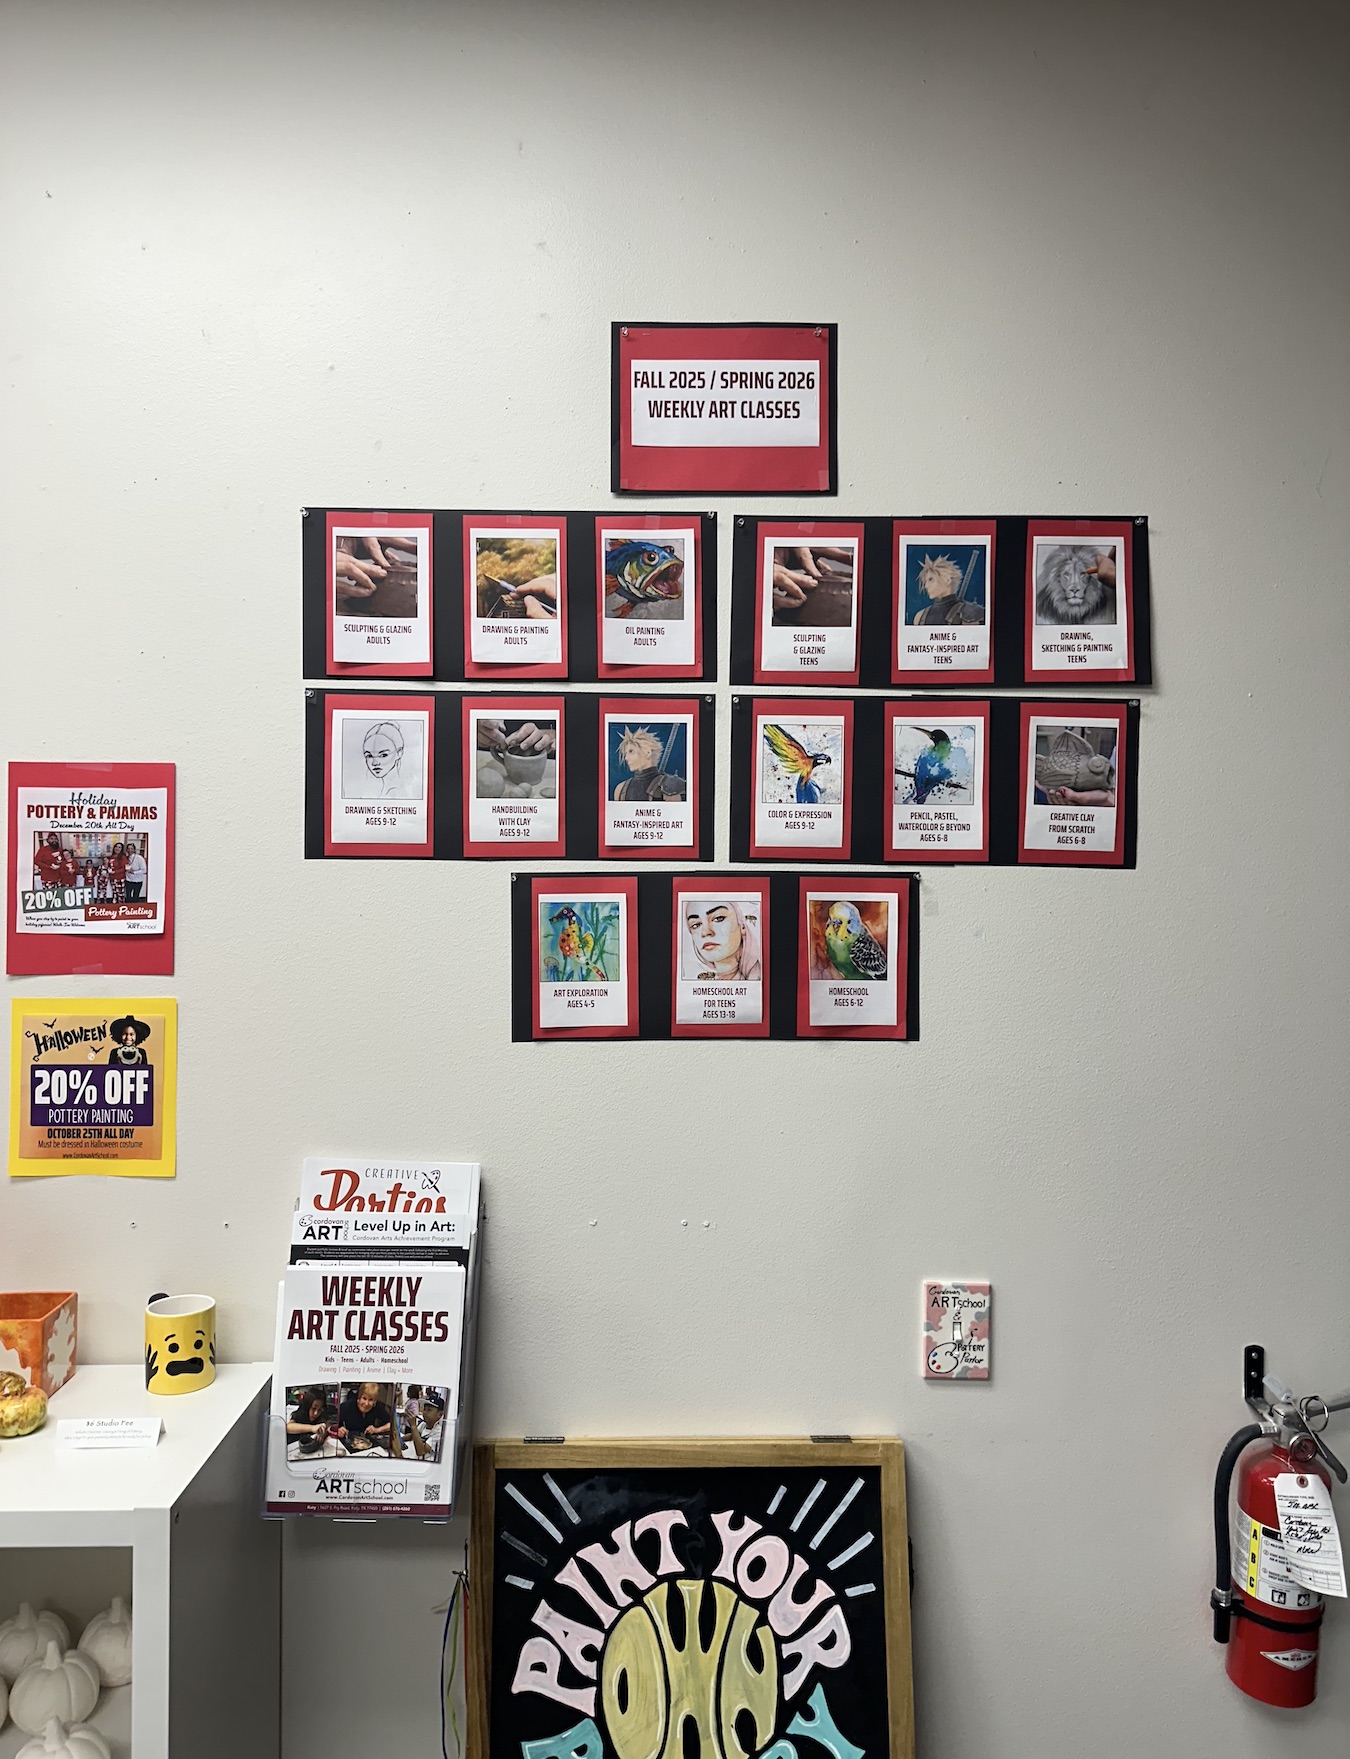
- Keep flyers, posters, and schedules current.
- Weekly Class Schedules, Camps, Workshops, Fundraisers, Parties, etc.
- Ask for 5-Star Reviews
- When a customer has a positive experience, ask if they would be willing to leave a 5-star review on Google, Yelp, Facebook, or other review platforms. Positive reviews help build trust, improve online visibility, and attract new customers. Maintaining a strong online reputation is important, and it is crucial to maintain a review rating above 4.5 stars.
- A Simple approach is: “Were you happy with your experience today? If so, would you be willing to leave us a 5-star review?”
- Managers should have a QR code on the front desk so that customers can quickly access the review page from their phones.
- Enlist Teachers & Staff
- Ask teachers and staff to help promote upcoming classes, camps, workshops, parties, and special events. Make sure they are familiar with current promotions and know how to talk with customers about upcoming opportunities.
- Coupons For Your Next Camp:
- Encourage repeat registrations by giving camp students a coupon for a future camp. Send designated promotional flyers and coupons home with students on the last day of camp or class to help promote upcoming programs and special offers.
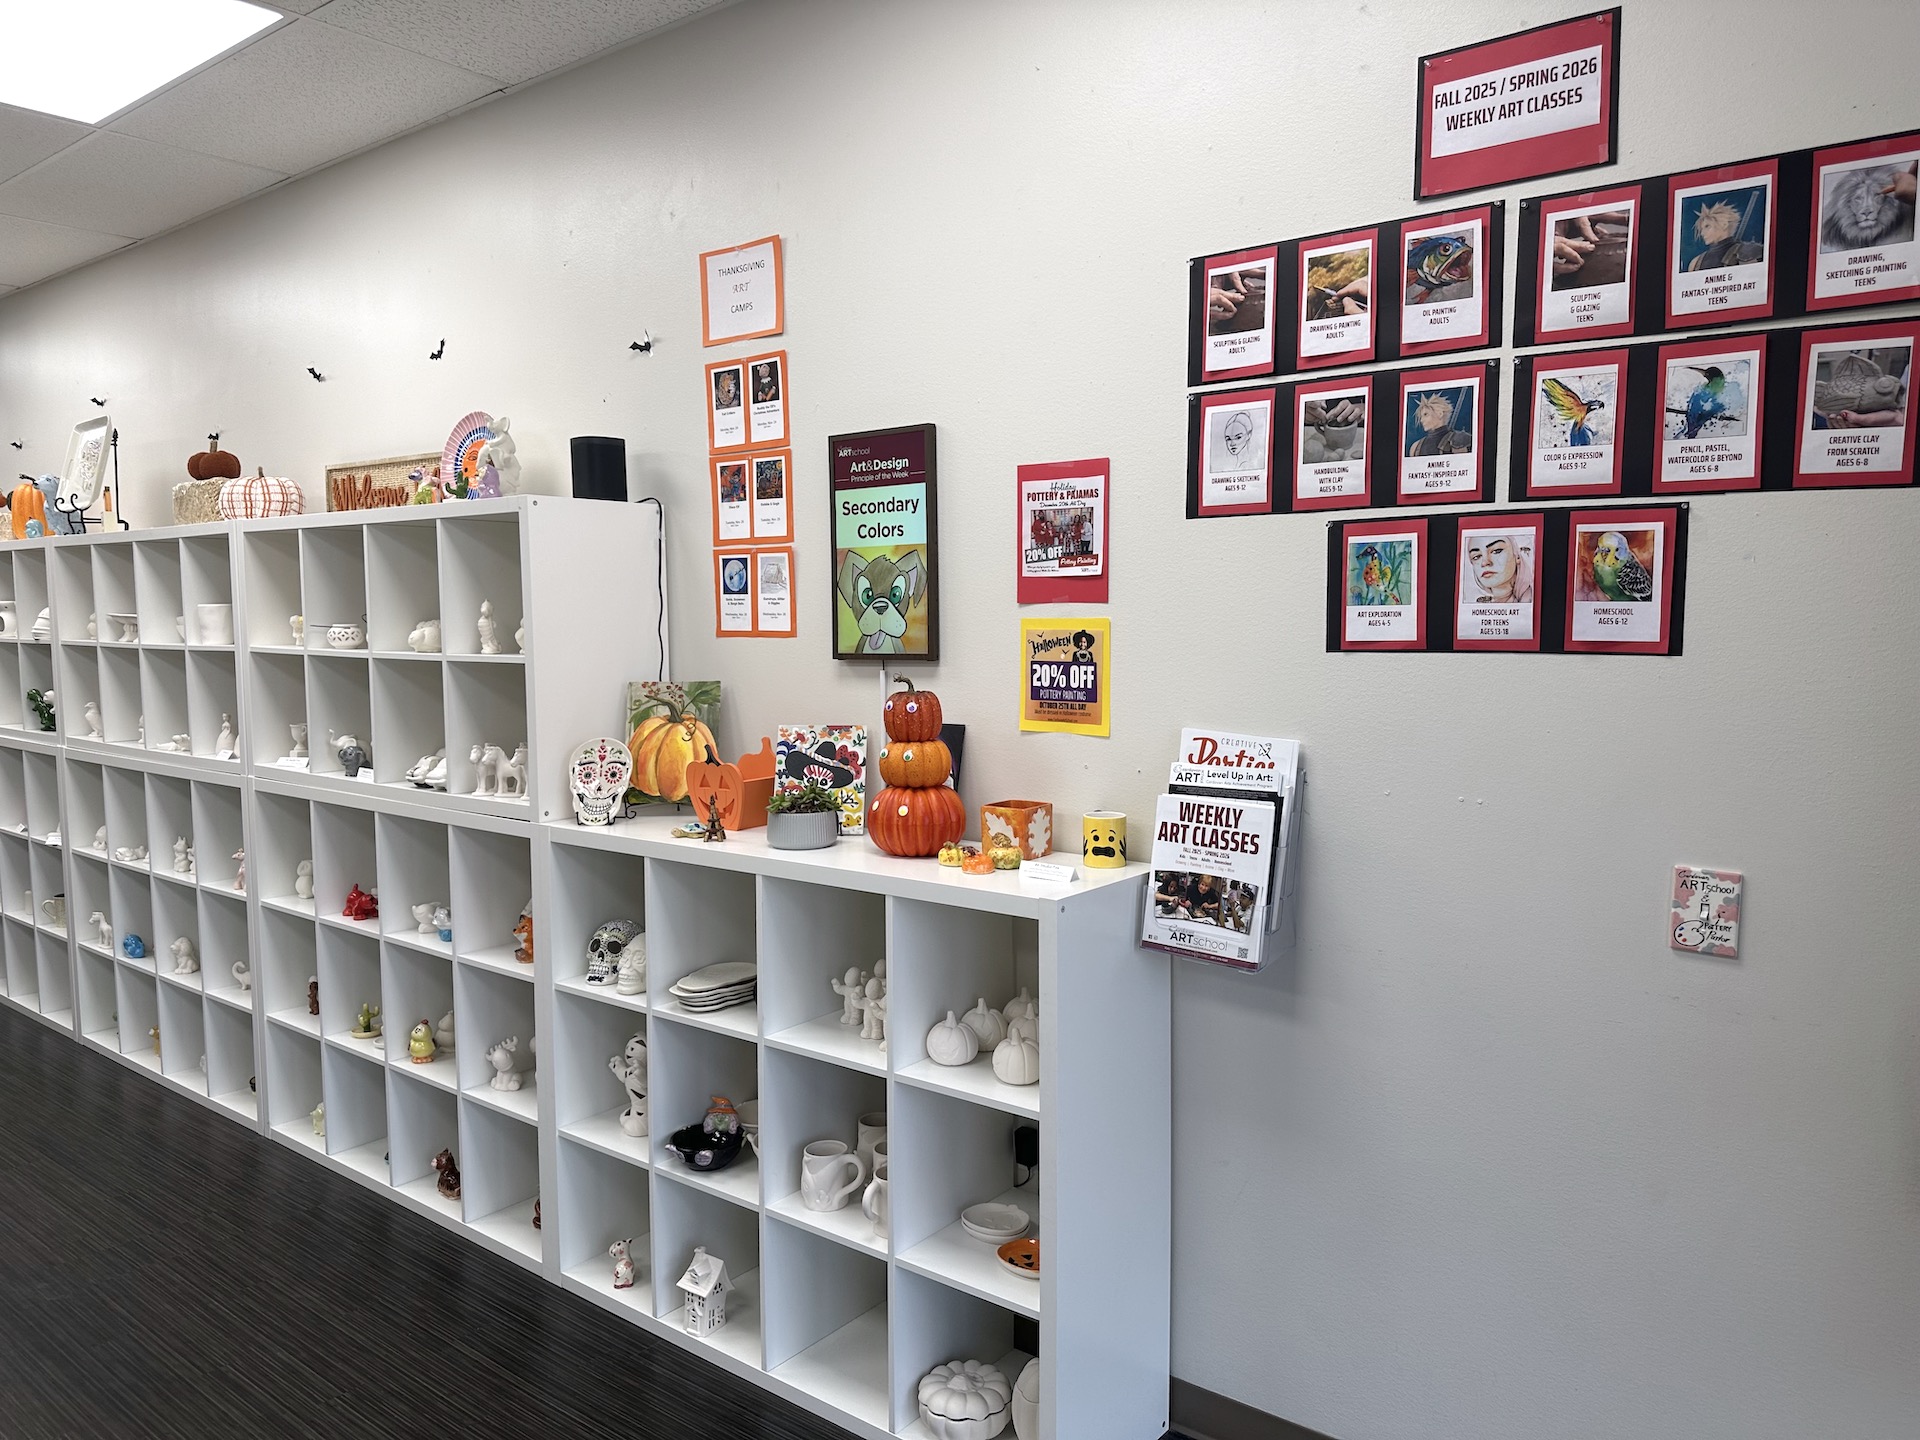
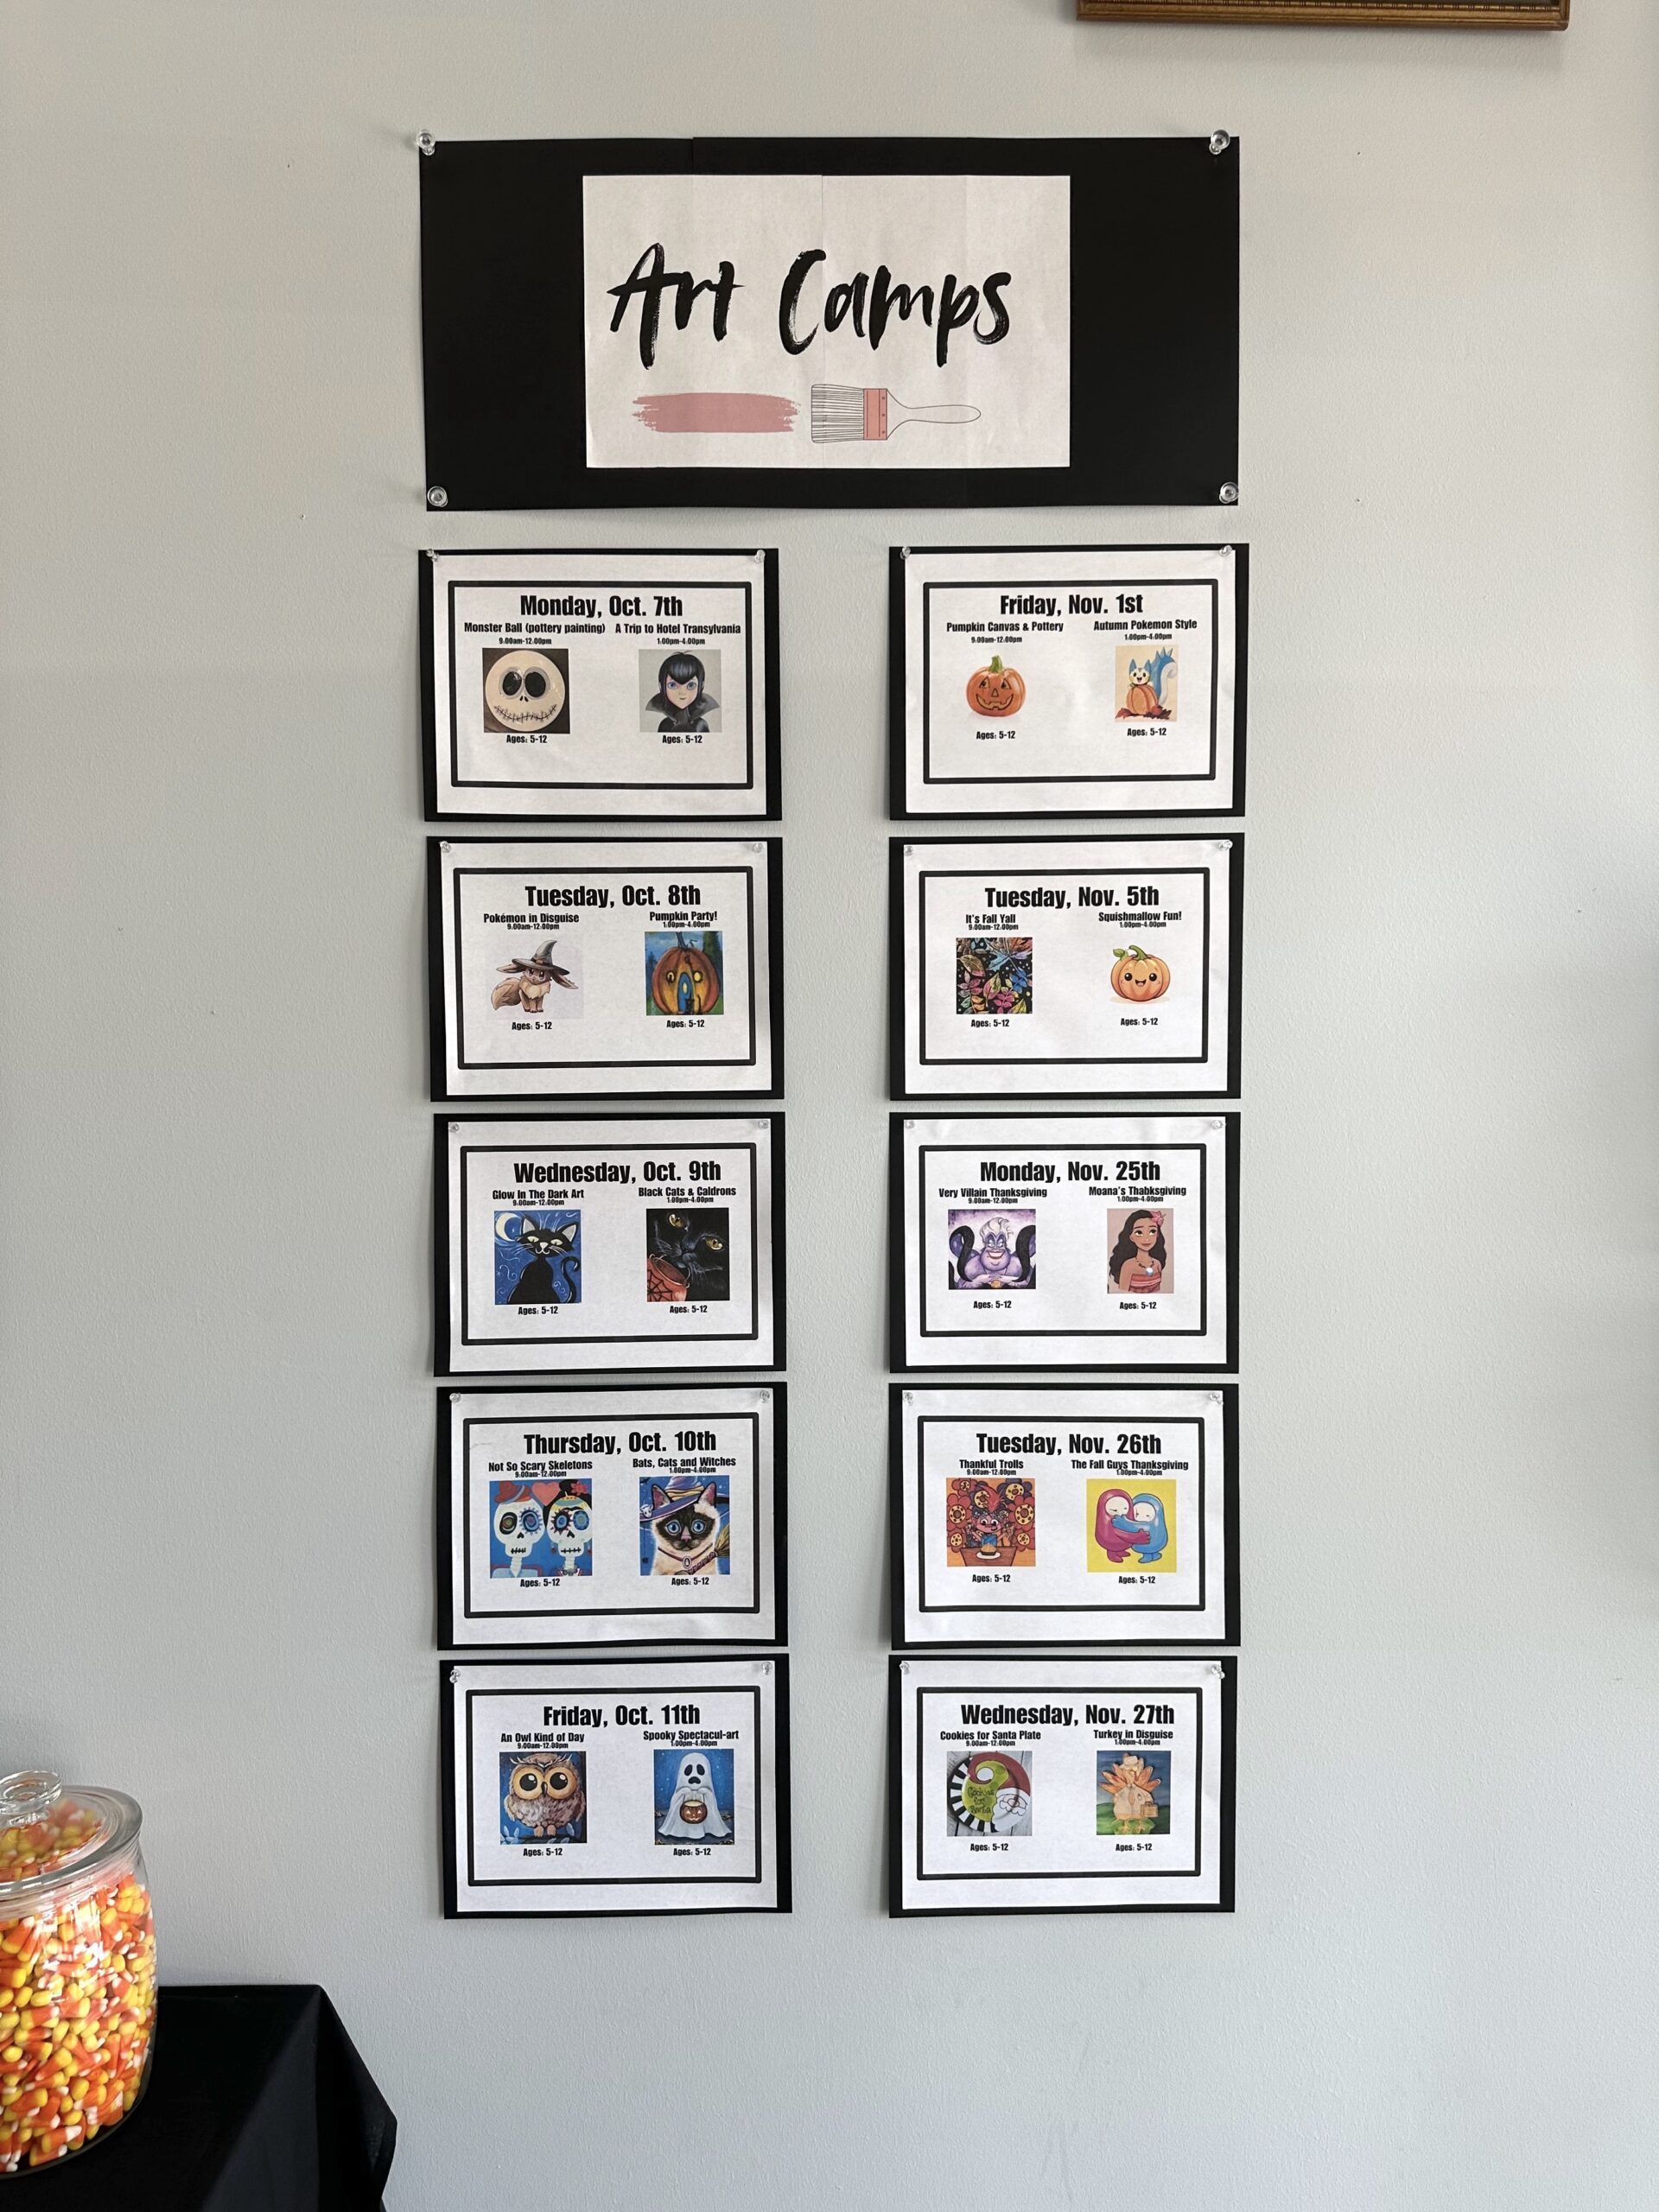
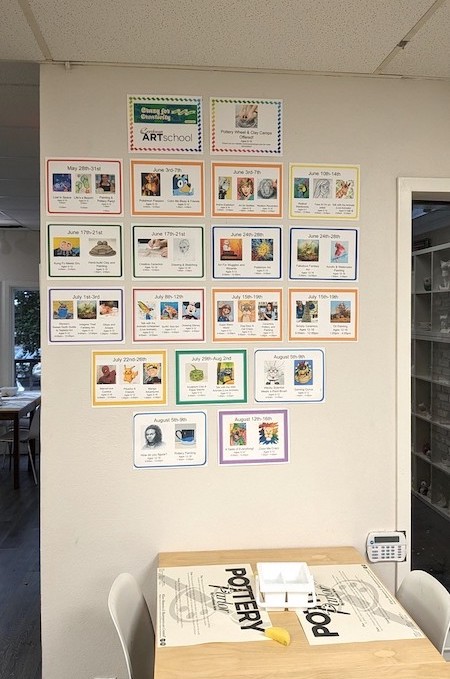
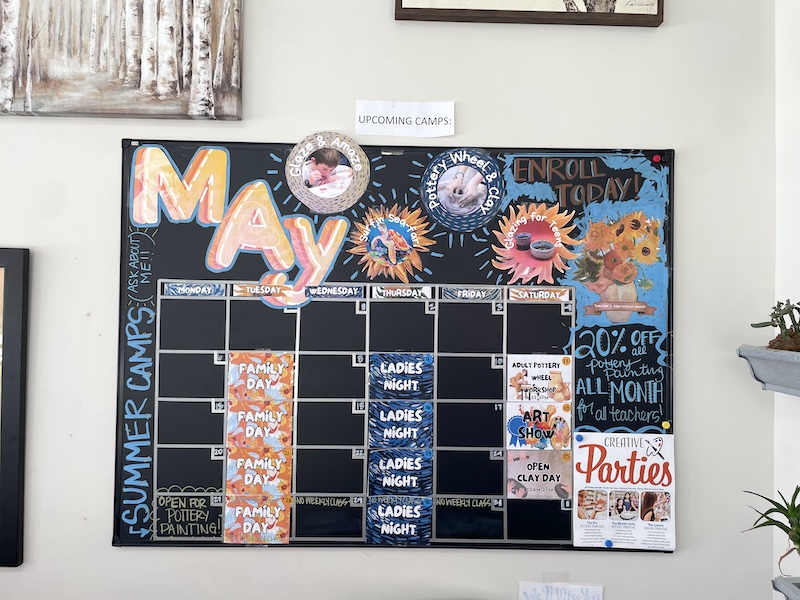
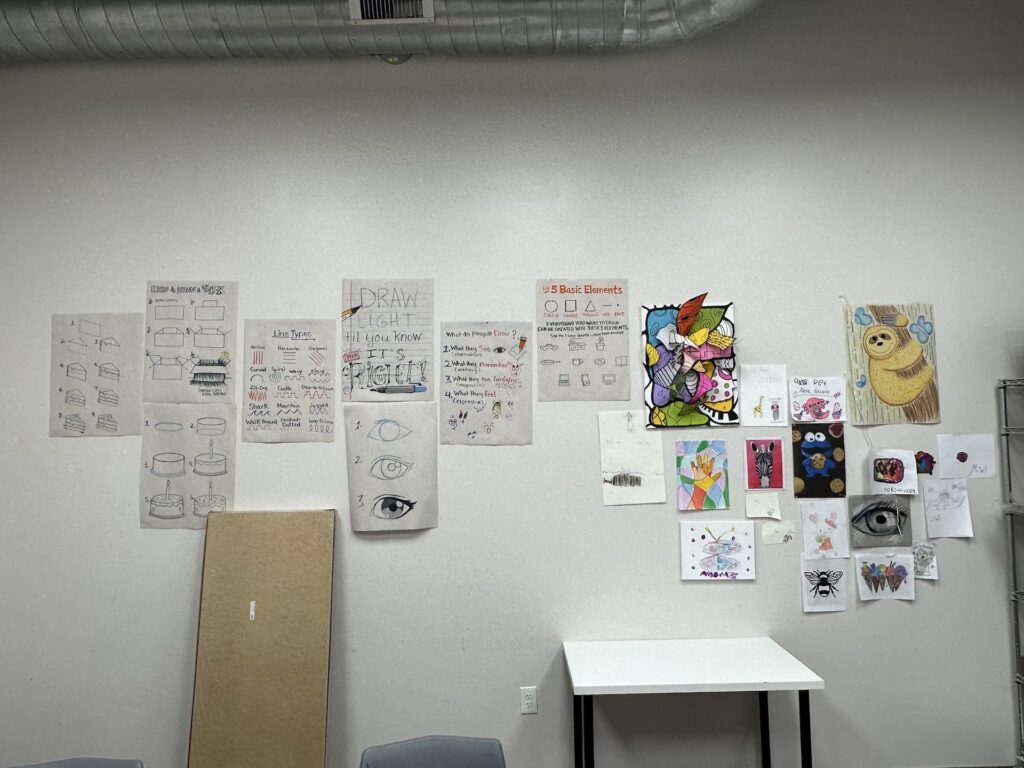
- Camp Wall Display:
- Maintain a dedicated camp display wall featuring upcoming camps. Keep the display current and in a high-traffic area of the lobby so parents and students can easily see it.
- Camp Wall Display:
- Always have upcoming camp images on a wall where they are visible with the dates and image. (See example photo below)
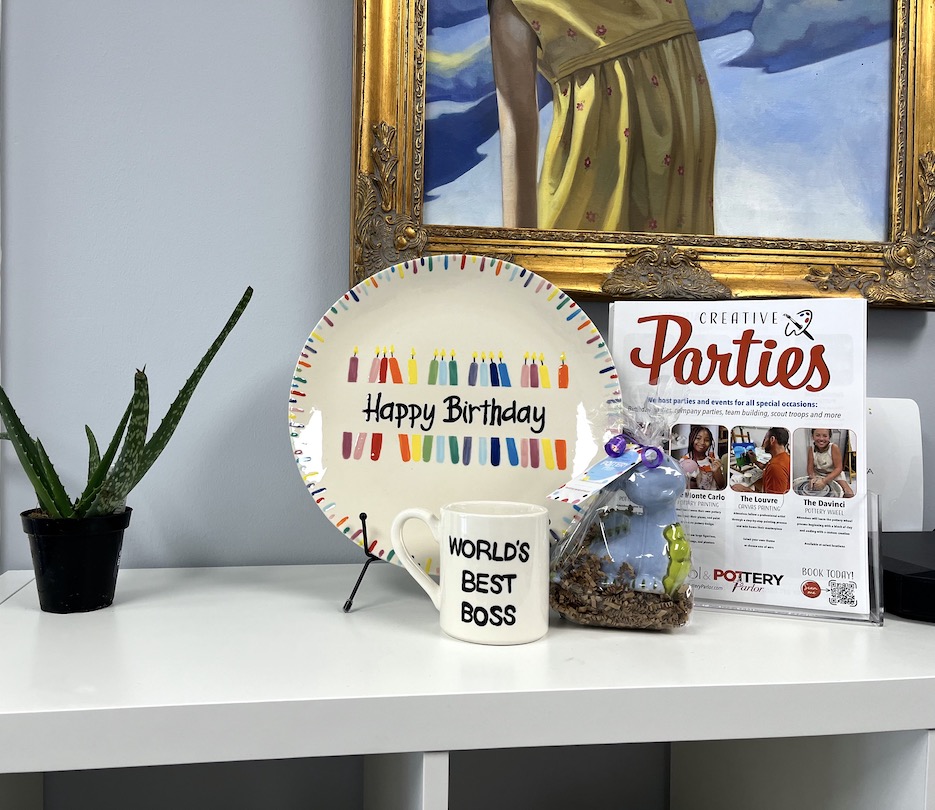
- Party Display:
- Create a party display in the studio that promotes birthday parties and group events. Include a sign such as “Book Your Next Party With Us!”, showcase the different party options available, and display photos from recent parties. A well-designed party display helps customers visualize the experience and encourages bookings.
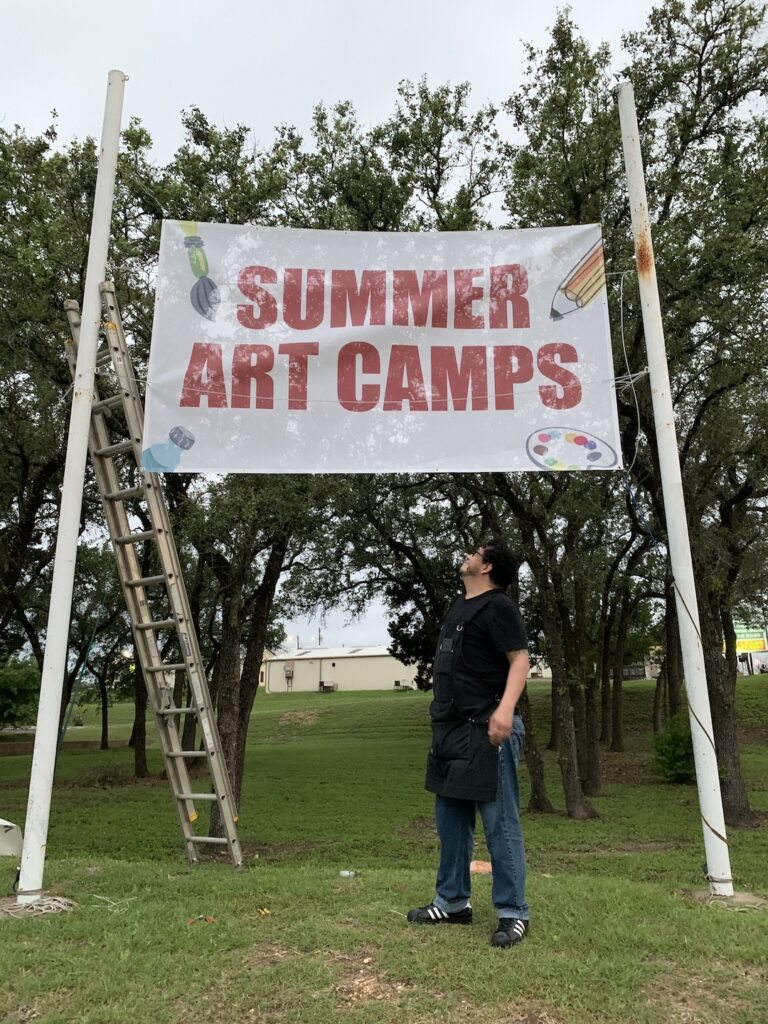
- Banners
- Use banners to promote seasonal classes, camps, workshops, and special events. Update banners throughout the year to highlight current registration opportunities and increase visibility. Banners may be displayed in studio windows or outside the building, subject to the terms of your lease and local signage regulations.
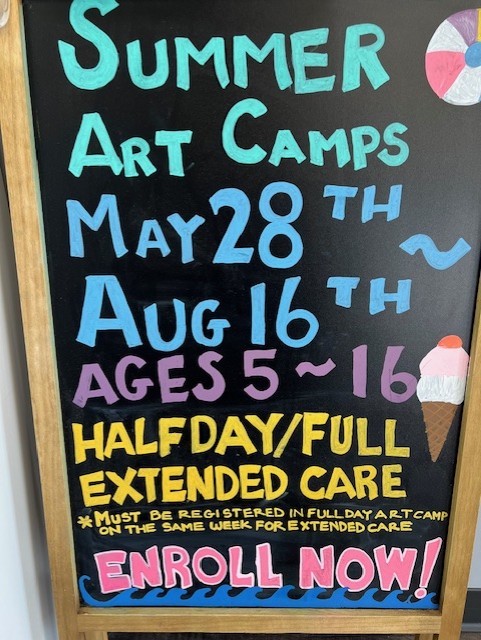
- Chalkboard/Digital Board
- Keep your chalkboard or digital display updated with current classes, camps, workshops, events, promotions, and important studio announcements.
- Sandwich Board
- Place a sandwich board outside the studio to promote classes, camps, workshops, events, and special offers. Keep the messaging current and easy to read so it attracts the attention of passing traffic.
- Gift Cards
- Keep gift cards readily available at the front desk and promote them as a convenient gift option for birthdays, holidays, teacher gifts, and special occasions. Display gift cards prominently and remind customers that they make great gifts for artists of all ages.
- Photo-Op Wall
- Create a designated photo area in the studio where customers can take fun and creative pictures. Whenever possible, incorporate the Cordovan Art School logo into the background so photos shared on social media help increase brand awareness and promote the studio.
- Newsletter Sign-Ups
- Encourage customers to subscribe to the Cordovan Art School newsletter to receive updates on classes, camps, events, promotions, and special offers. (show them how to subscribe on the Cordovan Art School website)
- PYOP Promotional Display
- Create a Paint Your Own Pottery (PYOP) display that promotes special events such as “Ladies’ Night” and “Family Day”. Clearly advertise any discounts or special offers available on those designated days to encourage customers to visit the studio and enjoy a pottery painting experience.
- PYOP Customer Loyalty Program
- Implement a customer loyalty program for PYOP to encourage repeat visits and reward loyal customers. Loyalty programs can include points, punch cards, discounts, free classes, PYOP rewards, referral bonuses, or other incentives that motivate customers to return to the studio regularly.
Monthly Marketing Initiatives
To help you kickstart your marketing efforts, we have provided you with a two marketing initiatives to do each month. Each initiative is listed during the month that it is most effective. Monthly marketing initiatives are meant to enhance the other strategies listed above.
Analyze Marketing Results
Managers and franchisees should regularly review and analyze the results of their marketing efforts to determine what is working and where improvements can be made. Tracking results helps ensure marketing dollars and time are being used effectively.
Marketing analysis should be viewed as an opportunity to test new ideas, refine existing strategies, and continuously improve performance. Successful studios are willing to adjust their approach based on results and feedback.
The Cordovan Corporate Team is available to provide guidance, resources, and support as studios develop and implement new marketing initiatives.
Jackrabbit Source Report
Managers should ensure that the “How Did You Hear About Us?” source report options in Jackrabbit are accurate and up to date.
For best results, limit the number of active source options to 12 or fewer choices. Too many options can overwhelm customers and lead to inaccurate data.
Sales and Promotions
From time to time, Cordovan Art School may offer promotions, discounts, and special offers to encourage enrollment and increase customer engagement. Examples include:
- Black Friday promotions
- Summer camp early-bird discounts
- Early registration specials
- Refer-a-friend programs
- PYOP promotions
- Seasonal sales and special events
Managers are encouraged to distribute coupons and promotional offers at school events, summer camp fairs, community festivals, and other outreach events. The specific offer should be approved by the studio owner and may include:
- $25 off a half-day camp
- $25 off a student’s first class
- One (1) free month of art classes
- Other approved promotional offers
Managers may also provide donations for silent auctions, raffles, and community fundraisers. Common donations include:
- One (1) free half-day 5-day camp
- One (1) free month of art classes
- One (1) free session of camp/ One (1) free 1-day camp
All promotions, coupons, discounts, and special offers must include an expiration date. Expiration dates create urgency and encourage customers to take action in a timely manner.
Promotional Materials
Managers should use approved Cordovan Art School promotional materials and templates. Managers should not create their own branding or promotional designs without approval.
Coupon and Discount Policy
Customers may use only one (1) promotion or discount per transaction. Promotions and discounts may not be combined. If multiple discounts are available, the customer should receive the promotion with the greatest value.
Declined Payments During Promotions
If a customer registers during a promotion and their credit card is declined, the manager should:
- Contact the customer promptly.
- Provide a copy of the declined payment notice if needed.
- Follow up to collect payment.
If payment is not received before the promotion expires:
- Remove the promotional discount.
- Add a note to the transaction stating: “Payment not received before promotion expiration date.”
Do not remove a student from a camp due to non-payment unless the camp is sold out. Many customers are unaware that their payment was declined and may still expect to attend.
If the camp is sold out:
- Remove the unpaid registration to open the space for another customer.
- Send an email notifying the customer that their registration has been canceled due to non-payment.
Black Friday
Cordovan Art School offers special Black Friday promotions each year. The timing and duration of these promotions may vary based on current market trends and company initiatives.
The goals of Black Friday promotions are to:
- Encourage current customers to pre-purchase future classes, camps, and services. This shows long-term commitment.
- Reward loyal customers with special pricing.
- Attract new customers and encourage them to try Cordovan Art School.
- Provide gift-giving opportunities during the holiday season.
Managers are responsible for:
- Entering Black Friday promotions into Jackrabbit.
- Verifying that promotions are displaying correctly on the website.
- Reviewing all pricing and promotion details for accuracy.
- Promoting Black Friday offers locally through approved marketing channels.
Understanding Digital Marketing
Internet Marketing
Cordovan Art School will be promoted through one primary website designed by the Franchisor’s selected supplier. The Franchisee is required to provide information on its business within the Cordovan Art School website via a landing page, following a provided template, and submitted for approval by the Franchisor.
Google My Business Account
As a franchisee, setting up a Google My Business (GMB) account is an essential step for enhancing your online presence and attracting more customers. A well-optimized GMB account helps your business rank higher in Google Search Engine Results Pages (SERPs). This increases the likelihood of potential customers finding your business when they search for relevant keywords. Having a GMB account also ensures your business appears on Google Maps, making it easier for customers to find your location. This is particularly beneficial for attracting local customers. GMB provides insights into how customers find and interact with your business online. You can see how many people view your profile, how they find you, and what actions they take, helping you make informed marketing decisions.
Search Engine Marketing
Search Engine Marketing (SEM) is the practice of marketing a business using paid advertisements that appear on search engine results pages, (SERPS). Advertisers bid on keywords that users of search engines, such as Google and Bing, may enter when looking for certain products or services. SEM is a form of internet marketing that promotes the website by increasing visibility in search engine results mainly from paid advertising.
SEM ads are often referred to as “Pay-Per-Click” ads, and are available in a variety of formats. Pay-Per-Click ads may be small, text-based ads, while Product Listing Ads (PLAs) are visual product-based advertisements which allow consumers to see information at a glance – i.e., pricing and reviews.
The greatest benefit of using SEM is that it offers advertisers the opportunity to put their ads in front of motivated customers who are ready to buy at the precise moment they are ready to make a purchase, due to their activity of searching for a description related to the advertiser’s product/service.
Search Engine Optimization
Search engine optimization (SEO) is unpaid search marketing. Unlike SEM, SEO does not involve businesses paying the search engine for traffic and clicks, but rather, the advertiser receives a free spot in the search results by having the most relevant content for a given keyword search.
Keyword Management
Keywords are entered by search engine users to find what they are looking for and are the basis of a SEO advertising strategy. There are free keyword tools available for use to test the effectiveness of the words in company description of services. Below are two websites that show potential as a useful tool.
WordStream – provides a range of valuable information, such as search volume for each individual keyword in Google and its general competitiveness.
Source: images/image6.png
Figure 1: WordStream Keyword Suggestion tool
Wordtracker – Find new keywords for your market. Wordtracker is a website which allows users to input a keyword and find the volume, competition, and IAAT.
Volume is the average number of searches per month over the past 12 months.
Competition – the higher the number, the more organic competition for the keyword.
IAAT – Also known as “In Anchor and Title” is the count of webpages on which the keyword appears in both the title tag and the text of a backlink.
Source: images/image7.png
Figure 2: Wordtracker’s demo photo of a full licensed account
Evaluating SEM Performance
Among the various parameters of measuring the effectiveness of an SEM campaign, a cost per lead and cost per signed agreement analysis, should be taken into consideration. The calculation as follows:
Cost of SEM Campaign ($) / # of internet leads = SEM cost per lead
For instance, if the monthly campaign cost is $120 and the franchise gets 4 leads a month, the SEM cost per lead is $30. Franchisees can also use this equation to determine how many leads are needed to see a return on investment for search engine ads. If the cost of a lead is average $30, and the cost of an ad is $1000 then 34 leads are needed to be effective. The best method of tracking leads and gathering a cost per lead is by asking your leads where they heard about you. A survey or conversation with your lead can achieve this.
Running a Successful SEM Campaign
Here are the steps a franchise can take to run an effective SEM campaign:
- Provide a list of geographic terms that represent your region. Cities, countries, postal codes, etc. being input, many areas have other geographic references and make sure that the SEO provider is aware of these regions and associate words to the territory.
- Monitor the campaign weekly to note changes in viewership by looking at the SEO reports.
- Track the search results and monitor your progress recording the dates and times the search was run.
- Schedule campaign runtimes. The default Google scheduled campaign runtime is between 6 am to midnight, Monday through Friday. Additional timeframes will be added upon request. It is recommended to schedule campaigns to be run outside of work hours to allow salespeople to follow up with leads during their work hours.
- Keep the campaign funded. Budget for the SEO campaign price depending on the needs of the company.
Social Media
Policy
The Corporate Office actively embraces social media to share prominent information about our brand and related news via posted content, images, and more. The Corporate Office investigates daily to identify and promptly follow up on online concerns so that we may mitigate the escalation of negative chatter. We leverage the opportunity the internet provides to gain insight into what people are saying about us.
To help protect the interests and reputation of our brand, guidelines have been created for franchisees who create or contribute to blogs, wikis, social networks, virtual worlds, or any other type of social media. Franchisees using social media and referring to Cordovan Art School must comply at all times with their executed Franchise Agreement.
Additionally, as a franchisee, the behavior of your employees and team members as it relates to their statements regarding Cordovan Art School on social media is your responsibility. As such, we expect you to have in place a policy that all team members govern their use of social media in connection with the Cordovan Art School brand.
All social media content posted on a Cordovan Art School social media platform is subject to review by the Corporate Office.
The Corporate Office will utilize social media platforms for marketing of all franchises, as this will enable us to reach more people and connect on a personal level with our customer base. Social Media Marketing (SMM) involves utilizing various social media networks for sharing ad content and communicating directly to our customers. Social media marketing primarily involves sharing of content, videos, and images for marketing purposes, as well as paid social media marketing.
The Corporate Office will manage a franchise-wide social media presence intended to boost the appeal of our brand. When available, each Franchisee will be granted a location page under the Corporate Office’s parent page to allow for localization of content, with the approval of the Corporate Office. With platforms that do not allow parent/child accounts, the Franchisor must be provided with administrative access to all your social media accounts.
Franchise Social Media Guidelines
If you refer to the Cordovan Art School brand when engaging use of social media, please adhere to the following policy and guidelines:
- Franchisees are prohibited from posting confidential or proprietary information about the Company, its subsidiaries, clients, vendors, employees or former employees.
- Franchisees may not discuss the Company’s numbers or sales figures (non-public financial or operational information), strategies and forecasts, legal issues, or nonpublic future activities or business plans.
- Franchisees must not use Company logos or any other Company images or iconography on personal social media sites, and are prohibited from using the Company name, logos, images or iconography to promote or endorse any product, cause, political party, or candidate.
- Stick to your own area of expertise.
- Any information posted should be on behalf of yourself as a Cordovan Art School franchisee; do not represent the Company at large.
- Post meaningful, respectful comments– in other words, never post spam or remarks that are off-topic or offensive.
- Always pause and think before posting. That said, reply to comments in a timely manner, but only when a response is appropriate.
- Respect proprietary Company information and content, and confidentiality at all times.
- When disagreeing with others’ opinions, keep it appropriate and polite.
- Know and follow your executed Franchise Agreement.
Rules of Engagement
Be transparent. Your honesty—or dishonesty—will be quickly noticed in the social media environment. If you are blogging about Cordovan Art School, use your real name, identify that you are a franchisee, and be clear about your role. If you have a vested interest in a topic you are discussing, be the first to point it out.
Be judicious. Make sure your efforts to be transparent do not violate your executed Franchise Agreement. All statements must be true and not misleading, and all claims must be substantiated and approved. Never comment on anything related to legal matters, litigation, or any parties in which Cordovan Art School is currently in litigation. If you want to write about the competition, make sure you know what you are talking about and that you have the appropriate permission. Be smart about protecting yourself, your privacy, and all confidential information. What you publish is widely accessible and will be around for a long time, so consider the content carefully.
Write what you know. Make sure you write and post only about your area(s) of expertise at Cordovan Art School. If you publish to a website referring to Cordovan Art School in any manner, please use a disclaimer similar to this: “The postings on this site are my own and don’t necessarily represent the Cordovan Art School Corporate Office’s position, strategy, or opinions.” Also, you must comply with all brand, trademark, copyright, fair use, trade secrets, confidentiality, and financial disclosure laws. If you have any questions about these laws, refer to your Franchise Agreement. Remember, you are personally responsible for your content.
Perception is reality. In online social networks, the lines between public and private, personal and professional are blurred. Just by identifying yourself as a Cordovan Art School franchisee, you are creating perceptions about your expertise and about our clients and organizations. You are also creating perceptions about yourself from your colleagues and fellow franchisees. Proudly serve the Cordovan Art School brand. Be sure that all content associated with you is consistent with your work and with our franchise values and professional standards.
Are you adding value? There are millions of words. The best way to get yours read is to write about what people value. It should be thought-provoking and build a sense of community. If your online posts help people improve their knowledge or skills, build their businesses, perform their jobs, solve problems, or understand our business better—then you are adding value.
Your Responsibility: What you write is ultimately your responsibility. Treat social media use seriously and with respect. Please know and follow your executed Franchise Agreement in all social media activity.
Be a Leader. There can be a fine line between healthy debate and incendiary reaction. Do not denigrate our competitors or our brand. Understand that you do not need to respond to every criticism or barb. Be careful and considerate. Once the words are out, you cannot get them back. And once an inflammatory discussion gets going, it is hard to stop.
If it gives you pause, pause. If you are about to publish something that makes you even the slightest bit uncomfortable, do not shrug it off and hit “send.” Rather, review these guidelines and figure out what is bothering you. When in doubt, discuss it with your Field Consultant. Ultimately, what you publish is yours– as is the responsibility for what you post online.
Photography Tips
Managers should take action photos of students (and teachers) being creative. Photos of students and teachers are used on social media, the Cordovan Art School website, and other places to give people a view into our studios!
If a parent notifies the manager that they do NOT allow photos to be taken of their kids, this information must immediately be written on the student’s account in Jackrabbit. The manager and teacher must NOT take any photos of any child who does not have a photo release. See “Safety of Students: “No Photos of My Child Requests.”
Parents are prompted to give photo release permission by clicking a box at the time of online registration. Some parents will write in a comment at the time of registration or contacting the studio if they do not want to give permission. The manager is responsible to keep accurate records of any student that is not given a photo release, and make sure no photos are taken of those students.
Managing Feedback
You can do everything right and yet still receive a negative “client review”. It all depends on the client’s expectations; they are either met or they are not. Consider the following strategies when managing interactions involving feedback.
Note: Franchisees that spot a ‘bad review’ should notify their Field Consultant and discuss potential solutions.
- Remember, a bad review can be a good thing. It can be an opportunity to correct a problem. Inform the Franchisor immediately if a complaint was issued.
- Take the time to respond to every single one of your reviews. This should be done in a private response only. The faster you respond to a negative response the better chance you have of correcting their perspective.
- Keep your response short and to the point.
- Start every response with the following: “Thank you for taking the time to review.”
- Second, if the review is positive, there is no need to say much more than, “Thank you for taking the time to review our business. I will share your review with the team.” If the review is negative, apologize, even if you don’t think you did anything wrong. Remember, online reviews can impact your business both negatively and positively.
- Be sincere and genuine. Never respond in a defensive manner.
- Third, offer to correct the situation any way you can. Be earnest.
- Finally, thank them again for making you aware and giving you the opportunity to make things right.
Trademarks
Cordovan Arts Franchising, LLC trade names and trademarks distinguish our services. Our trademarks are very valuable as they help protect and define our intellectual property. To preserve and enhance the value of our marks, franchisees must strictly adhere to the following guidelines:
- Use the trademarks exactly as they appear in the advertising and promotional materials and programs prepared and provided by the Corporate Office.
- Use the trademarks only after you have obtained the approval from the Corporate Office.
- Use the appropriate symbol — ™, ®, © — any time the trademarks are used.
- Promptly discontinue any use of the trademarks the Corporate Office determines to be improper.
- Do not use the trademarks or the franchise name when using another business name without the proper ‘DBA’ designation.
- Notify the Corporate Office immediately if you become aware of any other business using the trademarks or similar words or symbols.
Advertising Approval Requirements
Franchisees must obtain the Franchisor’s approval for all advertising and promotional materials that fall outside approved brand templates before publication or distribution. Requests should be submitted using the Request for Advertising Approval Form and will be reviewed on a case-by-case basis.
Franchisees may not advertise, promote, or co-market with another business without the Franchisor’s prior written approval.
Examples that require prior approval include:
- Co-branding with other businesses or organizations
- Seminars and educational events
- Symposiums and conferences
- Service endorsements
- Product endorsements
- Joint marketing campaigns
- Sponsorship agreements
Branding & Marketing Materials
To ensure consistent brand representation across all locations, franchisees are required to use the corporate graphic design team for the creation of marketing materials. Independent design or unauthorized creative work is not permitted, as it may compromise brand integrity and consistency.
For convenience, all standard marketing materials have been uploaded to the American Solutions for Business (ABS) portal, which can be accessed at www.americanbus.com. This platform provides franchisees with easy access to pre-approved, professionally designed templates for:
- Business Cards
- Flyers
- Promotional Swag
- Other Print Marketing Materials
Franchisees will be able to create their own login credentials on the ABS website and customize these templates by updating location-specific details such as:
- Franchisee’s Name
- Business Address
- Location Name
- Contact Information
This streamlined system allows franchisees to order high-quality, brand-approved marketing assets quickly and independently, while still maintaining the consistency and professionalism of the brand image.
Branding Guidelines
It is important to keep Cordovan Art School image and branding consistent throughout all graphics including social media, website, and print.
- Cordovan’s branding includes:
- Close-up images of happy students creating art.
- Make sure the backgrounds are interesting and the photos are light (not dark)
- Typography: Cordovan Art School uses Arial as its primary font.
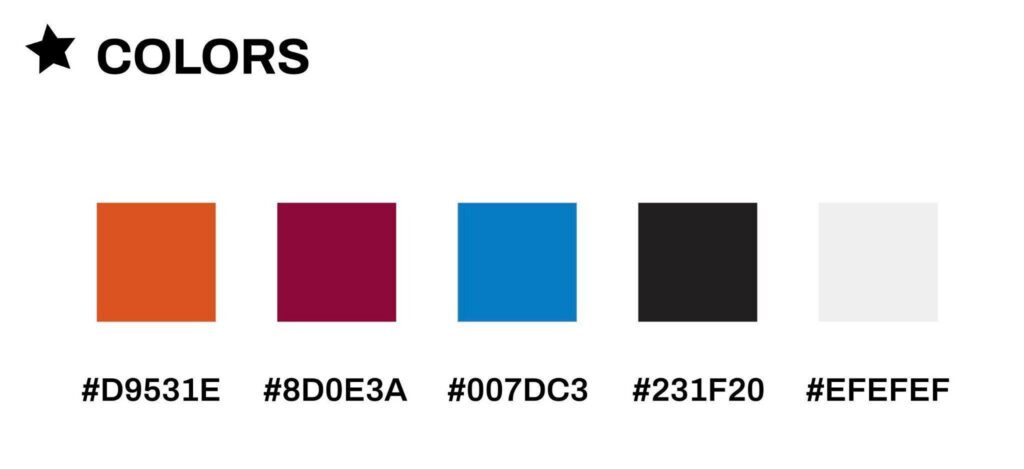
- Cordovan Colors are:
- Close-up images of happy students creating art.
Graphics
To keep branding consistent, all graphics should be created by the Cordovan marketing team. Managers should not design any graphics, marketing materials themselves. Cordovan Art School has advertising templates already created, and the designs can be tweaked to fit any new request for graphics.
Printable graphics like flyers, business cards, banners, etc. are located on the American Solutions for Business (ABS) portal. You will receive a login for your account. To go to the ABS portal, CLICK HERE
Digital graphics and editable PDF graphics are located here: UPLOAD LINK
Reach out to Cordovan Art School Marketing team for any specialized graphic requests. Specialized requests will incur a modest design fee.
Business Cards
When networking, it is important to present a consistent and professional image of our brand. Business cards are available through the American Solutions for Business (ABS) portal, where a standardized format has been created for all franchisees. A sample of the approved layout is provided below.
Business Card (Front)
Business Card (Back)
Suggested Operating Hours
The standard recommended operating hours for each location are as follows:
- Monday – Thursday: 12:00 PM – 8:00 PM
- Friday: Closed
- Saturday: 9:00 AM – 1:00 PM
- Sunday: Closed
Studios that offer Paint Your Own Pottery (PYOP) may choose to extend their hours of operation to accommodate walk-in customers, weekend traffic, special events, and group reservations.
Hours of operation may be adjusted based on customer demand, staffing availability, seasonal trends, and studio programming.
Pricing Guidance
Franchisees are encouraged to ask for guidance when establishing or setting prices for classes, camps, workshops, parties, PYOP, and other services to ensure their rates remain competitive and aligned with the Cordovan Art School brand. Franchisees should consider these recommendations along with local market conditions when setting prices.
Pricing decisions may be influenced by factors such as:
- Competitor pricing
- Cost of materials
- Labor costs
- Rent and operating expenses
- Local market demand
Weekly Classes (See Chart below)
- Ages 4-7: $174 – $184 per month
- Ages 8-12: $184 – $194 per month
- Teens & Adults: $214 – $224 per month
- Pottery: $234 – $244 per month
Camps (See Chart below)
- Full Day Art Camp: $549 – $569
- Half Day Art Camp: $339-$399
- Extended Care: $95
Cordovan Art School Pricing Guidance
Pricing slightly varies from location to location and should be calculated based on local market conditions
| CLASS PRICES | |||
| Ages | Class Duration | Low Price | High Price |
| Ages 4-5 / Ages 6-8 | 1 hour | $164.00 | $174.00 |
| Ages 6-8 | 1 hour (Clay) | $174.00 | $184.00 |
| Ages 9-12 | 1.5 hours | $184.00 | $194.00 |
| Ages 9-12 | 1.5 hours (Clay) | $194.00 | $214.00 |
| Homeschool | 1.5 hours (Homeschool) | $144.00 | $154.00 |
| Teens/ Adults | 2 hours | $214.00 | $224.00 |
| Teen/s Adults | 2 hours (Clay) | $234.00 | $244.00 |
| Adults | 2.5 hours | $244.00 | $264.00 |
| Adults | 2.5 hours (Clay) | $264.00 | $264.00 |
| CAMP PRICES | |||
| Session(s) | # of Days | Low Price | High Price |
| 5-Days, Half-Day (Morning OR Afternoon) | 5 days | $299.00 | $369.00 |
| 5-Days, Full-Day (Morning AND Afternoon) | 5 days | $479.00 | $589.00 |
| 5-Days, Half-Day (Wheel Throwing option) | 5 days | $329.00 | $399.00 |
| 5-Days, Full-Day (Wheel Throwing option) | 5 days | $509.00 | $619.00 |
| Extended Care | 5 days | $95.00 | $95.00 |
| Camps (October, Thanksgiving, Winter Break, Spring Break) | |||
| Session(s) | # of Days | Low Price | High Price |
| 5-Days, Half-Day (Morning OR Afternoon) | 5 days | $249.00 | $299.00 |
| 5-Days, Half-Day (Morning OR Afternoon) | 4 days | $199.00 | $240.00 |
| 5-Days, Half-Day (Morning OR Afternoon) | 3 days | $149.00 | $180.00 |
| 5-Days, Half-Day (Morning OR Afternoon) | 2 days | $99.00 | $120.00 |
| 5-Days, Half-Day (Morning OR Afternoon) | 1 days | $52.00 | $62.00 |
| Extended Care | 5 days | $95.00 | $95.00 |
| Camps (October, Thanksgiving, Winter Break, Spring Break) | |||
| Session(s) | # of Days | Low Price | High Price |
| 5-Days, Full-Day (Morning OR Afternoon) | 5 days | $489.00 | $399.00 |
| 5-Days, Full-Day (Morning OR Afternoon) | 4 days | $394.00 | $320.00 |
| 5-Days, Full-Day (Morning OR Afternoon) | 3 days | $296.00 | $240.00 |
| 5-Days, Full-Day (Morning OR Afternoon) | 2 days | $198.00 | $160.00 |
| 5-Days, Full-Day (Morning OR Afternoon) | 1 days | $99.00 | $80.00 |
| Extended Care | 5 days | $95.00 | $95.00 |
Wheel Throwing: Add $6 per day (e.g. 5-day camp = $30 extra for Wheel Throwing) | |||
Studio Care
Cleaning
The manager makes sure that the studio stays clean each day. Managers are responsible for cleaning the lobby, bathrooms, kiln room, hallways, classrooms, and any common areas. The bathrooms should be cleaned regularly throughout the day, and more frequently when camps are in session. The manager can assign these duties to staff members (not teachers), but the managers are always held accountable for the cleanliness and tidiness of their studio.
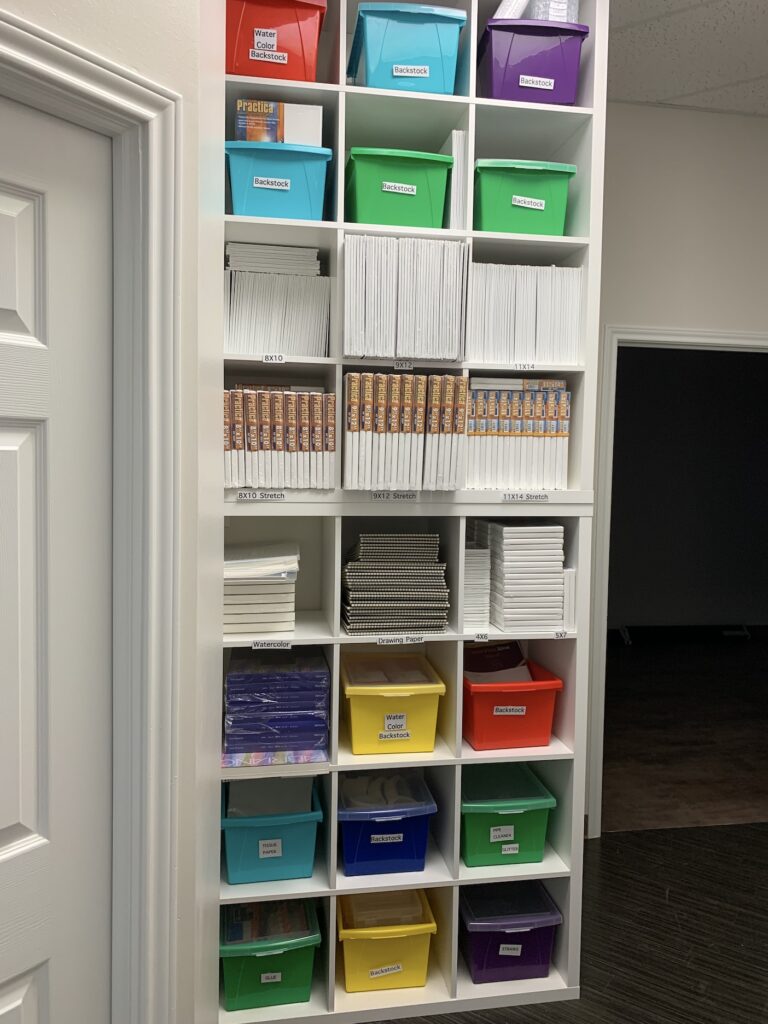
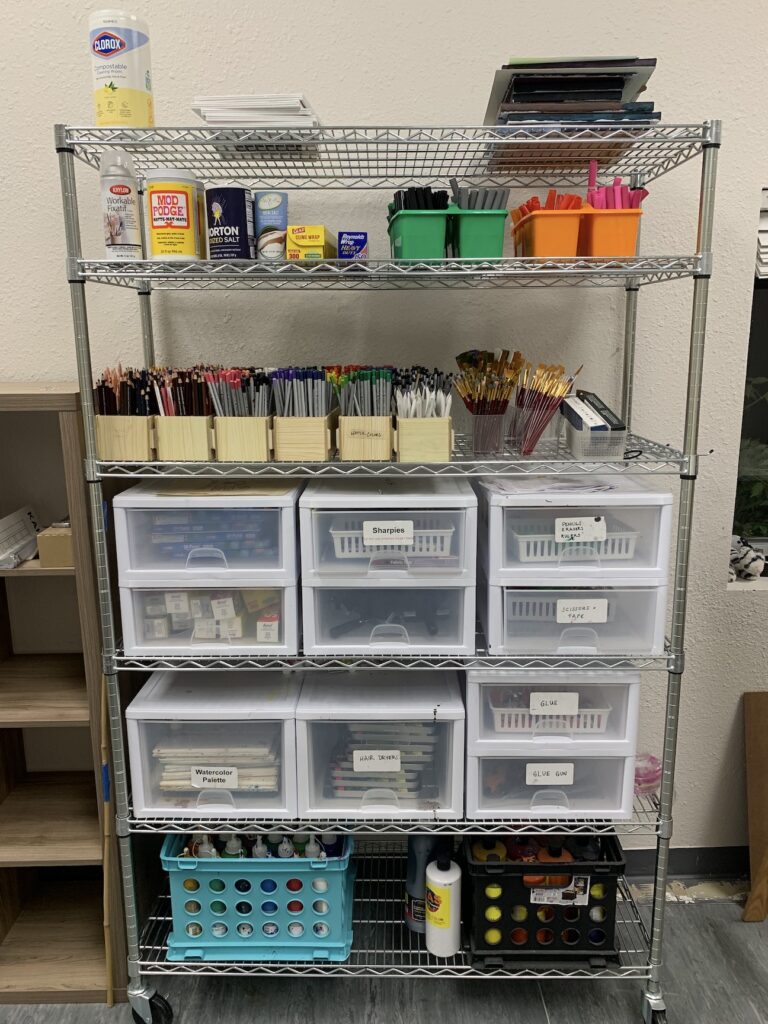
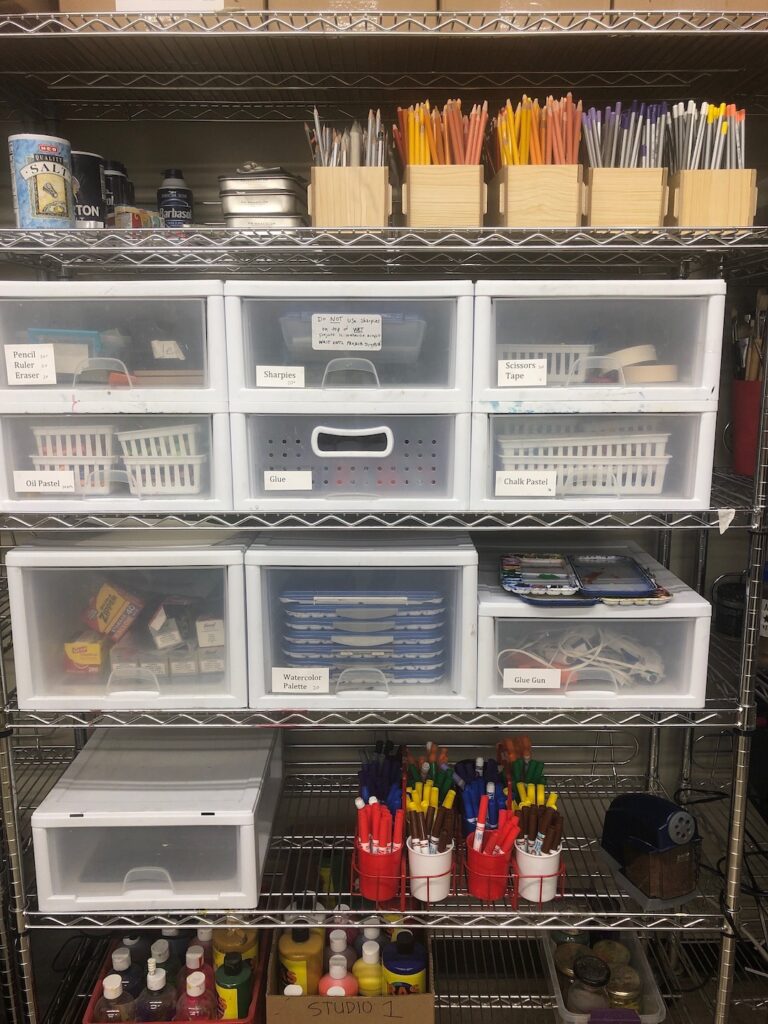
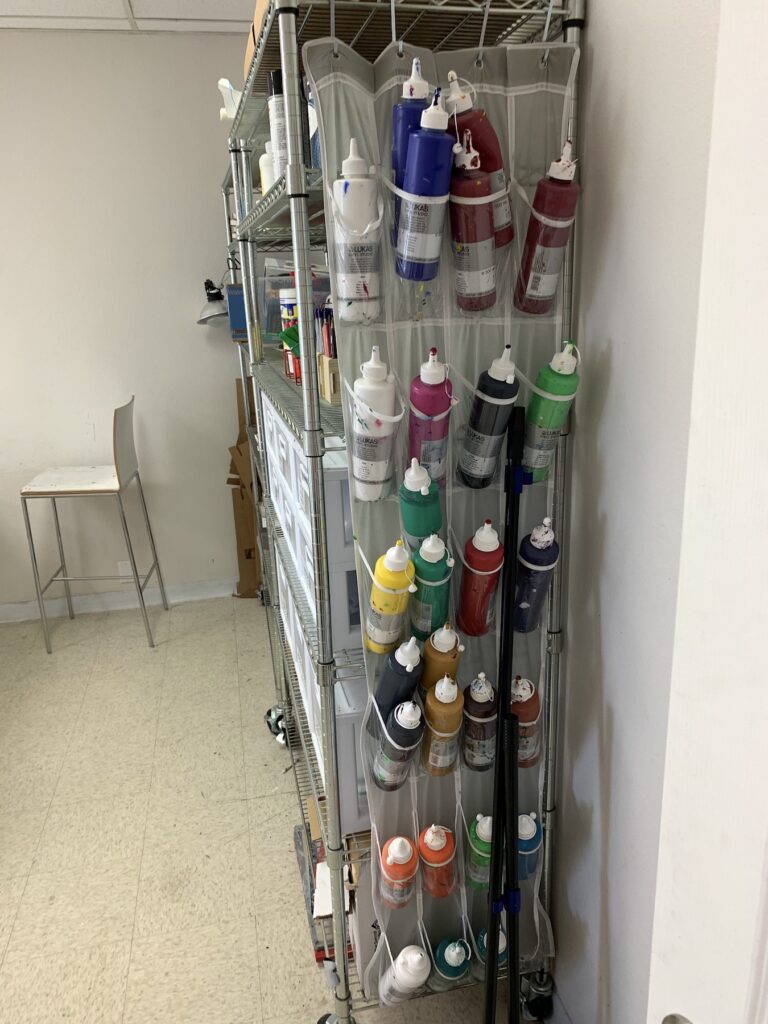
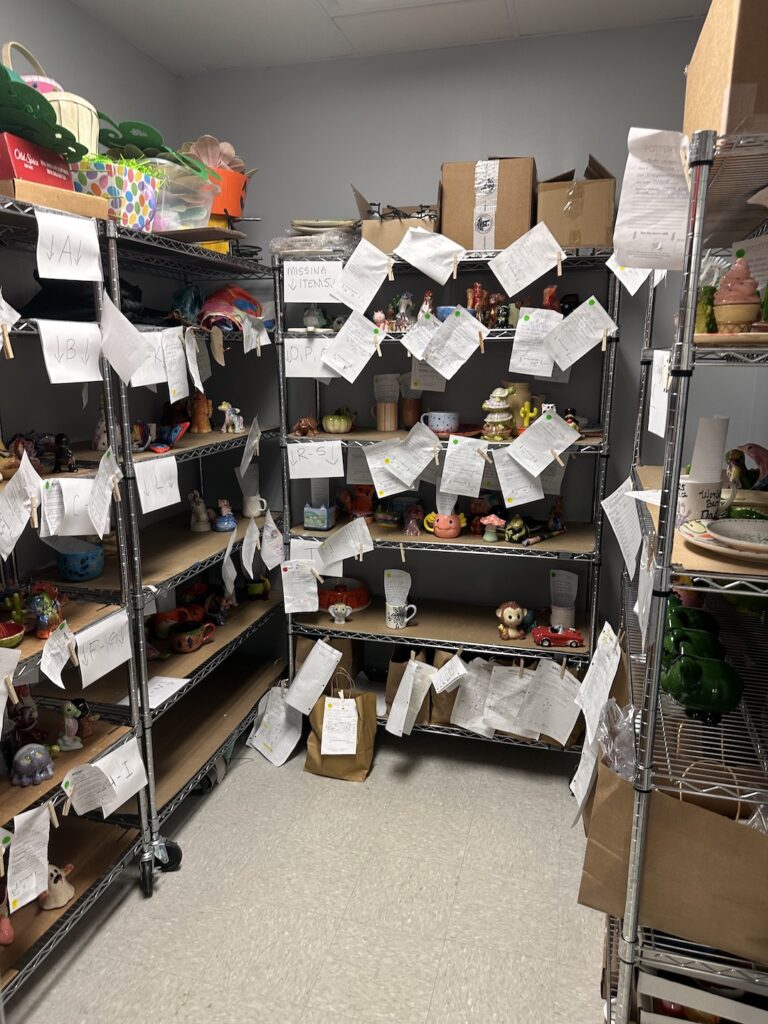
The kiln room, storage rooms and common areas must be kept clean, organized, and well maintained at all times. All shelves should be clearly labeled, and supplies must be stored in their designated locations. For safety, items must not be left on the floor. All sinks and work surfaces must remain clean and tidy.
Teachers are responsible for cleaning their classrooms immediately after each class and leaving the space in better condition than they found it. This includes cleaning work surfaces, maintaining sink areas, and organizing materials. Teachers should involve students in cleanup to reinforce responsibility and proper care of art supplies. Managers are responsible for reinforcing this expectation and providing reminders as needed.
Managers may hire a professional cleaning service to perform deep cleaning of the studio once per month. During summer camp season, increased studio usage may require more frequent cleaning. In these cases, deep cleaning is recommended once per week—preferably on Fridays after the final camp session—to ensure the studio is clean and prepared for Saturday morning classes.
Students should NOT leave their artwork in the studio after class or camp. Students are responsible for taking their artwork and personal belongings home with them at the end of each class or camp. If a student leaves anything at the studio, it is the manager’s job to notify the student to pick up their belongings so that the studio stays clean and free from clutter. However, if an art project spans more than 1 week, it is acceptable for the students to leave their artwork in the classroom, in a safe place where it will not be thrown away or damaged, so that they don’t run the risk of forgetting to bring it to class the next week.
Teachers are also expected to take their artwork and personal belongings home with them at the end of class so that each classroom remains free from clutter. However, a manager is allowed to assign a small cubby or place for their teachers to store a few small items during the school year. However, all teacher cubbies must be completely cleared out before summer camp season begins.
Lost and found items should be managed regularly, especially during camp season. If the owner is known, Managers must make reasonable efforts to return the item. Items may be held for up to 3 months. After that time, unclaimed items may be discarded or donated to a local organization. Perishable items (e.g., food or items containing food) must be disposed of within 24 hours
Managers are responsible for washing aprons once every semester.
Front Desk
The front desk sets the tone for the studio. Managers should keep the front desk free from clutter, clean, organized and minimalistic. The only items that should be placed on top of the front desk are: computer, jar with pens, business cards, and Cordovan Art School marketing literature. All food, personal items, office supplies, and any clutter should be placed in the storage room or under the desk hidden from the view of customers. Marketing literature from another business should NOT be placed on the manager’s desk.
Maintenance & Repairs
Managers oversee all studio facilities. When something doesn’t work, it is the manager’s job to make sure it gets resolved. This includes calling local professional companies to fix issues such as plumbing, electricity, HVAC, and any minor repairs that come along. On occasion, the walls may need touch up paint, and it is the manager’s job to make sure the walls stay looking fresh. At a minimum, the studio must be spot-painted with touch up paint once summer camp ends each year, before the Fall semester begins.
All major repair expenses need to be discussed and approved by the studio owner. It is always a good idea to get 2 or 3 different repair bids from different vendors in order to compare pricing when making a decision on which vendor to go with. However, in the event of an emergency (i.e. plumbing or HVAC emergency situations, there may not be time to get more than one bid.)
Lobby, Decorations & In-Studio Marketing
Managers must ensure that the lobby follows the Cordovan Art School branding guidelines.
In-studio Marketing:
- Digital Board/ Chalkboard: Managers must maintain a digital board or chalkboard behind the front desk displaying weekly classes, upcoming camps, workshops, events, and key studio information. The board must be updated monthly and must be artistically designed to be clear, engaging, and visually aligned with Cordovan Art School’s creative brand.
- Camp Wall Posters: Managers must promote upcoming camps using a designated camp wall display. Camp wall posters will be provided by Cordovan Art School.
- Party Display: The party display must be located in a high-traffic, highly visible area of the lobby. The display should be visually appealing, organized, and aligned with Cordovan Art School branding. The display must include:
- A clear sign promoting parties (e.g., “Celebrate with Us! We Host Parties!” or an artistic equivalent that clearly communicates party offerings)
- Visual samples representing each party type offered (e.g., canvas painting, hand-building project, PYOP birthday plates, pottery wheel project)
- Party flyers displayed in a designated holder adjacent to the display
- Flyers: Flyers should be readily available for walk-in customers. All flyers must be current, clean, and aligned with Cordovan Art School branding. Flyers include:
- Weekly class Schedules
- Camps
- Parties
- Events & Workshops
- Fundraisers
- Window Art: Where permitted by the property management company, studios may decorate exterior windows with hand-painted artwork for holidays, camps, and seasonal events. All window art must be clean, current, and professionally presented. Outdated, worn, or poorly executed displays are not permitted.
- Sandwich Board: A sandwich board signage may be placed outside on the sidewalk in high-traffic areas to promote studio messaging, where permitted. As a reflection of the brand, the sandwich board must be artistic, engaging, informative, and visually appealing.
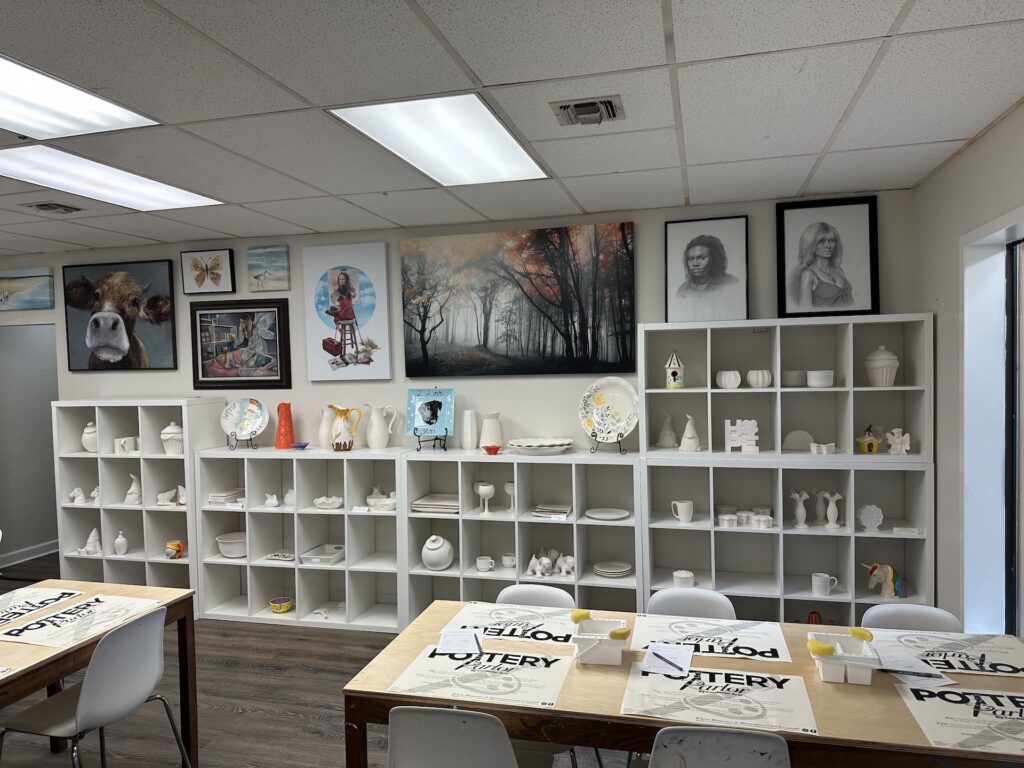
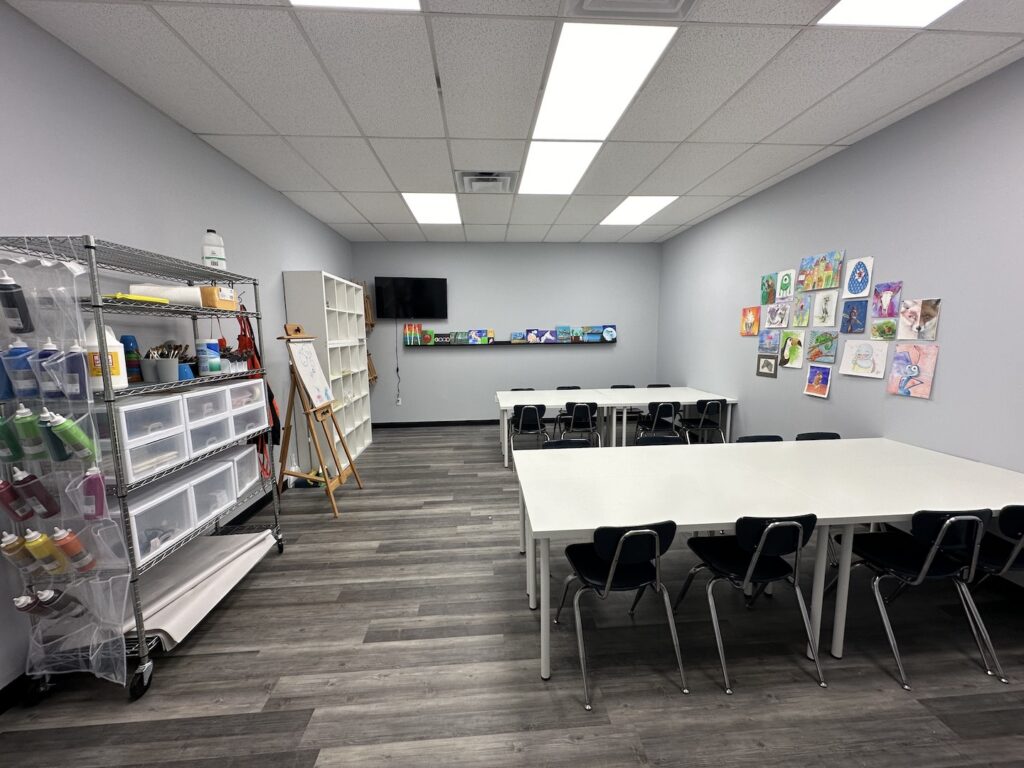
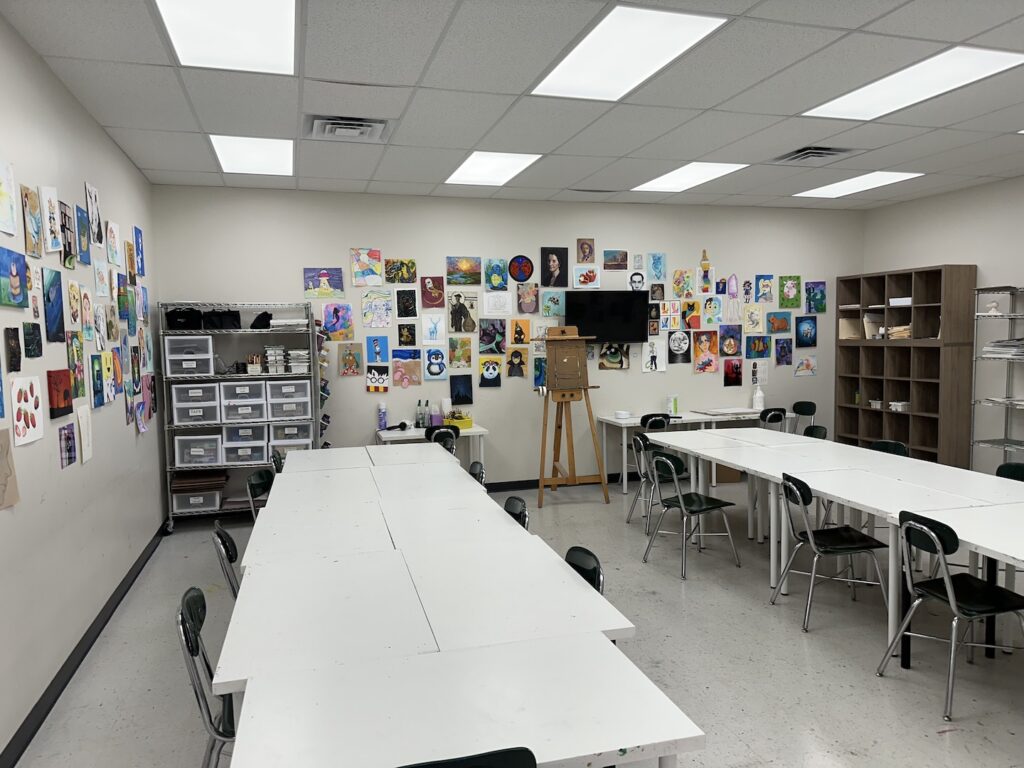
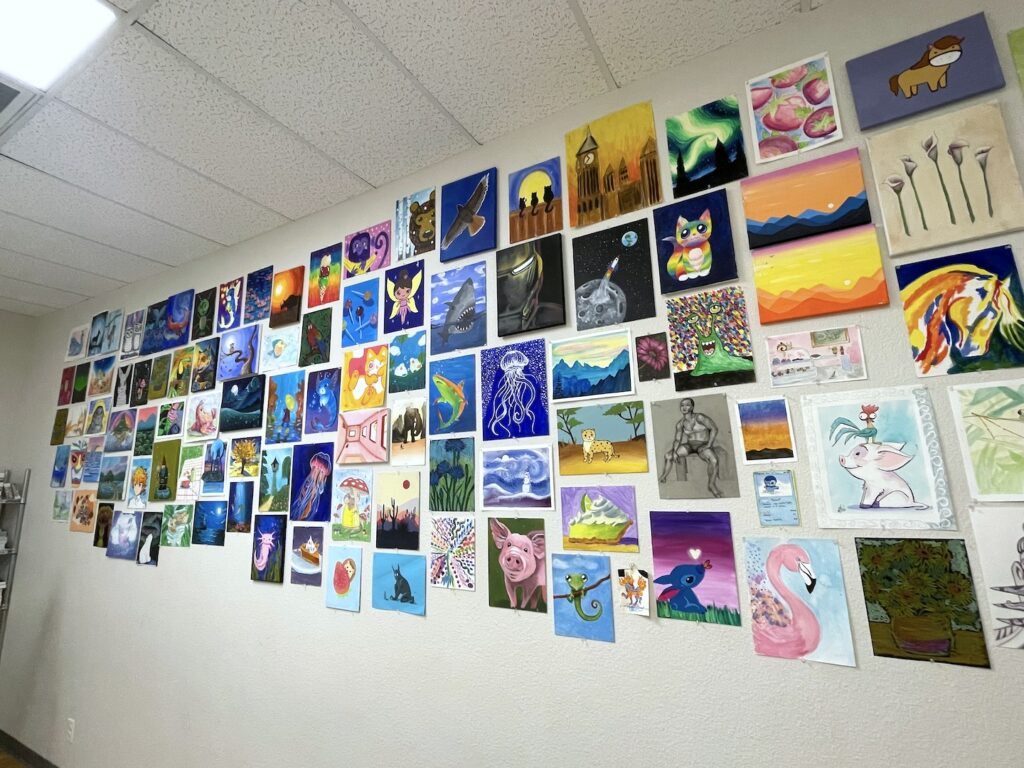
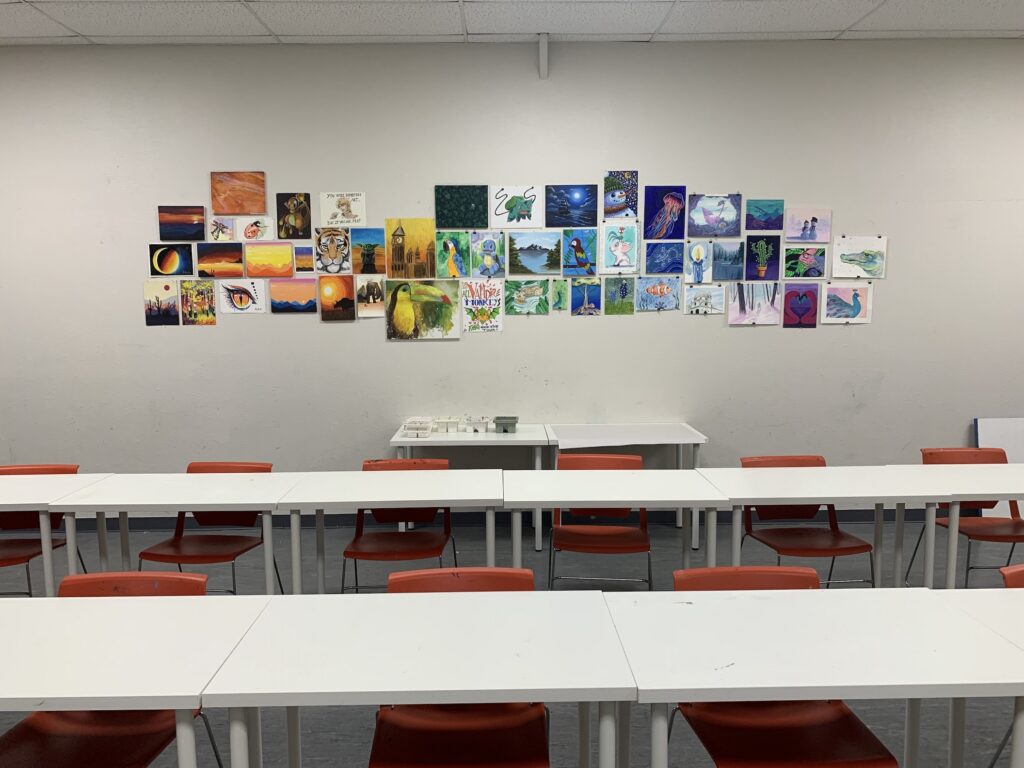
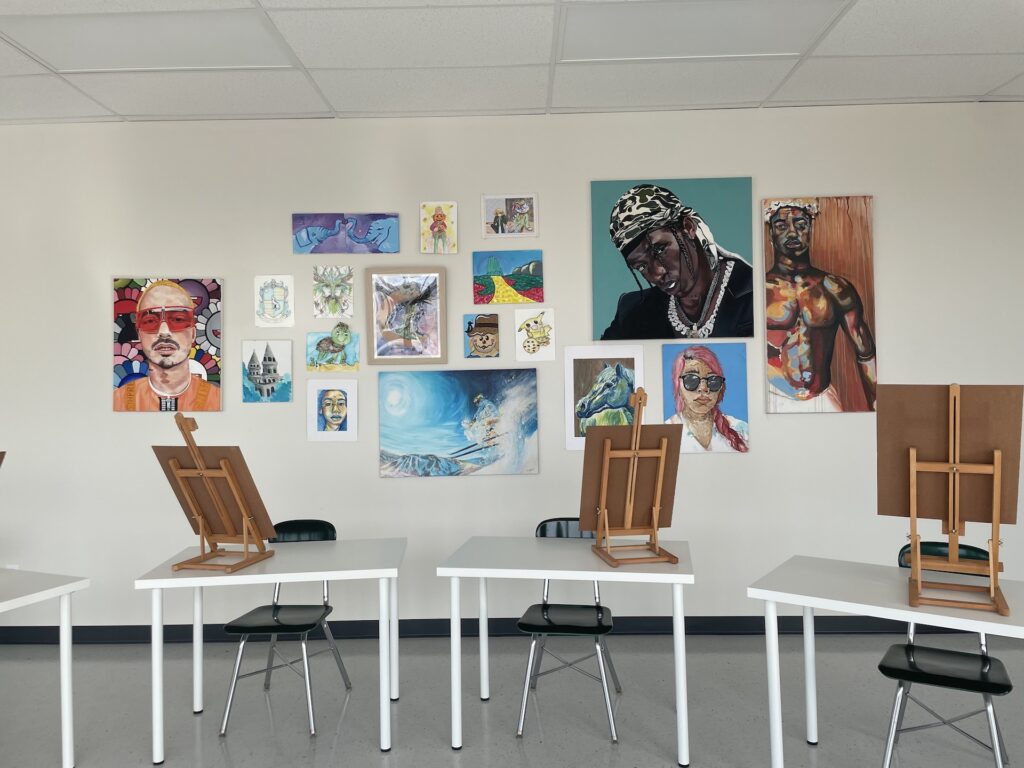
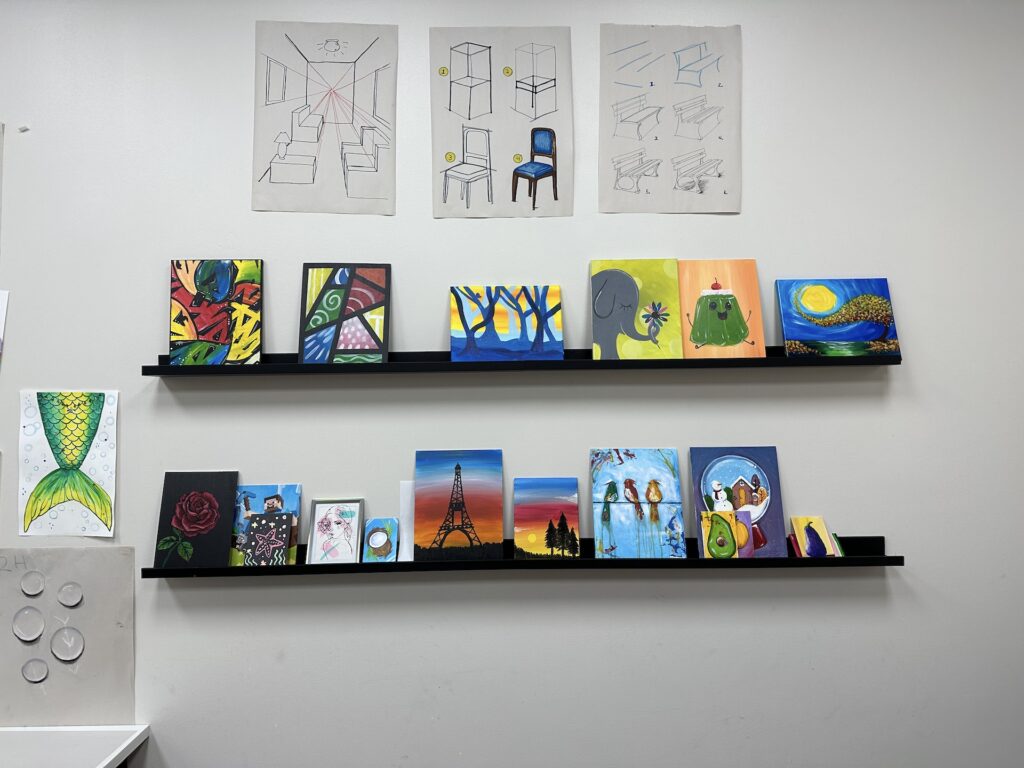
Artwork on walls
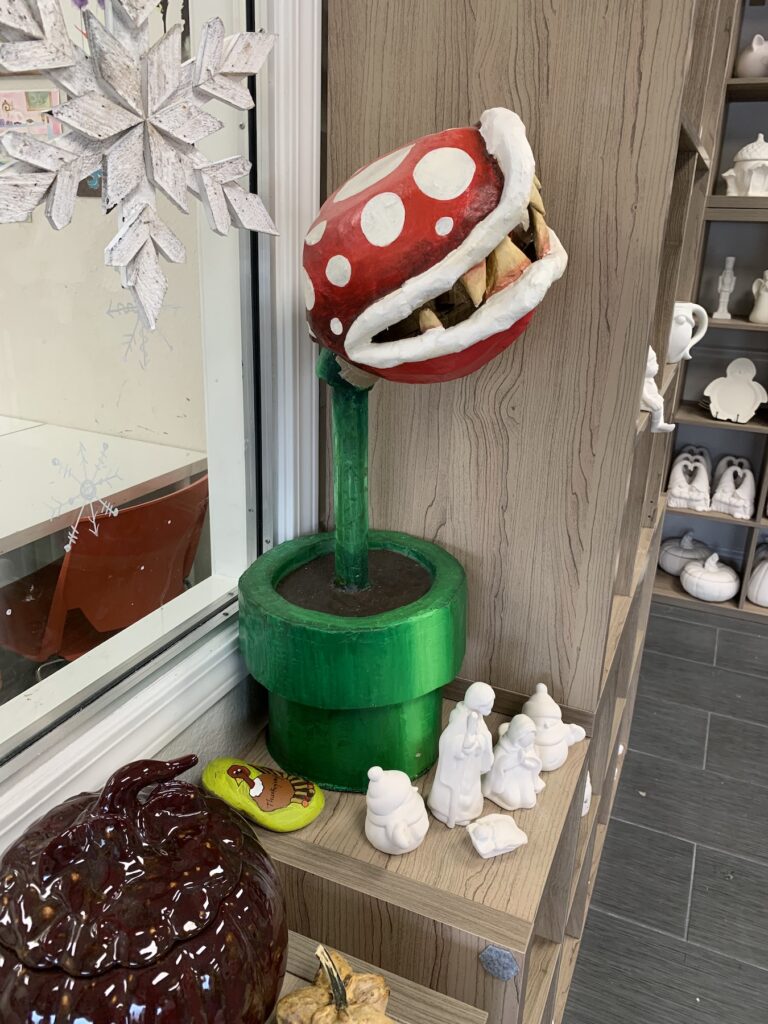
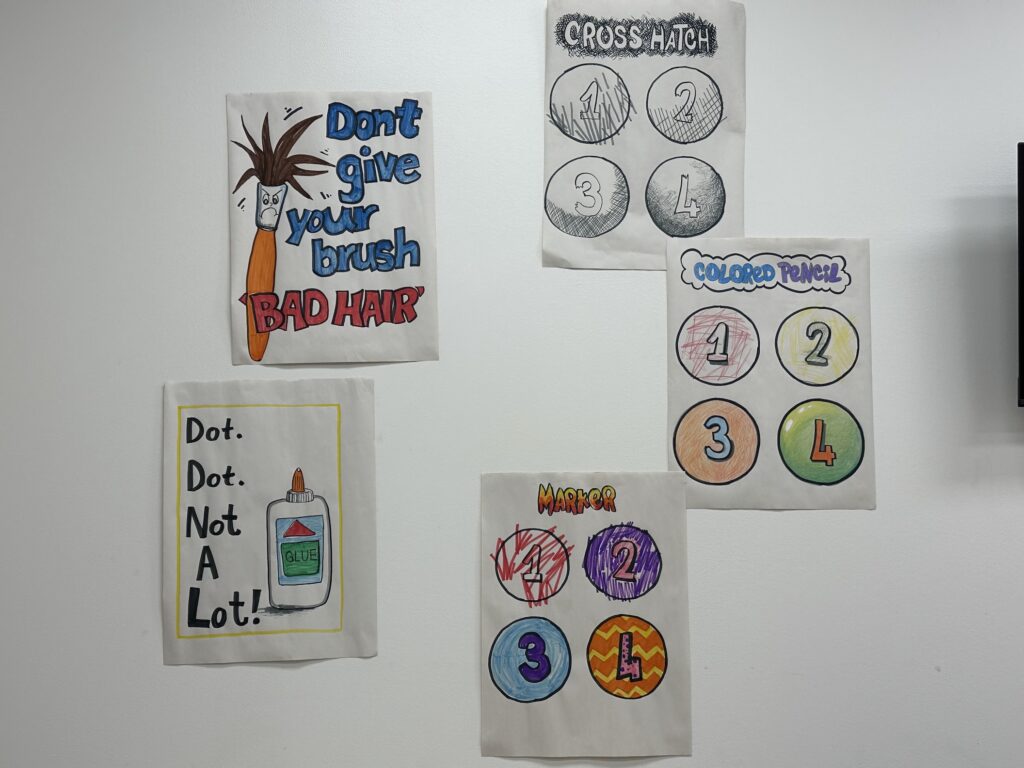
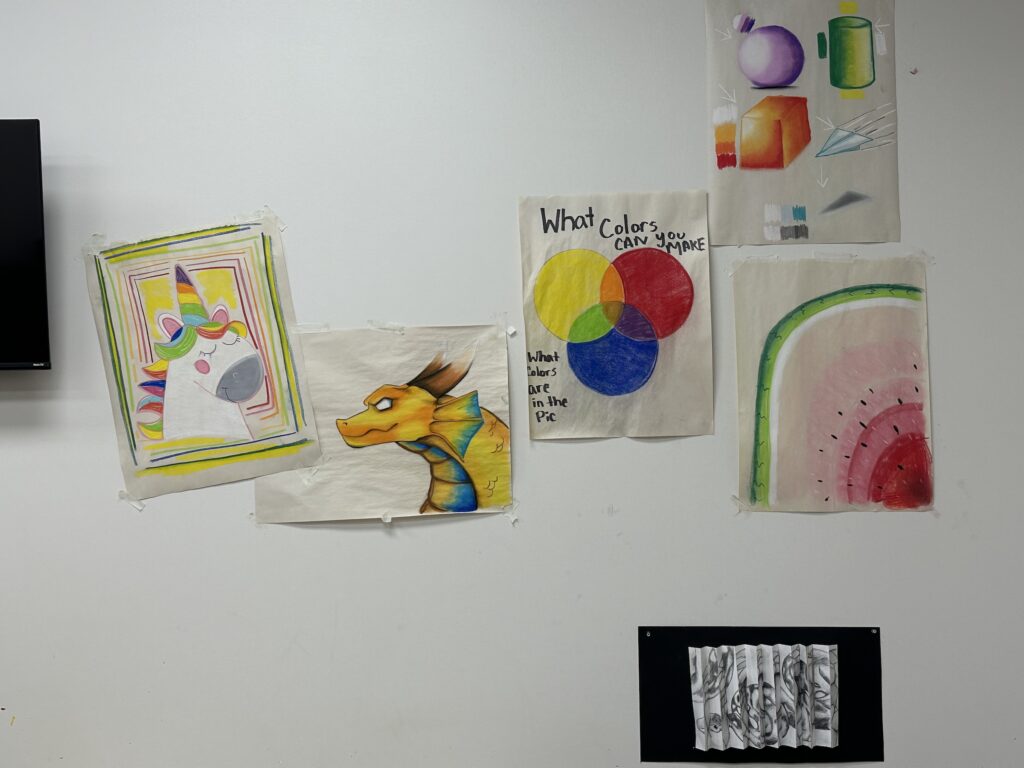
Artwork plays a key role in the studio experience. During tours, prospective students are often inspired by the artwork on display. The lobby and classrooms must feature original artwork, including student work, teacher work, and teacher class sample projects. Displays should create a fun, inspiring, and creative environment while showcasing the talent of Cordovan students and teachers. All artwork must be high quality, tasteful, and appropriate for children and families. Only the highest-quality, original artwork should be displayed on the walls.
Customer Service
Studio Tours
Whenever a prospective student/ parent comes into the studio, the manager should give them a studio tour. The tour should highlight the artwork on the walls, and explain what type of artwork is offered in each type of class. When appropriate, visitors may briefly observe a class in session to experience the studio environment. Managers must use discretion to avoid disrupting the students in the classroom.Tours are a very important part of helping the new student feel comfortable, so anytime a new student is in the studio, the manager should make a special effort to make the prospective student feel welcome and confident.
Phone Calls
Voicemail
Hello! You’ve reached the Cordovan Art School, [insert studio location studio. Our office hours are Monday through Thursday from [insert time] and Saturday from [insert time]. If you’re calling during these hours and we missed your call, we may be assisting students or have stepped away from the desk briefly. Please leave your name, phone number, and a short message, and we will return your call as soon as possible. Thank you, and we look forward to speaking with you!
Customer Call Script – FAQ’s
Every caller is either a current customer or a potential future customer. Smile while you’re talking, be enthusiastic, and focus on creating a welcoming experience. A positive phone conversation can make all the difference.
Manager’s can place this phone script next to their desk for staff members to refer to when answering the phone:
“Thank you for calling Cordovan Art School [location of studio]. This is __________. How may I assist you today?”
Weekly Art Classes: “Yes, we offer weekly art classes for a variety of age groups. Tuition is billed monthly and includes (4) four classes per month (one class per week), along with all art supplies—students simply need to bring themselves and their creativity! We also offer a 20% multi-class discount for students enrolled in more than one class. There is a one-time registration and supply fee of $85, and tuition is prorated if a student begins in the middle of the month. Tuition varies by class duration and age. (know the prices of each class-see JR or the website)
Free Trial Class: We’d also be happy to schedule a free trial class. Add the following info to JR:
- Student Name
- Date of Birth
- Parent Name
- Email Address
- Phone Number
Camps: We offer summer camps all summer long! Our half-day camps run everyday Monday through Friday:
- Morning Camp: 9:00 AM–12:00 PM [know the price] All art supplies included
- Afternoon Camp: 1:00 PM–4:00 PM [know the price] All art supplies included
- Full-Day Camp from 9:00 AM–4:00 PM [know the price] All art supplies included
- Students should bring a lunch, snacks, and a water bottle. Food is not provided
We do not offer sibling discounts on camps
PYOP: we offer walk-in Paint Your Own Pottery! There is a $6 studio fee per painter, plus the cost of the pottery piece selected. We offer special promotions:
- Ladies’ Night (Thursday): No studio fees
- Family Night (Tuesday): One studio fee for the entire group”
Parties: Yes, we host birthday parties and private events. A $50 deposit is required to reserve your party date, and that deposit is applied toward the total party cost.”
If you don’t know the answer to a customer’s question: That’s a great question. Let me get your name, phone number, and email address, and I’ll have our studio manager contact you as soon as possible
Phone Etiquette
All calls should be answered before the third ring using a warm, friendly greeting:
“Hi, Cordovan Art School, this is (your name) speaking.”
Monitor the phone regularly and respond to all missed calls within 30 minutes. Every missed call must be returned promptly, as it may be a prospective or current customer seeking to register for a class or request information.
When returning a call, use a professional introduction such as:
“Hi, this is (your name) from Cordovan Art School—I noticed I missed your call earlier and wanted to follow up.”
Voicemail messages must be checked regularly throughout the day. If a missed call does not result in a voicemail, the call must still be returned within the 30-minute timeframe.
When assisting an in-person customer, and the phone rings, manage the phone call as follows:
If appropriate, ask: “May I place you on a brief hold?” then mute the phone and complete the in-person interaction before returning to the call.
If the lobby is busy, allow the call to go to voicemail. Once available, check messages immediately and return calls promptly.
Email Policies
All emails must be responded to within 3 hours of being received, or first thing the next morning for any emails that were sent after the studio closed for the day.
Signature requirements for email
On the email signature line, the manager should put their name, the Cordovan Art School logo, the manager’s contact information, the studio address and the signature disclosure as written below.
This correspondence is on behalf of a franchised entity of Cordovan Art School and does not reflect the views of the Franchisor. The information in this email may be legally privileged or confidential information intended for the use of the individual or entity named in the TO: and/or CC: field(s) ONLY. If the reader of this email is NOT the intended recipient, you are hereby notified that any dissemination, distribution or copying of this email is strictly prohibited. If you have received this email in error, please notify us by replying to the sender in the FROM: field and destroy this email. Thank you.
Customer complaints sent by email:
If a customer complains by sending an email, it is the Cordovan policy to reach out to the unhappy customer with a phone call(not email or text). A warm, friendly voice can diffuse a tense situation, whereas the tone of an email can be misinterpreted. Always treat customers with poise, professionalism and kindness.
Weekly Art Classes
Managers and teachers must learn each student’s name and ensure every student feels welcome from the moment they walk through the door, following the Cordovan “Smile/Smile” policy.
Weekly Art Class Offerings
A list of all weekly classes is provided below.
Registering a New Student
Students may register online, by phone, or in person at the studio. If a student chooses to register in person, the Manager must complete the enrollment directly in the Jackrabbit Class system and process the first payment at that time. Managers must not direct customers to register online if they are physically present in the studio, as this significantly reduces the likelihood of completing the registration.
Managers must not leave new student registrations to chance! Whenever a prospective student or parent visits the studio, the Manager must collect their name, email, and phone number to enable follow-up after the visit. This ensures all interested customers can be re-engaged and supported through the registration process. Managers should follow up with the prospective student within 24 hours.
For tips on how to convert “in-person”customers into new-student registrations, download file: “In Studio” Student Conversions SOP
|
| >Enter student and parent contact information in the Jackrabbit Class system: >Families tab → Quick Registration >Register the student for the appropriate class or camp >Post all applicable fees, including registration and supply fees and first month of tuition (prorate tuition if student enrolls after the first class of the month) >Collect full payment at the time of enrollment: >Ensure the account is set up on autopay. |
Collecting 1st payment
At the time of registration, the Manager must collect the registration fee, supply fee, and first month’s tuition. All accounts must be set up on monthly auto-pay. Tuition must be prorated if the student enrolls after the first class of the month.
Trial students should not be enrolled until they confirm they are ready to register and provide payment. Managers must not hold class spots without payment.
If a student registers by phone or arrives to class and is ready to enroll the same day, the Manager must complete the registration and collect payment at that time.
The Manager is responsible for ensuring ongoing monthly payments. If a payment is declined, the Manager must promptly follow up by phone or email to obtain updated payment information. If needed, a printed statement may be emailed to the student or parent.
Student Cancellation
When a student withdraws from a class, the Manager must select the appropriate reason in the drop-down menu during the drop process in the Jackrabbit Class system. The drop may be processed immediately or scheduled for a future date.
If a student is not properly dropped from their class, the account will continue to be automatically charged tuition on the 1st of the following month due to autopay. Managers are responsible for ensuring all student withdrawals are processed accurately and in a timely manner to prevent unintended charges.
Additional details regarding the reason for dropping the class may be recorded in the “Misc.” tab on the student’s Jackrabbit account.
Tracking Attendance
Teachers are responsible for maintaining accurate attendance records for all classes and camps. The Manager is responsible for ensuring compliance by verifying that attendance is consistently and accurately recorded in the Jackrabbit Class system.
If a student does not attend class or camp, the teacher marks “A” (Absent) in the attendance record to confirm they were accounted for.
Follow the steps below:
Marking Attendance in Jackrabbit Class |
>Go to the “Class Summary” page >Click “Enter Absences” button >click on the “Absence Date Calendar” and select the date of the class >Place an “A” (Absent) for each student that was marked absent. >If you know the reason why the student missed the class, please add it to the note box. |
If a student misses two (2) consecutive weeks of class, the Manager must contact the student or parent to check in and express that the student has been missed. This outreach should be friendly, supportive, and focused on re-engaging the student.
If a student has decided to withdraw from a class, the Manager must remove the student from the Jackrabbit Class system to prevent future tuition charges. Student withdrawals may be processed immediately or scheduled using a “future” drop date, as appropriate.
Free Trial Classes
Students may register for a Free Trial Class through the website, email, phone, or in person. Students may attend a free trial for weekly art classes only. Free trials are not available for art camps, workshops, hand build clay classes, pottery wheel classes, parties, or PYOP. When a Free Trial Class request is received through the website or email, the Manager is responsible for contacting the prospective student within 24 hours to enroll them in a Free Trial Class. When a Manager receives a Free Trial request via email, the following is an example of a response that may be sent to the prospective customer:
Free Trial Class |
| [Name of person requesting a free trial class], Thank you for your interest in Cordovan Art School. We are excited to have you join us for the following free-trial art class: [Class Title] [Date of free trial class] [Time of free trial class] [Name of studio & location] Please confirm back to this email and we will hold your free trial spot in class. Sincerely, [Name of Manager] |
Notifying the Teacher
Once the student confirms their Free Trial Class with the Manager, the Manager is responsible for notifying the teacher of the student’s name and the date they will be attending class.
Registering the Student
Immediately following the Free Trial Class, the Manager should speak with both the student and the parent to ask how the class went and answer any questions they may have. The Manager should encourage enrollment and offer a $25 discount if the student registers on the same day as the Free Trial Class.
Excluded from Free Trials
Cordovan Art School does not offer Free Trial Classes for any of the following:
- Weekly Pottery Classes
- Parties
- Off-Site Classes
- Camps
- Paint-Your-Own Pottery (PYOP)
How to enroll a free trial student
How to enroll a NEW student into a Free Trial Class in Jackrabbit |
| > click on “Families” >click on “Quick Registration” and fill out form >select the class >choose the enroll date >Trial enrollment – select “yes” >Future drop date must be the exact same as the date of the Free Trial Class. >A new window will open titled “Post enrollment Fees” >click the box at the bottom that says “Skip this…I’ll Post fees another time…” DO NOT POST FEES >The family account page will show up >click on the student’s name. This will take you to the student’s page >verify “Type” is set as a Trial >verify “Future drop date” is the same as the Free Trial Class |
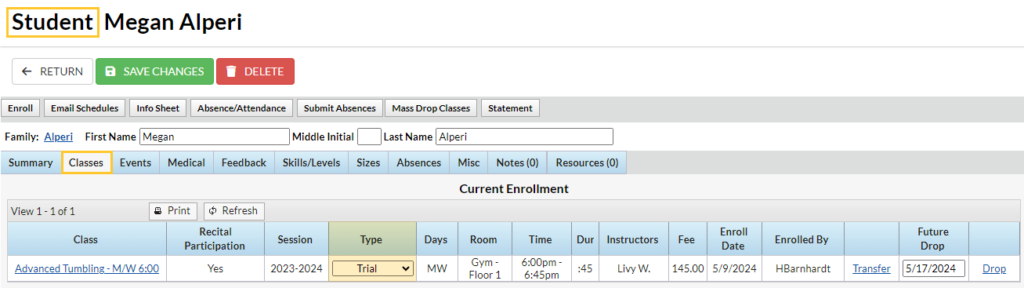
How to convert a student from a free trial student to a permanent student
How to convert a Free Trial student into a permanent student in JR: |
| > go to the student’s Jackrabbit page (not the family page) >click on the student’s first name >click on “Classes” tab >change “Type” from Trial to Trial-Enrolled >Next, post tuition and registration & supply fee |
Whenever a Free Trial student converts into a permanent student, the Manager must go to the student’s transaction page in Jackrabbit and manually post the following:
- Tuition for the class
- Registration and supply fee
- Prorated tuition if the student enrolls mid-month
If the student enrolls during the last class of the month, there is no need to post tuition because the student will automatically be charged full tuition at the beginning of the following month. However, the Manager will still need to manually add the registration and supply fee.
If a student does not enroll in a permanent class following their Free Trial Class, no additional action is needed. Jackrabbit will automatically drop the student from the class on the drop date selected during enrollment.
How to enroll an EXISTING student in a Free Trial Class in JR:
There may also be situations where an existing student is enrolled in a Free Trial Class. For example, a student may have previously attended a camp or workshop and now wants to try a weekly class before enrolling. In other situations, a student may want to switch from one class type to another (such as from an Art class to a Clay class) and would like to try the new class before making the change.
Managers should use good judgment and remain flexible in situations where offering a Free Trial Class would help the customer make an informed decision. However, Managers should not proactively offer Free Trial Classes to existing students unless it clearly makes sense for the situation, such as when a customer is uncertain about switching classes or deciding between programs.
How to enroll an EXISTING student into a Free Trial Class in JR: |
| > go to the Family Jackrabbit page >If the student is not already listed in the family’s account, add the student’s name to the family account. >click on the student’s first name to go to the student’s page >click “Enroll” >select the Class >A new window will open up titled “Enrollment Details” >”Enroll type” select Trial >”Future Drop Date” must be the exact same date as the Free Trial Class. >click “Enroll Now” >A new window will open titled “Post enrollment Fees” >click the box at the bottom that says “Skip this…I’ll Post fees another time…” DO NOT POST FEES >The student account page will show up >verify “Type” is set as a Trial >verify “Future drop date” is the same as the Free Trial Class |
After an “existing” student attends their Free Trial Class and decides to enroll in the class permanently, follow the instructions below:
How to convert the EXISTING Free Trial student into a permanent student in JR: |
> go to the student’s Jackrabbit page (not the family page) |
Whenever a Free Trial student converts into a permanent student, the Manager must go to the student’s transaction page in Jackrabbit and manually post the following:
- Tuition for the class
- Registration and supply fee
- Prorated tuition if the student enrolls mid-month
If the student enrolls during the last class of the month, there is no need to post tuition because the student will automatically be charged full tuition at the beginning of the following month. However, the Manager will still need to manually add the registration and supply fee.
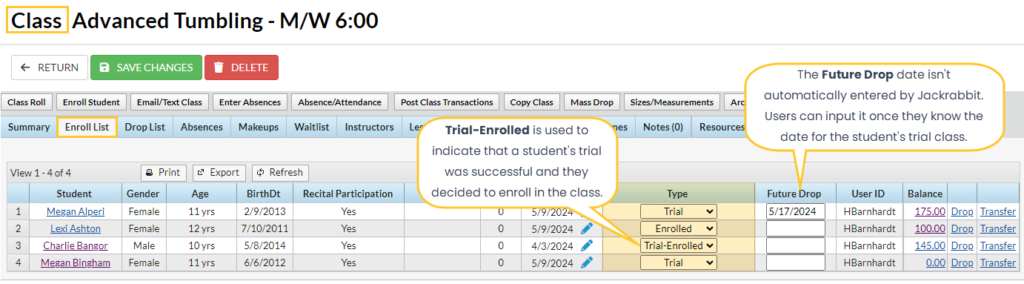
Room Assignments
Classrooms are assigned by the Manager. Teachers may not claim or reserve a classroom. Assignments may vary based on factors such as student age, class size, and room availability. Teachers should expect to teach in different classrooms as needed.
Student Storage
Students must take all personal items, including equipment, artwork, and supplies, home at the end of each class. Personal items may not be stored in classrooms. Exceptions may be made for multi-week projects. In these cases, Managers may allow artwork to be stored in a designated, secure area until the project is complete.
Student Awards & Recognition Program
One purpose of the Student Awards and Recognition “LEVEL UP” program is to motivate students. As students develop new skills and are recognized for their achievements by their teacher in front of their peers, they build confidence and take pride in their progress.
The “Level Up” program must be conducted during the first full week of each month, beginning on the first Monday of the month.
Managers should send a reminder email during the last week of each month to parents of students who are eligible to Level Up. This advance notice helps families prepare for the upcoming portfolio review and achievement.
Managers are responsible for preparing all awards, certificates, and related materials, and ensuring they are ready and provided to the teacher before class begins.
Teachers are responsible for reviewing student portfolios, recording all student advancements in the Jackrabbit Class system, and presenting awards and recognitions under the supervision of the Manager. Awards should be presented in front of classmates in a way that makes the moment feel special and meaningful for the student. Teachers are encouraged to involve the class in celebrating each student (e.g., clapping or cheering).
Teachers must ensure that all students feel encouraged, including those who are not receiving an award. This can be done by offering consistent praise, recognizing effort, and encouraging students to continue progressing toward future awards. Teachers should provide positive, specific feedback throughout each class to reinforce confidence and motivation.
Art Camps
Art Camps include Summer Camps, Thanksgiving Camps, Winter Break Camps, Spring Break Camps, and any holiday camp offered when school is out.
It is the responsibility of the Manager to properly input all Art Camp information into Jackrabbit. Once a camp has been entered into Jackrabbit, the Manager should verify that all information is displaying correctly on the website. If any information is inaccurate or missing in Jackrabbit, it will not display properly on the website.
It is the responsibility of the Manager to ensure that all teachers and assistant teachers understand what is expected of them, that art projects are well planned and thoughtfully prepared, and that the quality of the projects meets Cordovan standards.
During camp sessions, the Manager, Assistant Manager, and teachers each have different daily responsibilities. Managers must read these documents and ensure that all Cordovan team members follow the procedures outlined within them, as they provide vital information regarding the expected classroom experience.
Managers should print copies and regularly refer to the following sections of the manual for detailed instructions and expectations (See Managers, Teachers, & Staff Section):
- Manager Daily Checklist #2 (Camp Session)
- Art Teacher Responsibilities
- Assistant Teacher Checklist
Camp Registrations
Students may register for camp up until the time the camp begins. Managers should monitor online registrations leading up to the start of each camp, as parents may register their child at the last minute. As long as there are available spots in the camp, Managers should never close registration early.
Managers should wait to print final class rolls until the night before camp begins or the morning of camp. Before printing, they should confirm that all last-minute registrations are included on the class roll.
Managers should welcome last-minute and walk-in registrations and ensure that teachers are informed of any new students who are added after the class rolls have been printed.
Teachers should also be asked to prepare two (2) extra spots in each camp to accommodate possible last-minute registrations.
Student check-in/ check-out
The Manager must be stationed at the front desk when students arrive at camp in order to greet customers and assist with any last-minute registrations or questions.
When students arrive at camp, they should check in at the front desk so the Manager is aware of each student attending camp. When parents arrive for pick-up, they should check out with the teacher, who will be given a copy of the class roll by the Manager. Parents should write their initials on the class roll during both check-in and check-out.
Only a parent or guardian listed on the student’s contact page in Jackrabbit is permitted to pick up the child. Never allow a child to leave the studio with anyone who is not listed on the student’s contact page.
Hiring Teachers
Managers should hire teachers and assign teachers’ summer camp schedules 45–90 days in advance. The same procedure should also be followed for all other camp sessions throughout the year.
Managers should fully staff all camps by hiring one (1) teacher per classroom. For example, if a studio has four (4) classrooms, the studio should hire four (4) teachers.
Managers should work to fill each classroom with the maximum number of students allowed. Registrations should never be closed early.
Adjustments for New Studios: As new studios grow, they may not yet have enough customer demand to fill all available camp spots during their first few years of operation. In these cases, Managers may hire a smaller number of teachers based on projected student enrollment and anticipated camp registrations. Remember that many students register last minute, so plan accordingly.
It is generally easier to overstaff camps rather than not have enough teachers. Approximately seven (7) days before camp begins, the Manager should have a good understanding of enrollment numbers and determine how many teachers are needed. At that point, the Manager may adjust staffing by removing any unnecessary teachers from the schedule.
However, Managers should remember that many camp registrations occur at the last minute, so staffing decisions should be made carefully with the expectation that additional enrollments may still come in before camp begins.
Student to Teacher Ratio
# of students that are enrolled 7 days before camp begins | # of teachers needed | Notes |
1-10 students | 1 teacher | With 1 teacher there is room to grow to 16 students add Assistant Teachers as needed |
11-24 students | 2 teachers | With 2 teachers, there is room to grow to 32 students add Assistant Teachers as needed |
24+ students | 3 teachers* | With 3 teachers you have room to grow to 48 students add Assistant Teachers as needed |
*If you have 24 students, it is better to have 3 small classes with 8 students each and NO assistant teachers, than to have 2 large classes of 12 students each, and 1 or 2 assistant teachers. Art projects turn out better with smaller classes when students have more 1 on 1 time with the teacher
When to add an assistant teacher to camps:
Age Group | When to add an assistant teacher to Camps | Notes |
Ages 5-7 | 10-16 camp students | |
Ages 8-12 | 12-16 camp students | If the campers are closer to 8 years old, add an assistant when the camp reaches 12 students. If they are closer to 10 years old, then wait until the camp reaches 14 students |
Teens | n/a | no assistant needed for teens |
Communication with Teachers
Teachers should be given the following information with plenty of time to prepare:
- The age group of their camp students
- The number of students on their camp rolls (Managers should continue giving teachers updates as new registrations are received)
- Their classroom assignment
This information helps teachers prepare appropriate art projects that fit the age and skill level of their students.
Teachers must always be prepared for last-minute registrations, as students may register at the last minute or walk in on the day camp begins. For this reason, classrooms should be set up with two (2) extra spots available for additional students. It is better to be over prepared, even if the extra spots are not ultimately used. Extra supplies can also be helpful for unexpected situations, such as when a student spills water on a project or needs to restart their artwork.
Dividing Students in to Classrooms by Age
Assuming all camp titles are the same, students should be divided evenly between classrooms so that teachers are teaching approximately the same number of students. Students should generally be grouped by age.
For example, if a studio has 43 total camp enrollments for ages 5-12, and if the camp title is the exact same for all campers the students could be divided as follows:
- Classroom 1: the 15 oldest students by age
- Classroom 2: the 14 middle students by age
- Classroom 3: the 14 youngest students by age
If the studio has classrooms that vary in size, it is generally best to place the youngest students in the smallest classroom. Younger students often require more one-on-one attention, so grouping 5–6-year-old students together in a smaller classroom can help with classroom management.
When camps sell out, Managers should make sure all available seats in each classroom are utilized.
However, room assignments should also be adjusted using common sense and based on the number and ages of the students enrolled. For example, if only a few teens are enrolled in a camp, it may make more sense to place them in the smaller classroom.
If a student requests to be placed in the same camp as a sibling or friend, Managers should accommodate the request whenever possible. In most cases, the older student should be moved down into the younger student’s age group.
Teacher Training
Because summer camp volume is typically higher than other camp seasons, Managers should review the form “Art Teacher Responsibilities” with each teacher individually and have them sign the form when they receive their summer camp schedule. This form helps teachers prepare for camp by thinking through potential challenges before they arrive to teach on the first day of camp.
Managers must review the student safety plan with all teachers and assistant teachers. This information can be found in the “Art Teacher Responsibilities” form, with additional details provided in the “Safety of Students” section of the manual.
Managers should hold a teacher training meeting prior to summer camps each year.
Pottery Camps
To properly keep track of students’ pottery projects during camps, follow the steps below (see photos below):
- Assign a cardboard box to each student and label the box with:
- Student’s name
- Camp title
- Teacher’s name
- Make sure adequate shelf space is available for each student’s cardboard box.
- Place a painter’s form inside each student’s box.
- Label each pottery or ceramics piece with the student’s name on the bottom of the piece.
- Fill out the painter’s form with:
- The student’s name
- A description of every ceramic piece created
- Print out the class roll and clip it to the shelf to help keep different classes organized and separated from one another.
- Once the ceramic pieces are dry and ready to be fired, take a photo of each box showing:
- The student’s name
- The clay projects inside the box
- After firing, make sure each student’s clay pieces are returned to the same box they originally came from.
- Verify on the painter’s form that all ceramic pieces were safely returned to the student’s box.
- Carefully package the student’s ceramic pieces and return them to the student along with the painter’s form.
Label one (1) box per student with the student’s name, class title, and teacher’s name. Clip the class roll next to the students’ boxes to help keep classes organized and separated.
Place a painter’s form inside each student’s box and fill it out to help verify and track all ceramic pieces.

Classroom Management
Teachers are responsible for supervising their students during the entire three (3) hours of summer camp, including break time. Managers are not responsible for helping supervise breaks, as they need to focus on office and administrative responsibilities while also overseeing the overall operations and safety of the studio.
See: Art Teacher Responsibilities
Activities
For younger students, it is a good idea to occasionally take a “brain break” from art activities. Over the years, teachers have found many successful brain-break activities that help students refocus and recharge during transition times between art projects. Some examples include:
- Reading a story (especially for ages 5–7)
- Creative contests such as Hula Hoop or Limbo
- Interactive games such as:
- Pictionary
- “I’m Thinking of an Animal” during animal-themed camp weeks, where students ask questions to guess the animal
- 20 Questions
- Pokémon-themed games during Pokémon camp week
- Other camp-themed group activities
If teachers have additional brain-break ideas that work well, they are encouraged to share them with the team.
Assistant teachers can be assigned the responsibility of planning and leading activities during brain breaks. Teachers should actively utilize their assistant teachers and communicate clearly about what tasks need to be completed.
Because many assistant teachers are teenagers, they typically respond best when given direct instructions rather than being expected to independently recognize what needs to be done. Most assistant teachers are eager to help and do a great job when they are given clear direction and specific responsibilities.
For safety reasons, students must remain inside the studio at all times during summer camps. Once a parent drops off their child at camp, the student must remain inside the building until the parent or guardian returns for pick-up. This policy also applies during snack breaks and lunch breaks.
Students may not go outside unless specifically authorized by the Studio Manager.
Parent Reminders
Managers should send reminder emails to parents one (1) week before camp begins.
How to Send a Camp Reminder Email Through Jackrabbit Class
- Select the “Students” tab
- Select “Email Student Schedules”
Reminder: Summer Camp Next Week! |
[Insert Cordovan Art School Logo Here] |
Student Name Tags
On the first day of camp, students should receive a name tag. Put camp rolls and name tags for each age group on front desk during student check-in.
How to Print Student Name Tags for Camps
Go to Avery.com to set up an account Log into Jackrabbit Class. Export the roster for each camp and save the file to your desktop. In Avery, use blank template 8160. Add the Cordovan logo or image to the left side of the template. Import the roster data using the mail merge feature. Select the camp you are creating name tags for. Uncheck the top row with the large arrow, then click “Next.” Adjust the formatting by centering or enlarging the student’s name if desired. Click the “T” icon on the left side and add a text box labeled: Studio 1 Studio 2 Studio 3 Assign a different color to each studio. For example: Studio 1 = Green Studio 2 = Red Studio 3 = Blue Continue through print preview and printing prompts until ready to print. Make sure sticker paper is loaded into the printer before printing. Repeat this process for each camp. The name tag templates will automatically save in your Avery account, allowing managers to print additional stickers each morning if needed. Some managers choose to print name tags only Monday–Wednesday, since students typically know where to go by the last two days of camp and may no longer want to wear stickers. |
Free Summer Camp Giveaways
We recommend donating a minimum of three (3) free summer camps per year to support schools through silent auctions, carnivals, or other similar community events. This is a great way to give back to the community while also serving as an effective marketing strategy for the studio. Free camp donations may also be offered during other times of the year as opportunities arise.
The first few years of a new studio, it is unlikely that summer camps will sell out. For this reason, Managers should look for opportunities to give away free or discounted summer camps to strategic community partners, friends of the studio, influential community members, elementary art teachers, PTA presidents, and similar contacts. It is important to reach a variety of audiences so that word-of-mouth marketing spreads throughout different groups within the community. Free or scholarship camp spots should only be offered if the camps have additional room available and are not expected to sell out.
The goal during the first few years of camp programming is to fill seats and encourage positive word-of-mouth marketing throughout the community. The earlier students commit to attending camp, the more likely they are to tell their friends and help generate additional registrations.
Below is a sample email that can be sent to community contacts:
| Complimentary Summer Art Camp Opportunity Hello [Name], We are excited to announce our upcoming summer art camps at Cordovan Art School! Cordovan Art School has fostered the love of art in kids for over 15 years, and we’re excited to let you know that we have opened a studio here in our community! As a new studio we are looking to build awareness and introduce more families to our programs. We would love to offer a complimentary or discounted summer camp opportunity to you, your family, or members of your organization.Our camps are designed to provide students with a creative, encouraging, and fun environment where they can explore art, make friends, and build confidence. If you know of students or families who may be interested, we would greatly appreciate you helping us spread the word. Positive word-of-mouth and community support make a huge difference as we continue growing in the area. Please let us know if you have any questions or if there is someone specific we should contact. Thank you for your support! Cordovan Art School cordovanartschool.com |
Pottery Pick-Up
After camps are over, there may be leftover clay projects or pottery pieces that were never picked up by students or parents after firing. Before throwing anything away, please make sure the following steps have been completed:
- Call each student or parent and leave a message with a final deadline for pottery pick-up. Give families at least two (2) weeks for final pick-up.
- Email each family with a final pick-up deadline and include the studio’s business hours for pick-up.
- Add a note in the student’s Jackrabbit account documenting:
- The date of your phone call/ text
- The date of your email
- It is very important to keep written records of all communication attempts. If a parent later asks about pottery that was discarded, these notes will help verify that multiple contact attempts were made.
- If you have room to hold the pottery without cluttering your studio, you may hold the pottery up to a maximum of 3 months before you must throw it out if the student/parent has not picked it up to keep the studio free from clutter.
- PRO TIP: Before discarding finished clay projects from camps, check Jackrabbit to see whether the student is enrolled in any upcoming camps. For students registered for additional camps:
- Write the student’s name and upcoming camp week on the clay box
- During their next camp session, place the clay pieces in their classroom for pick-up
- Delivery service: Studios may also offer a pottery delivery service for parents who would prefer the convenience of home delivery. An additional fee should be charged for this service.
Pottery Delivery
Delivery of unclaimed camp pottery projects is optional. Decide if it is the right fit for your studio.
T-Shirts
Each student should receive only one (1) camp t-shirt, even if they are registered for multiple camps. Students should receive their t-shirt during the FIRST camp they attend.
When a t-shirt is given to a student who is registered for multiple camps, Managers should add a note in Jackrabbit under “Roll Notes.” This allows staff to easily see on future camp rolls that the student has already received a shirt.
T-shirts should be handed out on Thursday so students can wear them on Friday.
Tips for Organizing T-Shirt Distribution
- Print the Size Report
- Go to the “Reports” tab and select “Find Report”
- Type “Student Size” into the search bar and select the report that appears
- Choose the Summer Camp session
- Under Category 2, select the date of the current week’s camp
- If a parent did not enter a size, staff may need to estimate the student’s size
- Place a name tag on each t-shirt
- Print a second copy of the student camp name labels and place a name tag on each shirt.
- This makes it easier for teachers to distribute shirts and helps identify any shirts left behind.
- Recording T-shirt Distributions
- After handing out a shirt, please go into the student’s account → Misc Tab → Roll Notes box and type: SHIRT 2026
This will automatically print under the student’s name the next time you print any camp roll.
- After handing out a shirt, please go into the student’s account → Misc Tab → Roll Notes box and type: SHIRT 2026
- For students who were absent from class and did not receive their t-shirt
- Label the shirt with the student’s name and store it in a designated location for future pick-up or distribution during their next camp session.
- Add a note to the student’s Jackrabbit account.
- > Misc Tab
- > Roll Notes box
- Type the year of the camp shirt distribution (Example: “Camp T-Shirt 2025”)
- Type the year of the camp shirt distribution (Example: “Camp T-Shirt 2025”)
Student Photo Waiver
If a parent does not want pictures taken of their child and opts out of the photo waiver, the manager must write a note inside the student’s Jackrabbit account, and also notify the teacher:
- > Misc Tab
- > Roll Notes box
- Add a note “No Photos”. This will show up on a printed camp roll so the teacher can see.
End-of-Camp Coupons
On the last day of camp the students should receive these 3 coupons:
- $25 off your next camp
- $25 off your first month of weekly art classes
- 15% off pottery painting (for studios offering PYOP)
During summer camps, these coupons may be handed out with their t-shirts on Thursday or Friday. These coupons are intended to reward loyal students, and any customer who asks about a coupon may use it.
If a student is already enrolled in a class and would like to apply the coupon toward the following month’s tuition, simply place a credit on their Jackrabbit account.
Coupons may also be applied toward new registrations for Weekly Art Classes.
Variety of Art Projects
Teachers should follow the art projects provided for them. Whenever a project is labeled as “Teacher’s Choice,” the teacher should prepare the project ahead of time and show it to the Manager for approval before teaching it in class.
During summer camps, teachers should generally plan to teach two (2) art projects per day unless it is a Teen Camp. Teen projects are typically larger, more detailed, and may last multiple days.
Example of recommended art project variety during summer camps
- 3 Acrylic projects on canvas
- 3 Watercolor projects on watercolor paper
- 1 Drawing project (color pencils)
- 3 Additional mediums, such as:
- Oil pastel
- Chalk pastel
- Scratch art
- Print making
- Alcohol markers/ marker bleed
- Mixed Media
- Other
If the camp title does not include “Clay” or “Pottery,” teachers should not include clay projects in that camp
“Teacher’s Choice” projects should provide variety and allow students the opportunity to experiment with different art mediums and techniques throughout the week.
Approval of New Camp Titles & Descriptions
Studio Owners, Managers, and Teachers are encouraged to submit new camp title ideas to Cordovan Art School for approval. When possible, they should also submit a thumbnail image for any newly created camps that corresponds with the camp title.
All submitted images must:
- Be original artwork
- Not infringe on any copyrights or intellectual property rights
- Be created by a Teacher at Cordovan Art School
Approved images may be used for marketing and promotional purposes related to the camp.
Submission of a camp title or thumbnail image does not guarantee approval. Approval of all camp titles, artwork, and marketing materials is at the sole discretion of Cordovan Art School.
Paint Your Own Pottery (PYOP)
The lobby may also serve as a Paint Your Own Pottery studio, or Pottery Parlor. The decision to add a Pottery Parlor is determined by the studio owner, and the decision is generally based on the available lobby space and overall layout of the studio.
The studio manager is in charge of overseeing the Paint Your Own Pottery (PYOP) in the studio.
General Overview
Painter’s Fee: Paint Your Own Pottery (PYOP) customers are charged a painter’s fee. This fee covers the cost of glaze paint, brushes, PYOP tools, glazing, and firing. The painter’s fee is added to the transaction at customer check-out. The PYOP studio must display signage explaining the painter’s fee throughout the studio so customers are not surprised by the fee at check-out. Small signs must be placed throughout the studio and on display shelves in order to educate customers about the painter’s fee before they begin painting.
Paint Bar: Staff members are responsible for keeping the paint bar area, including sinks, clean and free of clutter. Staff should pour glazes for the customers, especially for children! Kids should never pour their own glazes, as this helps reduce waste and maintain organization at the paint bar. When assisting customers, staff members should ask, “Which 3–4 colors would you like to start with?” Customers should also be informed that they may return for additional paint at any time if they run out of a color or would like to add more colors to their project. Managers and staff should use good judgment when overseeing the paint bar. Some patrons may be allowed to pour their own paints if appropriate. The goal is to create an environment where customers feel comfortable, welcomed, and free to be creative while still maintaining an organized and efficient pottery studio.
Placemats, Set up, Busing Tables: PYOP placemats should be placed on all lobby tables, so the studio is ready for customers when they arrive to paint pottery. Staff members should assist customers by providing water, brushes, and painting tools as needed. After customers finish painting, staff members should bus tables (similarly to a restaurant) by washing out brushes, cleaning paint palettes, and rinsing the water containers. Once the table has been cleaned, a new placemat should be set out for the next customer.
Keep extra placemats on hand, and reorder supplies before they run out.
Painter’s Forms: Once customers have finished painting their pottery, they must fill out a Painter’s Form that identifies their pottery pieces. This form must always remain with the customer’s pieces throughout the glazing and firing process to ensure proper identification and accurate customer pick-up.
Always use a Painter’s Form to keep track of all PYOP items. This same form is used for, hand-build clay ceramics and wheel-thrown pieces. Descriptions written on the form should be detailed and specific, as there may be multiple identical or similar pieces in the studio at the same time.
Keep extra Painter’s Forms on hand, and reorder before they run out.
Customer check out: After the Painter’s Form has been filled out, customers may leave their PYOP pieces on the table and proceed to the register to check out. If a PYOP customer does not finish painting their piece, they must still check out and pay for the piece before leaving the studio. Customers are welcome to return at a later date to continue painting their pottery. However, the customer must take the unfinished piece home with them, as the studio does not store unfinished PYOP pieces.
Transporting, Glazing and Firing:The manager or assigned staff member is responsible for transporting the customer’s PYOP piece(s), along with the corresponding Painter’s Form, to the kiln room where the pottery will wait to be glazed and fired. The Painter’s Form must always remain with the PYOP pieces to ensure proper identification throughout the process.
Once the glaze on the PYOP piece has fully dried in the kiln room, typically within 1–2 days, staff members will dip the pottery into the clear glaze and fire it in the kiln. (See sections below for additional details on glazing and firing.)
Customer Pick-up: After a customer’s PYOP piece has been fired, a staff member should promptly notify the customer that their pottery is ready for pick-up.
When the customer arrives at the studio, staff members should proudly present the finished PYOP piece so the customer can see how it turned out before it is wrapped. Staff should compliment the customer on something they appreciate about the craftsmanship or creativity of the piece before professionally wrapping and bagging it for the customer to take home.
Price Tags (Labels): Each PYOP piece displayed on the shelves must have an individual price tag that matches the price listed in the POS system. Proper labeling helps ensure accurate pricing, organization, and a smooth customer check-out experience. (See labeling section below for additional details.)
Pottery Parlor Closing Procedures:
- The studio stops accepting new pottery painters one (1) hour before the close of business. On weekends, staff members may begin cleaning the Pottery Parlor 1 hour before closing, as long as there are no pottery painters in the lobby. If customers are still painting in the studio, staff should wait until 30 minutes before closing to begin cleaning so customers do not feel rushed.
- Fifteen (15) minutes before closing, staff members may politely notify customers that the studio will be closing soon and let them know they are welcome to return another day to finish painting their pieces. If a customer plans to return later to continue painting, the unfinished pottery must be taken home, as the studio does not store unfinished PYOP pieces.
- Staff members assigned to the Friday evening shift are responsible for setting up studios for Saturday parties so the studio is clean, organized, and ready for Saturday morning events.
- Staff members should not stay longer than 15 minutes after the end of art classes or after the Pottery Parlor closes.
- During slower days with very few PYOP customers, managers should either send extra staff members home early or assign them additional tasks that need to be completed around the studio.
Purchasing and Receiving
Placing an Order
Bisque: Bisque should be purchased through Cordovan Art School’s pre-approved merchant accounts with Chesapeake Ceramics, Gare Ceramics, Bisque House, and Bisque Imports. Managers should stock the PYOP pieces that are the best sellers and reorder high-selling items before inventory runs out.
Seasonal Orders: Managers should order holiday and seasonal PYOP inventory at least three (3) months before the holiday season arrives (eg. Mother’s Day, Christmas, Thanksgiving, Valentine’s Day, etc). Seasonal PYOP pieces should be prominently displayed and staged in the lobby 3 months before each holidays season. Once the holiday season has ended, seasonal PYOP pieces may be boxed, labeled, and stored for use during the following year’s holiday season.
Brushes and Accessories: Brushes and PYOP accessories should be purchased and replenished as needed. Once a brush becomes old, damaged, or too worn out for proper use, it should be replaced to maintain a quality customer experience.
Receiving Shipments
Managers and staff are responsible for receiving, inspecting, and organizing all incoming inventory and shipments. All boxes and shipments must be checked upon arrival to ensure the correct items and quantities were received and that products were not damaged during shipping. Inventory must be unpacked promptly, labeled if needed, and organized in the appropriate storage or display areas. Any damaged, missing, or incorrect items should be documented and reported to the supplier as soon as possible.
Wash hands: When handling pottery inventory it is important to have clean hands. Anyone handling bisque must wash their hands thoroughly with soap and water before touching the pottery, including when unpacking bisque shipments from vendors. Natural body oils, lotions, and moisturizers can cause colors and dipping glaze to repel from the pottery surface, leaving grainy or white areas after firing. Proper handwashing is extremely important and should always be followed when handling bisque.
Purchase order and Shipping Invoice: Each shipment of bisque from vendors includes a shipment invoice or packing list. This invoice is typically attached to the side of one of the boxes in a plastic sheath. It is the manager’s responsibility to compare the shipment invoice against the original purchase order receipt. This checks-and-balances process helps ensure the vendor shipped all items that were purchased. Managers must carefully compare the shipping invoice with the actual purchase order, as discrepancies between the two can occur. The image below is an example of the type of packing list vendors include with shipments.
Source: images/image18.png
Take photos: Staff members should take photos of every shipment upon arrival from UPS and FedEx BEFORE opening any boxes. Pottery and bisque pieces are fragile and may become damaged during shipping. Vendors often require photos of shipments and damaged pieces in order to verify claims and reimburse the studio for broken items.
Staff should take photographs of shipments within three (3) hours of arrival. Photo documentation should include exterior photos showing the pallets and boxes. In addition, staff must open each box upon arrival and take photos of the bisque inside, as pieces are often found broken during shipping. Proper photo documentation helps support reimbursement claims for damaged inventory.
The photos below are examples of the type of photos that should be taken when shipments or pallets arrive.
Source: images/image6.png
Source: images/image7.png
Damaged Shipments
Inspecting the Bisque: Inspect each box carefully to ensure the pottery pieces were not broken during shipping. Any damaged, chipped, or cracked pieces must be documented with a detailed list of the damaged items along with supporting photos and reported to the manufacturer or vendor for reimbursement.
Adding Inventory to POS
Add Bisque to POS system: Once all boxes and items have been accounted for, the received merchandise must be added into the current inventory system. If the pottery pieces already exist in the POS or inventory software, staff only need to update the inventory quantities by adding the newly received items. However, if the shipment includes a new pottery piece that has never been ordered before, a new inventory item must be created in the system that includes the item name, SKU, price, and quantity.
Cleaning Bisque
Preparing the Bisque Floor: Use a stiff bristle brush to remove bisque residue and dust from the pottery pieces, paying special attention to crevices. Use rubber grit to scrub off any brown cardboard marks left from shipping and packaging.
With a damp sponge (not soaking wet) and clean water, gently wipe off each pottery piece to remove any remaining dust or residue before placing it on the studio floor.
Pricing and Labeling
Labeling PYOP: All pottery pieces must be labeled before being placed on the studio floor. Labels are created using the Avery website, which is a free website that staff can register for using an email address. Use the free label template 5418 for PYOP labels. These labels can be purchased through Amazon.
Labels should be printed before the shipment arrives from the vendor. This allows staff to clean the bisque, apply the labels, and place the pottery pieces on the sales floor efficiently once inventory is received.
Each label must contain three things:
- Name of the PYOP piece
- SKU # that corresponds with POS system
- Price
Example of a label:
Tiny Tot Sparkle DB 32923 $14 |
Staging
Placement: Bisque should be displayed in a neat and organized manner throughout the studio. Groupings of the same pottery piece should be placed near each other and spaced appropriately so that the overall display is attractive and organized.
If a display PYOP sample piece is available, it should be placed at the front of the shelf in plain view so customers can easily see, touch, and use it as inspiration while selecting pottery to paint. Display pieces must be neatly painted, properly glazed, and fired.
Expensive, fragile, and larger PYOP pieces should generally be placed on higher shelves. Safety is paramount in the studio lobby, and heavy PYOP should not be placed within easy reach of young children where it could potentially fall and cause injury.
Managers and staff should use common sense and good judgment when arranging pottery displays. Some heavier pieces, such as plates, may need to be displayed on lower shelves so customers can easily view them and may also be stacked appropriately for convenience and space efficiency.
Staging: The placement of PYOP throughout the studio is an important part of merchandising and increasing sales. Pottery pieces should be displayed in areas that are easy to see at the eye level of the target customer.
For example, kid-focused PYOP pieces such as unicorns, banks, ballerinas, cars, and trucks should be displayed at children’s eye level so they are easily noticed and appealing to young customers. More functional pottery pieces, such as butter crocks or yarn bowls, may be better suited for mid-range shelf levels where they are more visible to adult customers.
Staging also includes placing similar types of PYOP pieces together in designated sections throughout the studio. Because there are many different styles and types of PYOP offerings, grouping similar pieces together makes it easier for customers to find what they are looking for.
Functional pieces such as plates, bowls, mugs, and platters should be displayed near one another. Keeping similar pieces together allows customers to easily compare differences in price, design, size, and dimensions while shopping for the perfect piece.
Mix in Different Price Points: Each section of PYOP shelves should include a balanced range of affordable, mid-range, and higher-priced pieces displayed near one another so customers have multiple options to choose from regardless of budget.
Source: images/image19.png
Seasonal Staging
Seasonal Staging and Decorations: Studio decorations and PYOP displays should be updated with each season and major holiday. Pottery pieces for the current season should be showcased in highly visible areas, ideally near the front of the studio where customers will see them immediately upon entering.
Mixing seasonal decorations with PYOP displays is an effective way to enhance staging and highlight featured pieces. Decorative items such as flowers, pumpkins, greenery, ribbons, or seasonal décor can help showcase pottery and provide customers with inspiration for how the finished pieces could be displayed or used in their own homes.
The photo below is an example of Fall PYOP staged with flowers and pumpkins. This type of display helps inspire customers and gives them creative ideas for decorating with similar pottery pieces.
Source: images/image21.png
Rotating PYOP Displays: Pottery should be rotated between different shelves and display areas throughout the studio at least four (4) times per year. Bringing new seasonal pottery onto the sales floor is a great opportunity to rotate and rearrange existing inventory throughout the studio. For example, during the Spring season the studio may showcase items such as gnomes, planting pots, handprint plates, and fairies. As the season transitions into Summer, the Spring inventory should be rotated and mixed into less prominent areas of the studio to make room for summer-themed inventory. Examples of summer inventory may include mermaids, tea light vases, mason jars, and animal-themed pottery pieces.
The photo below is an example of Valentine’s Day staging. Displayed prominently on the manager’s desk is a Valentine’s Day gift bag containing a Valentine-themed pottery piece, brushes, a gift card, and chocolates. This type of staging can help upsell gift cards and inspire seasonal PYOP purchases. Similar types of staging can also be used for other holidays such as Christmas, Easter, and Halloween.
Source: images/image22.png
Set-Up and Take-Down: It is important to set up and remove seasonal decorations in a timely manner. After a major holiday has passed, the seasonal décor should be taken down promptly and replaced with décor and pottery displays for the upcoming holiday or season.
PYOP Party Staging
Party Packages: There should be two designated pottery sections in the studio that specifically showcase PYOP pieces available for parties. Each party package section should be clearly labeled and organized so customers can easily see which pottery pieces are included in each package option. The two party package options are The Rio and Monte Carlo.
The Rio Party Package section includes PYOP pieces in the lower price range. Examples of the Rio Party Package are smaller figurines, basic mugs, and basic plates.
The Monte Carlo Party Package section should include PYOP pieces in the higher price range. Examples of the Monte Carlor Party Package include larger figurines, banks, plates, mugs, and bowls.
Because many parties are for younger children, PYOP party package pieces should be displayed at children’s eye level so they are easily visible and accessible for kids to see and reach.
Managers may use discretion when selecting which pottery pieces to feature in each package display area. Studios should maintain at least 32 pottery options available in the Rio section and at least 24 pottery options available in the Monte Carlo section.
Source: images/image20.png
Kiln

Kiln Wash and Shelves
Kiln wash is a protective coating applied to kiln shelves that helps prevent glaze from sticking to the shelf if glaze drips from a bisque piece during firing. With kiln wash applied, dried glaze can be scraped off the shelf more easily, helping protect and extend the life of the kiln shelves.
A fresh coat of kiln wash should typically be applied to kiln shelves once every 6 months to 1 year, depending on kiln usage and wear.
To mix kiln wash, begin with approximately ¾ cup of water in a large bowl designated for kiln wash mixing. Slowly add several tablespoons of powdered kiln wash into the water (never pour water into the powder). Mix thoroughly after each addition until the mixture reaches a thin, creamy consistency similar to heavy milk or slightly thinner than pancake batter. Add small amounts of water as needed, especially when mixing enough kiln wash for multiple shelves.
Apply the kiln wash mixture to the kiln shelves using a clean 2–3 inch synthetic bristle brush. Apply one solid coat to only one side of each kiln shelf and allow it to dry completely before coating the other side. DO NOT COAT BOTH SIDES OF THE SHELF AT THE SAME–PAINT ONLY ONE SIDE AT A TIME.
Kiln wash should be applied to the KILN SHELVES ONLY. Do not apply kiln wash to the kiln floor stones or interior kiln wall.
When applying the kiln wash, extend the kiln wash ¼ inch beyond the shelf edge to make sure the edge of the shelf is painted. Add two (2) coats of kiln wash to each shelf, front and back.
Extra kiln wash powder should be stored in a clearly marked, airtight container for future use. The original plastic bag is acceptable for storage as long as it is sealed tightly. Powdered kiln wash has an unlimited shelf life when sealed properly.
Test Firing
Before firing pottery for the first time it is important to perform a test firing of the kiln. A test fire should be performed again anytime that alterations or maintenance have been completed on the kiln.There are four important reasons to complete a test fire before firing pottery.
- To oxidize the elements. This is also sometimes referred to as a ‘seating the elements’ firing.
- To temper the kiln shelves, posts and stilts.
- To make sure the electrical wiring installation was completed properly.
- To learn the “personality” of the kiln. Every kiln, much like an oven, has slight variations in the way it fires. Some kilns may fire slightly hotter or cooler, develop hot or cool spots, or fire differently between the top and bottom shelves. It is important to use a cone 06 during this testing phase to help evaluate firing consistency and kiln performance.
Loading the Kiln
Place the three shortest kiln posts in a triangle pattern on the bottom of the kiln, spacing them approximately 1 inch away from the kiln walls.
Set a kiln shelf on top of the posts with the kiln-washed side facing upward. Once a shelf has been filled with pottery, add additional kiln posts and place another shelf on top to continue loading the kiln.
Load pottery pieces onto the kiln shelf, always leaving at least 1 inch of space between each piece to allow for proper heat circulation during firing.
Always leave at least 1½ inches of space between the thermocouple and any pottery piece, kiln shelf, or kiln post. The thermocouple regulates the temperature of the kiln and requires proper clearance to function accurately.
Always check stilts to make sure they are standing straight upright and that the pins are free from any glaze residue from previous firings that could cause the stilts to tilt.
When loading large pieces, like platters, into the kiln, place them on the middle shelf, rather than on the top or bottom shelf. This helps larger items fire evenly.
Do not move or bump the kiln after it has been loaded, as doing so could cause the pottery pieces inside to shift or topple over during firing.
Watch Out for the Thermocouple and Heating Elements: Do not bump the thermocouple when placing shelves inside the kiln during loading or unloading. The thermocouple is delicate and essential for accurate temperature regulation within the kiln. Care should also be taken to avoid damaging the kiln heating elements while loading or unloading shelves and pottery.
Never turn on the kiln during a storm or when there is a possibility of severe weather that could cause a power outage. Losing electricity during a firing can damage pottery, affect firing results, and potentially damage the kiln.
Stilting: Pottery pieces that have glaze or paint on the bottom must be placed on stilts during firing. This commonly includes pieces such as plates, mugs, bowls, and other functional pottery items. If painted or glazed pieces are not stilted properly, they may stick to the kiln shelf during firing, which can ruin both the pottery piece and the kiln shelf.
Place the stilt in the center of the pottery piece so the metal spikes support and lift the painted pottery above the kiln shelf. The base of the stilt should rest securely on the kiln shelf during firing.
Greenware Clay (Handbuild Clay): Clay used for hand-built and pottery wheel projects before it has been fired is called greenware. Once greenware has been fired, it is referred to as bisque. In simple terms, unfired clay is called greenware, and fired clay is called bisque.
Do not stlit Greenware: Do not place greenware pottery on stilts when firing. If greenware is stilted, the clay may melt into the stilts during firing, which can damage both the stilts and the pottery piece.
Source: images/image24.png
Cone Fire 06 Firing Procedure:
Once the kiln is fully loaded, the pottery is ready to be fired. Before starting the kiln, double-check that the shelves have at least 1½ inches of clearance from the thermocouple. Also, double-check that all peephole plugs are properly inserted into the peepholes before beginning the firing cycle.
At Cordovan Art School, all clay projects are fired to cone 06. Always verify that the kiln is set to “06” and not simply “6.” Accidentally firing to cone 6 instead of cone 06 can cause pottery pieces to melt or explode. It will damage the pottery pieces, the kiln shelves, and the kiln itself.
To begin the firing process, follow the six (6) steps listed below:
- Select Cone Fire 06 and press Enter
- Make sure to press both 0 and 6. Always verify the kiln is set to 06, not 6.
- Select Speed: Medium and press Enter.
- Select Preheat: 0 and press Enter
- Select Hold: 0 and press Enter
- Select Cool: 0, press Enter
- Press Enter again to begin the firing cycle
Once you initiate the firing cycle, the kiln will make a clicking noise coming from the electrical panel. This is normal and indicates that the firing process has started. After a few minutes, the clicking sound may stop, but the electrical pulses from the heating elements will continue throughout the firing cycle until firing is complete.
An 06 firing will typically reach a maximum temperature between 1810–1835 degrees Fahrenheit. The firing process usually takes approximately 7½–8 hours, or longer depending on how full the kiln load is.
Unloading the kiln
Wait to open the kiln lid until the temperature has cooled to under 100 degrees Fahrenheit. Once the kiln cycle is complete and the pottery pieces are cool enough to safely touch, you may begin unloading the kiln. Gloves are recommended when unloading pottery and handling stilts.
Take pottery pieces out of the kiln one at a time. If stilts were used during firing, use the stilt mark stone to sand or scrape off the stilt marks on the bottom of the pottery piece and smooth over any sharp glaze or glass residue caused by the stilt points. Wear gloves when using the stilt mark stone, as sharp glaze remnants can cut fingers.
Source: images/image25.png
Maintenance and Cleaning
Always make sure the kiln is turned off and unplugged before performing any maintenance or cleaning.
Broken pottery pieces and dust may settle at the bottom of the kiln over time. To clean the kiln, use a shop vacuum with a hose attachment. Do not place the vacuum motor inside the kiln. Only use the hose and attachment, as placing the motor inside the kiln may damage or short out the electrical circuits.
Inspect the element grooves regularly to ensure there is no damage to the bricks or heating elements. Also check the thermocouple to make sure it has not been bumped, bent, or moved out of place.
Over time, small cracks or minor separations may naturally develop in the kiln bricks, lid, or kiln floor. Small cracks are normal and generally not a cause for concern. However, if there is major or significant damage to the kiln bricks, heating elements, or thermocouple, take clear photos and send them to a kiln repairman to assess the severity of the damage.
Thermocouple
The thermocouple is the metal component extending into the inside of the kiln. In simple terms, it functions as the kiln’s heat sensor and regulates the firing temperature.
When loading and unloading the kiln, be careful not to bump the thermocouple. It can be bent or damaged easily, which may cause the kiln to fire hotter or cooler than intended. Moving shelves in and out of the kiln is the most common cause of damaging the thermocouple.
Always use caution when loading shelves, removing shelves, and stilting pottery pieces. When vacuuming the kiln, use a very soft cloth to gently wipe dust from the thermocouple. When stacking kiln shelves, leave approximately 1½ inches of clearance between the thermocouple and both the upper and lower shelves. Shelves placed too close to the thermocouple can cause it to sense excess heat prematurely, which may cause the kiln to shut off before reaching the proper firing temperature.
Thermoshock
The dipping glaze applied over painted bisque is essentially liquid glass. During firing, the glaze’s milky, liquid consistency becomes molten and flows over the pottery surface, smoothing out as the kiln heats. Once the kiln reaches the glaze maturation temperature—typically around 1830 degrees Fahrenheit—the glaze begins the process of cooling down and hardening into a smooth, clear gloss coat.
It is important not to rush the cooling process by opening the kiln too early. Even at temperatures of 200, 150, or 125 degrees Fahrenheit, the pottery and glaze are still cooling and stabilizing. The cooler the pottery becomes before exposure to outside air, the more durable and stable the finished piece will be.
Opening the kiln too early can cause a problem known as thermal shock. Thermal shock occurs when warm pottery is suddenly exposed to cooler air, causing the pottery to cool too quickly. This may result in immediate or delayed cracking, chipping, or fracturing of the pottery. Sometimes cracking noises can even be heard as the pottery rapidly contracts.
To help prevent thermal shock, do not open the kiln until the internal temperature has cooled below 100 degrees Fahrenheit.
What to do if a Piece is Damaged in the Kiln?
If a PYOP piece is damaged during the kiln firing process, the manager should notify the customer as soon as possible and invite the customer back to the studio to paint a replacement bisque piece at no charge.
If a hand-built ceramic piece or pottery wheel project created during a weekly class or camp is damaged during firing, the manager should notify the student, or the entire class if multiple pieces were affected. Students should be informed that due to the nature of kiln firing, pottery pieces can occasionally crack, break, or become damaged during the firing process.
Weekly class students do not receive a refund or studio credit for damaged hand-built or wheel-thrown pottery pieces. The manager should make sure the next firing kiln runs smoothly.
Glazing
Dipping Vat/ Mixing Glaze
The dipping vat is used to store the clear dipping underglaze used on all PYOP items. The dipping vat comes with a glaze mixer attached. Cordovan Art School uses NT3 Clear Glaze by Mayco as the dipping glaze. The glaze functions like a liquid glass and creates the smooth, shiny protective surface on finished pottery pieces after firing.
Because the glaze is made from a combination of materials and minerals, it naturally begins to separate after sitting idle for more than 25 minutes. (Think of it like ketchup where the water rises to the top without use) For this reason, the glaze must be mixed thoroughly for approximately 8–10 minutes before dipping any pottery pieces.
Anytime you mix the glaze, use a strainer to remove any floating pieces of debris from the glaze, such as hair, fuzz, or paint. The strainer should be lined with a Home Depot HDX paint sprayer filter bag, which is available in both 1-gallon and 5-gallon sizes.
If dipping is paused and additional pieces will be dipped later the same day, make sure the dipping area and mixer are cleaned and organized before stepping away. During longer dipping sessions, remix the glaze after approximately every 30 pottery pieces to maintain proper consistency.
Once dipping is complete, securely place the lid back onto the dipping vat with the mixer properly positioned in the designated hole to seal the vat from outside air. If the lid or mixer is not secured correctly, the glaze will start to dry and the glaze viscosity can become inconsistent.
Do not allow the glaze level in the dipping vat to become too low. Refill the vat with additional glaze as needed.
Viscosity
Viscosity is the measurement of the glaze mixture’s thickness and consistency. It determines how thick or thin the dipping glaze is. If outside water or other liquids are accidentally introduced into the glaze, it can negatively affect the viscosity. Likewise, if the glaze is left unsealed for an extended period of time, the mixture may begin to dry out and become too thick.
To measure viscosity, use the designated viscosity measuring tool. Fill the measuring tool with glaze and use a timer to measure how long it takes for the glaze to fully empty from the tool.
The NT-Clear One glaze viscosity should measure between 19–22 seconds.
Dipping Mantra
Dip in and dip out. Don’t linger the pottery in the glaze
It’s drip, drip, drip
And shake, shake, shake,
And shake, shake, shake,
And rock and roll, and rock and roll,
And shake, shake, shake,
And dab, dab, dab,
Finally, when it’s done you place it on the drying rack.
Dipping Techniques
The Vertical Dipping Technique is one of the easiest glazing methods to learn. Hold the pottery piece approximately 8 inches above the dipping glaze in a vertical position. Plunge the piece completely into the glaze until it is fully submerged, then immediately remove the piece by pulling it straight back out in the same direction. Hold the piece above the glaze vat and allow excess glaze to drip off for approximately 4–6 seconds. Then gently, but firmly, shake the piece to remove additional glaze before placing it on the drying plaques located on the drying table. Using a mop glaze brush or fan brush, dab glaze onto the areas where your fingers held the piece on the top side. Once the piece is dry, carefully turn it over and dab glaze onto the finger hold areas on the bottom side as well.
This dipping technique works especially well for small plates, tiles, trivets, small figurines, candle sticks, and similar pottery pieces.
The Crescent Moon Technique: Hold the pottery piece approximately 8–10 inches above the dipping glaze. Plunge the piece into the glaze following the curve of a crescent moon or a backwards letter “C,” entering the glaze at a horizontal angle as the piece is submerged. Then remove the piece using the same curved motion in reverse. This technique helps reduce trapped air pockets and allows the glaze to coat the pottery more evenly. Without this motion, the exterior of the piece may receive too much glaze while the inside may not receive enough coverage.
The Crescent Moon Technique works especially well for cups, mugs, bowls, banks, and similar pottery pieces with deep or hollow interiors.
The Half & Half Technique is one of the most commonly used dipping methods. This technique follows the same basic principle as the Vertical Dipping Technique; however, only half to approximately 4/5 of the pottery piece is submerged vertically into the glaze. Dip the pottery piece into the glaze and remove it by pulling it straight back out in the same direction it entered. Hold the piece above the dipping glaze and gently, but firmly, shake it several times to remove excess glaze. Then place the piece onto the drying plaque and allow it to dry.
Once dry, hold the already glazed portion of the piece and dip the unglazed section into the glaze, stopping at the edge of the previously glazed area. Avoid excessive overlap between glaze layers. Overlapping glaze can create an overly thick glaze application, which may discolor the colors underneath or cause the glaze to pull away from the pottery surface and expose the raw bisque underneath.
If glaze overlap occurs, the overlap area may need to be “feathered” once dry. A poplular method of fixing the overlap is to immediately use a soft fan brush to smooth and feather the overlap area while the glaze is still wet.
This dipping technique works especially well for larger pottery pieces such as platters, trays, plates, and bowls.
Glazing Greenware
Do not dip greenware into the dipping glaze vat. Glaze may only be applied to greenware by hand using a paintbrush. Greenware refers to hand-built clay or pottery wheel clay that has not yet been fired in the kiln.
Kiln Room Organization
Pottery Organizational Flow
There should be a minimum of three (3) separate storage racks for pottery in the back storage area. Higher-volume studios may require additional racks based on customer demand and pottery volume.
The three designated racks should include:
- Pottery that has been painted by customers and is waiting to be glazed/dipped.
- Pottery that has recently come out of the kiln and is cooling or being processed.
- Pottery that has been kiln fired and is ready for customer pick-up.
Rack #1: Glazing
PYOP painted by customers that is waiting to be glazed should be immediately placed on Rack #1 along with its corresponding Painter’s Form.
Once it is glazed, it should return back to it’s place on the rack to dry.
If the Painter’s Form is missing any key information, the missing information must be added by a staff member BEFORE dipping the PYOP piece (name, email, phone, description of piece, date painted). If the customer did not include a pottery description, staff must write one on the form. If the description written by the customer is vague or lacking sufficient detail, staff should add additional identifying details to help distinguish the pottery piece from other similar items. This step is especially important before dipping, because once pottery is dipped in clear glaze, many pieces begin to look similar. The Painter’s form must remain with the pottery piece(s) at all times until the customer picks up the finished pottery.
Painted PYOP pieces should be organized systematically on the rack, with the most recently painted PYOP placed on the top shelf. This organization system helps staff identify which pieces need to be dipped and fired first so pottery can be returned to customers in a timely manner.
Rack #2: Cooling (Post-Kiln Fire)
Directly adjacent to the kiln, there should be dedicated rack(s) for unloading fired pottery, stilts, kiln posts, and kiln shelves.
Once a pottery piece is moved from the Glazing Rack into the kiln, the corresponding Painter’s Form must be moved from the Glazing Rack to the Cooling Rack. After the pottery piece has been kiln fired, it should immediately be reunited with its corresponding Painter’s Form on the Cooling Rack.
Make sure the stilts, kiln posts, and kiln shelves are returned to their appropriately labeled storage locations on the rack.
This image illustrates the organization of pottery pieces that have just been removed from the kiln. Notice that the corresponding Painter’s Form has been matched and placed with the finished pottery piece(s).
Source: images/image26.png
Rack #3: Customer Pick-Up
Once a pottery piece is moved from the Cooling Rack to the Customer Pick-Up Rack , the corresponding Painter’s Form must accompany the piece.
Customer pick-up shelves must be organized alphabetically from A–Z by the customer’s last name to make it easy for staff members to quickly locate the pottery piece when the customer arrives to pick up their pottery.
Customers must be notified immediately once their pottery is ready for pick-up. Prompt customer pick-up is important, as unclaimed pottery reduces available storage space for newly fired pieces.
PYOP Pick-up
Presenting PYOP to Customer
When a customer comes in to pick up their finished pottery, the staff member should hold up the piece, show it to the customer, and say something positive about the finished pottery. It can be as simple as, “How good does that look!” or “I love the colors you used on this piece!”
Whatever is said should be genuine, positive, and encouraging. Staff should find something unique about the pottery piece and compliment the customer on their creativity, color choices, design, or craftsmanship.
After the customer has viewed their finished PYOP piece, it should be carefully packaged in a Cordovan-branded to-go bag for the customer to take home.
At the time the customer paints their PYOP piece, staff should inform the customer that the pottery will be ready for pick-up in 7 days. This allows adequate time for the pottery to dry, be dipped in glaze, kiln fired, cooled, and prepared for customer pick-up.
Contacting the Customer
1st contact: When the pottery is removed from the kiln and placed on the customer pick-up shelf, contact the customer to let them know their pottery is ready for pick-up. Staff should call the customer using the phone number listed on the Painter’s Form. If no phone number is provided, staff should send an email instead.
After contacting the customer, write the date of the phone call or email directly on the Painter’s Form. Allow one (1) week after the first contact for the customer to pick up their pottery, as many customers do not come in immediately.
2nd contact: If the pottery has still not been picked up after one (1) week, send a second reminder by phone call or email. Record the date of the second contact on the Painter’s Form after reaching out to the customer.
3rd contact: If the pottery still has not been picked up, repeat the same process for a third contact attempt. During the third reminder, inform the customer that the studio has attempted to contact them for three (3) consecutive weeks. Let the customer know they have one (1) additional week to pick up their pottery before the pieces may be donated or discarded.
Holding PYOP
A studio should hold customer PYOP pieces for three (3) months. After three (3) months, the manager may discard the PYOP pieces as long as the studio has followed the “PYOP Pick-Up Protocol,” including contacting the customer three (3) separate times and allowing the pottery to remain on the pick-up shelf for the full three-month period.
One of the easiest ways to track how long a PYOP piece has been on the pick-up shelf is to place a colored sticker on the PYOP bag at the end of each month. A new colored sticker should be added each month. For example:
- Month 1: Green sticker
- Month 2: Blue sticker
- Month 3: Yellow sticker
- Month 4-6 Repeat the sequence again
Once four (4) stickers have been placed on the bag, staff will know that more than three (3) months have passed since the pottery was placed on the customer pick-up shelf.
One (1) week before placing the fourth sticker on the bag, staff should make one final phone call or email reminder to the customer, informing them that the pottery will be discarded the following week if it is not picked up.
PYOP Staffing during Peak Times
The studio may require additional staffing during peak business periods to help maintain customer service and studio cleanliness. PYOP staffing often includes high school or college students.
Saturdays: Saturdays are often one of the busiest days of the week for the studio. Managers may need to schedule additional staff members to assist walk-in PYOP customers, help with birthday parties and events, dip bisque, clean the studio, restock supplies, and assist with general customer service needs. Staffing levels should be adjusted based on the size, customer traffic, and needs of the individual studio.
Summer Camps: Additional staffing may also be needed during summer camps. PYOP employees can assist with cleaning, helping campers, assist walk-in PYOP customers, dipping bisque, organizing supplies, etc. Peak times are typically around lunchtime when PYOP walk-in customers arrive at the studio during summer camp check-in and check-out times. As needed, managers may schedule an extra PYOP staff member during peak hours based on the customer volume and operational needs of the studio.
Parties
See Form: Party Form click here
See Form: Party Checklist click here
Booking a Party
Parties may be booked through the Cordovan Art School website, over the phone, or in person at the studio. Whenever a party is booked the manager should follow these procedures:
- Complete the Party Form and place it in the binder located at the front desk.
- Add the customer’s name and contact information to the studio calendar.
- Collect the required $50 party deposit from the customer.
- Review the Party Checklist
- Schedule a teacher or staff member to lead the party.
When a customer books a party through the Cordovan Art School website, an automated notification email is sent to the manager. Upon receiving this notification, the manager must contact the customer the same day to confirm receipt of their party booking and gather additional details about their party as needed.
The example below is a sample email that can be sent to confirm the party booking has been received.
Book a Party: Confirmation email |
Thank you for booking a party at Cordovan Art School. We are excited to celebrate with you and look forward to hosting your party! If you have any questions or need to make changes to your reservation, please contact the studio. Thank you, Cordovan Art School [Studio Location] [Phone Number] |
General Information
Payments: The party deposit is due at the time of booking. Final payment for the party will be collected on the date of the event and will be based on the actual number of attendees who participate in the party. Any remaining balance must be paid before the party concludes.
Tips: If the customer leaves a tip, the tip should be divided evenly among all teachers and staff members who helped prepare, host, and clean up the party.
Food, Beverages, and Gifts: Customers are responsible for providing their own food, beverages, and gifts for the party. Cordovan Art School does not provide food or beverages.
Decorations: Cordovan Art School does not provide party decorations. However, customers are welcome to bring and set up their own decorations for the party.
Party SWAG: All PYOP parties include a complimentary custom-made Birthday Plate. The Birthday Plate will be created by the studio and provided to the birthday guest as part of the party package.
Party Room Set-Up: The manager is responsible for preparing the classroom and party area for all parties prior to the guests’ arrival. Specific setup requirements vary by party type and are outlined in the corresponding sections below.
Parties are held in a classroom. Managers are responsible for ensuring that the classroom is available for the scheduled party and that the space can comfortably accommodate the expected number of attendees.
A designated gift and food table should be set up prior to the arrival of party guests. The table should be covered with a clean, presentable tablecloth and used for cake, food, drinks, gifts, and other party items brought by the guests.
Studios should keep several party tablecloths available for use. Managers are responsible for ensuring that tablecloths are clean, in good condition, and washed as needed between parties.
Staffing a Party
Always have a minimum of two (2) employees scheduled during parties. One employee should serve as the Primary Host, who is typically the manager. The second employee should be either an Art Teacher (for Canvas Painting or Pottery Wheel parties) or a Staff Member (for PYOP parties). Both employees should work together to ensure the party runs smoothly and that guests receive excellent customer service throughout the event.
Primary Host Responsibilities:
- Room set up, room preparation and cleanliness
- Assisting guests during check-in and check-out
- Collecting final payment
- Supporting overall party operations and customer experience
- Helping ensure the party stays on schedule
- Assist the Art Teacher/ Staff Member as needed, including set-up and clean-up
- Making sure all guests leave the party with their completed artwork, party swag, and any Cordovan Art School coupons or promotional materials. For PYOP parties, remind guests that their pottery will be ready for pick-up approximately seven (7) days after the party to allow time for glazing, firing, cooling, and processing.
Art Teacher / Staff Member Responsibilities:
- Teaching and leading the party activity
- Art supply set-up and clean-up
- Creating a fun and engaging experience for each guest
- Monitoring supplies and materials during the party
Larger parties: For larger parties with more than 22 painters, it is recommended that a third employee be scheduled to assist with party operations and customer service.
Off-site Parties: Cordovan offers off-site parties. An extra fee should be added to the price of the party for travel and any extra work involved. Always consider the safety of the teachers when booking an off-site party.
Party Types
Cordovan Art School offers 3 different types of parties:
- Canvas Painting Party “The Louvre”
- PYOP Party “The Monte Carlo”
- Wheel Throwing Party “The Davinci”
1. Canvas Painting Party
- Nickname: “The Louvre“
- Led by an ART TEACHER
- Includes step-by step instruction throughout the party.
- The party theme is selected by the customer, and the art project should be designed around that theme.
- Guests take home their artwork at the end of the party.
2. PYOP Party
- Nickname: “The Rio” and “The Monte Carlo“
- Led by a STAFF MEMBER
- Includes general oversight helping guests paint their own pottery pieces at their own pace.
- Includes a custom party plate.
- The staff member must complete the Party Form to keep track of which pottery pieces belong to each guest.
- The Party Form must remain with all pottery pieces at all times until the finished pottery is picked up by the customer.
Keeping track of pottery: The Party Form is used for parties and large groups to track multiple pottery pieces that are associated with a single party reservation or transaction. Extra copies of the Party Form should be printed and kept in the party binder at the front desk.
It is extremely important to accurately identify each guest’s pottery piece. During parties, many guests may choose and paint the same type of pottery. For example, several guests may paint the same turtle, mug, or figurine. To prevent confusion, each painter—or a staff member assisting them—must write the guest’s name on the bottom of the pottery piece using a glaze pencil.
The Party Form should also include a description of each pottery piece painted by each guest. Having both the guest’s name written on the pottery and a detailed description on the Party Form makes it much easier to identify and return the correct piece to each party guest after the pottery has been glazed and fired.
The Party Form must be completed by the staff member assigned to lead the party. This form must remain with all pottery pieces at all times until the finished pottery is picked up by the customer.
Custom Party Plate: The Rio and Monte Carlo PYOP party packages include a complimentary custom Party Plate for the guest of honor.
Before the party, ask the customer what theme or design they would like featured on the front of the plate. Examples may include a princess, cartoon character, animal, sports theme, or other age-appropriate design. Staff may use the transfer technique and reference images to create the artwork. A talented staff member should be assigned to paint the design. The artwork should be neat and personalized, but it does not need to be overly detailed or perfect. The Party Plate should be created at least 2–3 days before the party date so it is ready for guests to sign during the event.
The front of the plate should also include a personalized message such as “Happy Birthday Johnny” (birthday party) or “Worlds #1 Boss” (corporate party) Always double-check the spelling of the guest of honor’s name before painting the plate.
During the party, have all guests sign the back of the plate using a glaze pencil. Only glaze pencils should be used, as other writing materials will burn off during firing. The signatures create a personalized keepsake for the birthday guest.
Before signing the plate, all guests must wash their hands thoroughly. Signing typically takes place near the end of the party when guests may have food, frosting, grease, or other residue on their hands. Oils, frosting, or food residue transferred to the plate or glaze pencil can interfere with glaze adhesion and may cause defects during firing. Clean hands help ensure the finished Party Plate fires properly and becomes a lasting keepsake for the guest of honor.
Source: images/image27.png
Source: images/image17.png
Wrapping PYOP for Party Guests: When preparing party pottery for pick-up, place each finished pottery piece inside a clear stretch plastic gift bag. The bag should be filled with decorative packing paper to create an attractive presentation and help protect the pottery during transport.
Attach a “Thanks for Attending” card and a Cordovan Art School coupon card to each bag using ribbon. A hole punch may be used to create an opening in the card so the ribbon can be securely tied around the bag.
Each thank-you card should include:
- The name of the guest who painted the pottery piece.
- The name of the person who hosted or invited them to the party.
This personalized packaging creates a memorable experience for guests and makes it easy to identify each pottery piece when it is picked up. The photo below shows an example of how party pottery should be packaged and presented once it is ready for customer pick-up.
Source: images/image8.png
3. Wheel Throwing Party
- Nickname: “The Davinci“
- Led by a POTTERY WHEEL TEACHER.
- Includes step-by step instruction throughout the party.
- Includes a custom party plate.
Follow all procedures outlined in the Pottery Wheel Classes section, with the following modifications:
Party Form: Use the Party Form instead of the Painter’s Form to track guest projects.
Custom Party Plate: The Davinci party package includes a complimentary custom Party Plate for the guest of honor. Follow the same Party Plate procedures outlined in The Rio and The Monte Carlo party sections.
Number of Classrooms: 2 classrooms are required for Pottery Wheel parties. The first classroom is the pottery wheel room, where guests receive wheel throwing instruction and create their pottery projects. The second classroom is flex space to be used for a hand-build clay activity station for larger parties, food and cake, gift opening, parent seating and gathering area, general overflow. Whenever possible, the second classroom should be located adjacent to the pottery wheel room to allow staff to easily supervise both areas and facilitate smooth transitions between activities.
Party Size: The maximum number of guests for a pottery wheel party is two (2) times the number of pottery wheels available. For example, if a classroom has six (6) pottery wheels, the maximum party size is twelve (12) guests. The teacher does not get a dedicated wheel. The teacher may borrow a student’s wheel to do demonstrations. Larger groups will split time between 2 different activities.
Two Activities for Larger Parties: If the number of guests exceeds the number of available pottery wheels, a second activity must be provided for guests while they wait their turn on the wheel. Typically, this second activity is a clay hand-build project. For these larger parties:
- Guests should be divided into two (2) groups.
- One group participates in pottery wheel instruction while the other group completes the hand-build activity.
- Groups switch activities at the half-way point so all guests participate in both experiences.
- It is recommended to extend the party duration by an additional thirty (30) minutes to allow adequate time for both activities.
Number of Pottery Pieces Included: Each artist is allowed to make up to two (2) pottery wheel pieces to take home as part of the party. For larger parties, each guest is allowed to take home one (1) pottery wheel piece, and one (1) clay hand build piece.
Set Up: It is the Teacher’s responsibility to set up the Wheel Stations prior to guests arrival, which includes weighing and portioning clay, filling water bucket, setting out sponges, ribs, chamois, and other pottery tools.
Clay Portions:
- Children should receive approximately 1 pound of clay per project.
- Adults should receive approximately 2 pounds of clay per project.
- Extra clay should be available for mistakes and additional attempts.
Some Teachers prefer to pre-center the clay before the party begins, while others prefer to allow guests to wedge and center their own clay as part of the learning experience. The studio manager and teacher may determine the best approach based on factors such as party size, guest age, available time, and instructor preference
Incomplete or Failed Projects: Teachers are encouraged to create demonstration projects during the party that can be used for instructional purposes. If a party guest does not finish their pottery wheel project, or if all of their projects are unsuccessful, the teacher may give the guest one of their demonstration pieces to take home. The goal is to ensure that every guest leaves with a positive experience and memories.
Glazing:
- OPTION 1: After the pottery has completely dried and been bisque fired, a designated staff member may glaze the pottery on behalf of the guest. (This is the preferred option)
- OPTION 2: After the pottery has completely dried and been bisque fired, the pottery wheel party guests may return to the studio and glaze their pottery pieces themselves.
- If this option is offered, the guest must follow these procedures:
- schedule an appointment to return and glaze their pottery before leaving the party.
- agree to pay an additional painter’s fee when they return to custom-paint their pottery piece.
- agree that if they do not return within three (3) months to paint their pottery piece, they are giving the studio permission to dispose of the piece.
- If this option is offered, the guest must follow these procedures:
Clear notes must be written on the Party Form, indicating which guests are painting their own pieces. Once a guest returns to the studio to glazes their pottery, it will fired again and made available for pick-up.
Returning to Paint a Pottery Wheel Piece: A guest who attended a pottery wheel party may return to paint their pottery piece, but only if all of the following requirements are met:
Ordering pre-mixed color glazes for PYOP parties: https://www.theceramicshop.com/store/category/10/36/the-ceramic-shop/Cone%2B06%2BLow%2BFire/
Tutorial on how to dip pottery wheel pieces into glaze or clear coat: https://www.amaco.com/clay_how_tos/169
Extra Compensation: Follow the same extra compensation policy for Pottery Wheel Teachers as outlined in the Pottery Wheel Classes section.
Party Pick-Up Procedures: The person who booked the party should pick up all completed pottery pieces at the same time. It is their responsibility to distribute the finished pottery pieces to the guests who attended the party. Any exception to this pick-up policy must be clearly communicated to both the person who booked the party and the artist who created the pottery piece. All exceptions must also be clearly documented on the Party Form.
Food and Drink Policy: Absolutely no food or drinks are allowed in the pottery wheel room at any time. Food and beverages can contaminate clay and damage equipment.
Pottery Wheels
Not all studios have pottery wheels. If a studio elects to have pottery wheels, they should add pottery wheel into its schedule for classes, camps, parties, and workshops whenever possible.
Weekly Classes
Class Size: The number of students enrolled in a pottery wheel class must not exceed the number of pottery wheels available in the classroom. Teachers do not receive a dedicated wheel for themselves. For example, if a classroom has six (6) pottery wheels, the maximum class size is six (6) students. The teacher may borrow a student’s wheel to do demonstrations.
Set Up: The pottery wheel teacher is responsible for arriving early to complete any preparation work and set up the classroom before class begins.
The teacher may prepare pre-weighed portions of clay in individual bags before class and distribute them to students as class begins. Managers may assist with classroom setup and preparation as needed.
The photo below shows an example of a properly organized pottery wheel workstation for a student.
Clay Amount: Students are allotted one (1) pound of clay per project. Older or more experienced students may increase to 1.5 pounds of clay once they demonstrate the ability to successfully center and manage larger amounts of clay. Always weigh the clay before distributing it to students to ensure consistency and proper material usage.
Labeling Student Projects: It is the teacher’s responsibility to ensure that all pottery pieces are properly labeled with the artist’s name and tagged with a paper label or description as needed before the end of class. Managers should remind teachers if this step is overlooked.
For pottery wheel classes, a Painter’s Form should be attached or taped to the bat to identify the artist and their work. Proper labeling is essential so pieces can be accurately tracked, fired, and returned to the correct student.
The photo below shows an example of how pottery wheel projects should be labeled and organized at the end of class.
Clean-Up: Student Responsibilities: Approximately 25–30 minutes before the end of class, students should begin cleaning their workstations and washing any tools, bats, buckets, and equipment they used during class. Students should also assist with general classroom cleaning tasks, including mopping, wiping down work surfaces, cleaning around sinks, and helping return the classroom to a clean and organized condition before leaving. If students are able to complete clean-up efficiently, the teacher may reduce the amount of time allotted for clean-up as appropriate.
Clean-Up: Teacher Responsibilities: After class has ended, the teacher is paid for an additional thirty (30) minutes. This time should be used to complete any remaining clean-up and classroom organization tasks. Responsibilities may include:
- Finishing classroom clean-up
- Organizing shelves and labeling student work
- Transporting pottery to the kiln room for drying or firing
- Cleaning and storing tools and equipment
- Sweeping and mopping as needed
- Preparing the classroom for the next class
Clean-Up:Manager’s Responsibilities: It is the teacher’s responsibility to leave the classroom clean, organized, and ready for the next instructor. Any cleaning or organizational tasks not completed by the teacher become the responsibility of the manager. Managers are also responsible for cleaning and maintaining pottery wheel bats to ensure they are ready for future classes.
Extra Compensation (Wheel Teachers Only): Pottery wheel teachers should add an additional thirty (30) minutes to their timesheet for each pottery wheel class, camp, workshop, or party they teach. This additional paid time is intended to cover setup, labeling, transportation of student work, classroom organization, and clean-up responsibilities unique to pottery wheel instruction.
This additional paid time applies only to pottery wheel programs and does not apply to any other type of art class.
Removing Projects from the Bat: The responsibility for removing a student’s pottery project from the bat is determined by the studio manager in consultation with the pottery wheel teacher(s). Each studio may establish the process that works best for its staffing and workflow. At some studios, the teacher removes the projects from the bats, while at others the manager performs this task. When a project is removed from the bat, the teacher or manager may carve the student’s name into the clay to help identify the piece throughout the drying, firing, and glazing process. Whatever system is used, it should ensure that each student’s work is properly labeled and easily identifiable.
Drying: Pottery wheel pieces require time to dry before they can be glazed. The amount of drying time will vary depending on the size and thickness of the piece, as well as humidity levels within the studio.
Pottery should not be glazed until it is completely dry and has been bisque fired. Attempting to glaze pottery that has not fully dried can result in cracking, breakage, or other firing defects. Teachers and managers should ensure that all pottery wheel projects are completely dry before moving them to the kiln room for firing.
Note: Non-fired clay will soak the moisture very quickly causing it to soften, and it can break. Glazing non-fired clay pieces is NOT recommended, and can lead to the pottery breaking. However, if there is not enough time to fire the pottery, non-fired pottery wheel pieces can be glazed by hand–as long as the glaze is BRUSHED ON using a paintbrush (not dipped).
Glazing Student Projects: Once the students’ pottery projects are completely dry and have been bisque fired, the students glaze their own pieces using the colors of their choice. The teacher’s role is to guide students through the glazing process, demonstrate glazing techniques, and provide assistance as needed. Teachers should encourage creativity while helping students apply glaze properly to achieve the best possible results during firing. Students are responsible for selecting their glaze colors and decorating their pieces.
Organizing Wheel Throwing Projects: Wheel throwing projects should be organized on the shelves inside the wheel room while they are drying. Shelves may be organized in whatever manner makes the most sense for the studio, such as by teacher, class, age group, student, camp, party, or workshop. To prevent damage and confusion, the only person who should move wheel throwing projects on the drying shelves is the TEACHER. Students and other staff members should not move, rearrange, or handle pottery wheel projects unless specifically directed to do so by the teacher. This helps ensure projects remain properly labeled, protected, and organized throughout the drying and firing process.
Transporting Projects to the Kiln Room: The only person authorized to move a pottery wheel project from the classroom to the kiln room is the teacher. A project should only be moved when it is completely dry and is clearly labeled with the student’s name. A teacher may also take a photo of the piece for identification purposes. Because many pottery wheel projects can look similar, proper identification is critical to ensure each piece is returned to the student who created it.
The Painter’s Form must remain with the piece throughout the drying, firing, glazing, and pick-up process.
Firing Wheel Throwing and Hand-Build Projects: Pottery wheel and hand-build clay projects should never be fired in the same kiln load as PYOP projects. Whenever possible, studios should have two separate kilns: one kiln designated for PYOP projects and one kiln designated for pottery wheel and hand-build clay projects. However, if a studio has only one kiln, PYOP projects and pottery wheel/hand-build projects must be fired in separate batches.
Before loading any pottery into the kiln, the manager should double-check that each piece is properly labeled and identifiable. After firing, the manager should ensure that each piece is reunited with its’ Painter’s Form, and restored to the appropriate shelf, rack, or storage area along with its corresponding Painter’s Form.
Post-Firing Storage and Organization: Once a pottery wheel project has been fired, it is the manager’s responsibility to return the finished piece to the pottery wheel classroom or designated pick-up area.
There should be a separate shelving area designated for all post-fired pottery wheel and hand-build projects. These shelves should be organized in a manner that allows teachers and students to easily locate finished pieces.
Depending on the size and layout of the studio, post-firing shelves may be organized by teacher, class, age group, student, camp, party, workshop, or another logical system. Regardless of the organization method used, all finished pieces must remain properly labeled and accompanied by their Painter’s Forms so they can be accurately identified and returned to the correct student.
Food and Drink Policy: Absolutely no food or drinks are allowed in the pottery wheel room at any time. Food and beverages can contaminate clay and damage equipment.
Parties & Workshops
SEE PARTIES: 3. WHEEL THROWING PARTY
Camps
Clay Ordering for Camps: As a general rule of thumb, order one (1) box of clay for every three (3) half-day camp students per week. Actual clay usage may vary depending on student age, project size, and the number of clay projects completed during the camp. Managers should monitor clay inventory and adjust orders as needed.
Assistant Teachers for Pottery Wheel Camps: If there are eight (8) or fewer students enrolled in a pottery wheel camp, the teacher must manage the camp without the assistance of an assistant teacher. Additional staffing should be considered when enrollment exceeds eight students or when student needs warrant additional supervision and support.
Clean-Up During Camps: During pottery wheel camps, a staff member should be assigned for classroom cleaning and organization during the lunch hour, allowing the pottery wheel teacher to take a lunch break. The staff member should receive a break either before or after the lunch period.
However, at the end of each camp day, the pottery wheel teacher should remain for an additional thirty (30) minutes to complete clean-up and organizational tasks. Responsibilities may include cleaning the classroom, organizing shelves, labeling projects, transporting pottery to the kiln room once pieces are completely dry, and preparing the classroom for the next day.
Teachers should follow the same clean-up, labeling, storage, and pottery-handling procedures outlined in the “Pottery Wheel: Weekly Classes” section.
Wrapping and Packaging Camp Wheel Projects: Once a student’s pottery wheel projects have been fired and are ready for pick-up, the pieces should be carefully wrapped and placed in a customer pick-up bag to help protect them during storage and transport.
Labeling: The customer pick-up bag should be clearly labeled with the student’s name and phone number on the outside of the bag, so staff can easily contact the student when their pieces are ready for pick-up. Any accompanying labels, Painter’s Forms, or identification paperwork should remain with the project until it has been picked up by the student or parent.
Wheel Pottery Camp Delivery: See Section on Clay Camp Delivery
Teachers
Artistic Qualifications:
Cordovan Art Teachers must be skilled artists with a strong foundation in traditional art techniques, ensuring that students are consistently learning the principles of art and design. Teachers should strive to develop students’ artistic abilities by teaching sound artistic fundamentals while fostering creativity, confidence, and a love of art.
Art Teacher Responsibilities
After an art teacher is hired, the manager should provide them with the Art Teacher Responsibilities Form. This document outlines teacher expectations, responsibilities, policies, procedures, and performance standards.
Managers should review the document with the teacher and answer any questions to ensure the teacher understands the expectations of their role. Teachers are expected to follow all policies and procedures outlined in the Art Teacher Responsibilities Form throughout their employment with Cordovan Art School.
Teacher Login and Lesson Plan Access
Teachers may create their own login to the Cordovan Art School Online Training System : click here
Once registered, teachers can log in to view lesson plans, class schedules, and curriculum resources: https://online.cordovanartschool.com/
Teaching Philosophy
While Cordovan Art School provides a lesson plan framework, teachers are encouraged to use their individual artistic strengths and teaching styles to enhance the learning experience. Because Cordovan Art School teachers are skilled artists with a strong foundation in traditional art techniques, they may adapt lesson plans and instructional approaches to better engage students and enrich the classroom experience while still teaching the required Art Principles, Elements, and Techniques. The school’s slogan, “we create artists,” reflects the core purpose of the teacher’s role.
Lesson Plans
Teachers should review their lesson plans BEFORE arriving for classes, camps, workshops, or parties so they are prepared to teach.
Teachers at Cordovan Art School are responsible for teaching art projects that incorporate the Principles of Art and Design.
Teachers may teach any project found in the Cordovan Art School lesson plan library or create their own lesson plans.
Teacher’s Choice Lesson Plans
Whenever a teacher creates their own lesson plan (Teacher’s Choice), the lesson plan must be submitted to the manager for approval in advance using the approved Lesson Plan Form.
Teacher’s Choice lesson plans must be submitted at least one (1) week prior to the scheduled class, camp, workshop, or party. It is the manager’s responsibility to ensure lesson plans are submitted on time and approved before instruction takes place. Managers may provide courtesy reminders to teachers as needed.
Lesson Plan Form (google doc): click here
Lesson Plan Form (word doc):
Sharing Lesson Plans on the Lesson Plan Library
Teachers may submit their approved Teacher’s Choice lesson plans to Cordovan Art School for consideration in the company-wide lesson plan library.
If approved, these lesson plans may be made available for use by other Cordovan Art School teachers. Teachers will receive compensation from Cordovan Art School for lesson plans that are submitted to the lesson plan library and approved. Submission does not guarantee approval, and all approval decisions are made solely at the discretion of Cordovan Art School.
Digital Lesson Plan Submission Link: click here (this link is not currently working)
Camp Lesson Plans
Teachers must submit their camp lesson plans to the manager at least one (1) week before the camp begins. All lesson plans should align with and support the camp theme.
Managers are responsible for reviewing lesson plans before camp begins and ensuring that teachers have prepared an appropriate variety of projects and activities for the duration of the camp.
Art Games and Activities for Camps
Art-related games, creative warm-up exercises, and team-building activities can be a fun addition to camps. These activities encourage creativity, build confidence, promote social interaction, and help students get to know one another.
Teachers are encouraged to incorporate age-appropriate art games and activities throughout the camp experience to create an engaging and positive classroom environment.
New Teacher Studio Tour
After hiring a new teacher, the manager should schedule a tour of the studio with the new teacher. During the tour, the manager should introduce the teacher to the studio layout, explain studio procedures, and show them where supplies, materials, equipment, and classroom resources are located.
The tour should include, when applicable:
- Classrooms and teaching spaces
- Art supply storage areas
- Pottery and kiln areas
- Paint Your Own Pottery (PYOP) stations
- Cleaning supplies and equipment
- Teacher work areas
- Restrooms and break areas
- Emergency exits and safety equipment
The manager should also answer any questions the teacher may have and ensure they feel comfortable navigating the studio before teaching their first class.
Teacher-to-Teacher Mentoring
New teachers should be given the opportunity to shadow experienced teachers as they teach classes. Shadowing allows new teachers to observe classroom management techniques, instructional methods, student interactions, and the overall classroom experience.
Teacher-to-teacher mentoring is an effective way for new teachers to learn how to lead art projects, manage a classroom, and develop confidence before teaching independently.
The manager is responsible for scheduling all teacher-to-teacher mentoring opportunities. Whenever possible, new teachers should shadow at least two (2) different teachers to gain exposure to a variety of teaching styles and classroom environments.
New teachers should be compensated for shadowing and mentoring sessions.
Teacher Check-Ins and Support
Managers should meet with each teacher at least once per semester for a one-on-one check-in. These conversations may take place before class, after class, or at another time that is convenient for the teacher.
The purpose of the meeting is to:
- Show appreciation for the teacher’s contributions
- Listen to any concerns, ideas, or needs the teacher may have
- Offer support, encouragement, and guidance
- Provide constructive feedback or correction when necessary
- Strengthen the relationship between the teacher and manager
These conversations can be informal and do not need to be structured performance reviews. The manager should create a positive, supportive atmosphere and demonstrate encouraging leadership. The goal is for both the teacher and manager to feel that they are working together to make the studio the best it can be.
Managers are encouraged to provide a small token of appreciation during these meetings when appropriate, such as a coffee gift card, a favorite treat, a handwritten note, or another meaningful item that helps the teacher feel valued and appreciated.
Teacher Evaluations
The purpose of teacher evaluations is to improve the student experience, support teacher growth, and maintain a high standard of instruction throughout the studio.
Managers should provide parents and students with the opportunity to evaluate their teacher at the end of each semester.
Teacher evaluations should be distributed and collected by the manager, not the teacher. This helps ensure that feedback is honest, constructive, and gathered in a consistent manner.
After reviewing the evaluations, the manager should share relevant feedback with the teacher. Positive comments and accomplishments should be highlighted to recognize the teacher’s efforts and successes. When appropriate, the manager should also discuss areas for improvement and provide guidance, support, and resources to help the teacher continue developing their teaching skills.
Parent and Student Complaints
If a teacher or manager receives a complaint from a parent or student regarding a teacher, class, or classroom experience, the manager should make every reasonable effort to resolve the issue.
If the manager is unable to resolve the concern independently, the manager may invite the parent or student to meet after class with both the manager and the teacher present. The purpose of this meeting is to openly discuss the concern, listen carefully, and work together toward a resolution.
The manager should notify the teacher in advance of the meeting so both the manager and teacher can be prepared to discuss the situation professionally and constructively.
In these situations, it is important that both the manager and teacher listen respectfully and seek to understand the concerns being expressed so the parent or student feels heard and valued.
All complaints, concerns, and significant follow-up actions should be documented in the student’s Jackrabbit account for future reference and recordkeeping.
Building Friendships Between Students
Managers should remind teachers to find ways to help their students feel important. Teachers should look for opportunities to help their students feel connection, belonging, and friendship with the teacher and with the other students. Connections can be made during class through compliments, conversations, teacher notes to parents, warm-up exercises, cultivating an environment where students can interact with each other, etc.
Teacher Appreciation
Teachers are one of the most important parts of Cordovan Art School. A great teacher can have a lasting impact on students, contribute to a positive studio culture, and make the manager’s job easier and more enjoyable. Managers should consistently look for opportunities to recognize, support, and appreciate the teachers who help make the studio successful.
Managers should also encourage teachers to become invested in the studio by helping create an environment where teachers feel ownership and pride. This may include displaying teacher-created sample projects, showcasing teacher artwork throughout the studio, including teachers in the art show planning and set up or other events.
Managers can make a significant difference by showing genuine appreciation for their teachers. Appreciation does not need to be expensive or elaborate. Small acts of recognition can go a long way in helping teachers feel valued and motivated. Here are some ideas, but feel free to personalize these and have some fun with it:
- Give handwritten thank-you notes.
- Recognize teachers during teacher meetings.
- Celebrate birthdays and work anniversaries.
- Display teacher artwork in the studio.
- Give teachers small gifts during holidays or at the end of a semester. (Manager’s should get budget approval from owner)
- Organize teacher appreciation lunches or gatherings.
- A drop box in the studio where students can write personalized notes thanking their teachers
- Weekly in-studio lunches during Summer Camps (Manager’s should get budget approval)
- Teacher team-building activity
- Teacher spotlights on social media
- What other ideas do you have to make your work environment more fun for everyone?
Cordovan Perks
Managers, teachers, and staff members receive the following perks for working at Cordovan Art School:
- Free weekly art classes for themselves and their immediate family members (spouse and children only). This benefit does not extend to extended family members, relatives, friends, or guests.
- 50% off Paint Your Own Pottery (PYOP) for themselves and any guest they bring to paint with them. The employee must be present and participating with their guest(s) in order for the discount to apply.
Team-Building Activities
Managers may organize one (1) team-building activity per year for teachers and staff to help build relationships, strengthen teamwork, and create a fun and positive studio culture.
Team-building activities may include social gatherings, group outings, meals, creative activities, volunteer projects, or other events that encourage camaraderie and appreciation among team members.
Managers must obtain budget approval before scheduling or paying for any team-building activity. All expenses must be approved in advance and fall within the approved budget.
Managers Teaching Classes and Camps
A manager’s most important responsibility is to serve as the leader of the studio and ensure that all administrative and operational duties are being completed effectively. Managing a Cordovan Art School requires significant coordination involving students, parents, teachers, scheduling, emails, community outreach, customer service, Paint Your Own Pottery (PYOP), studio organization, cleaning, inventory, emergencies, and other day-to-day operations.
For this reason, managers should not assign themselves to teach classes, camps, workshops, or parties unless they have received prior approval from the studio owner.
In certain situations, it may be beneficial for a manager to teach if they possess the necessary artistic and teaching skills and if doing so serves the needs of the studio. However, the manager must first obtain permission from the studio owner before accepting any teaching assignment. The manager’s primary focus should always remain on leading the studio and ensuring that all operational responsibilities are being properly managed.
Teacher Substitutes and Emergency Coverage
Teachers are responsible to find a substitute if they are unable to teach a class or camp. However, there may be times when emergencies happen and a manager needs to step up and help.
Managers should work to build strong relationships with art teachers and maintain a reliable network of qualified instructors. Having a strong pool of teachers makes it easier to find substitutes when unexpected emergencies occur.
In cases of extreme emergencies, the manager may need to step in and teach a class themselves. However, this should be the exception rather than the rule. The manager’s primary responsibility is to oversee studio operations, and every effort should be made to secure a substitute teacher before the manager assumes teaching duties.
Teacher Storage Space
Teachers should not store personal equipment, personal art supplies, artwork, teaching materials, or other personal belongings in Cordovan Art School classrooms, storage areas, or workspaces. They are expected to take their personal belongings home at the end of each class, camp, workshop, or party. Keeping classrooms free of personal items helps maintain an organized, professional environment and ensures that studio space remains available for studio operations.
Pro-tips for higher quality art projects
Watercolors
Use these pro-tips to help students create higher-quality watercolor paintings
- Always paint in a background. This can really help with covering smudges on the paper and also helps the paintings look finished. Even if it’s just a solid color it will always look better than raw canvas or paper as a background. Try sponge painting or using a wet paintbrush to spread paint more easily.
- Use a hair dryer to blow dry in between layers or colors! This really helps the colors not mix together, and also encourages the kids to slow down a bit.
- Remind the kids to go from big to small. Big stuff first then small details.
- Pre-paint your subject with white paint on top of dark background colors if using transparent colors over the background. This really helps the colors pop. You can also have the kids mix a small amount of white paint into the transparent colors to help the opacity. You can tell which colors are transparent by the small square symbol on the bottle. Black square is opaque, white square is transparent, half white/black is semitransparent. Remember acrylic paint darkens as it dries. I’ve included a key attached to this email. I included a work in progress painting of a toucan. The greens are all very transparent and will show up better on the white silhouette than just straight on the blue background.
- Use watercolor pencils (grey) to sketch your image before painting. This was a trick one teacher found to be really, really helpful. It’s much easier for students to erase the watercolor pencil with a damp paper towel, or the pencil line will just dissolve into the paint once it’s painted over. This is especially helpful for heavy-handed students.
- Tape edges down on watercolor, Bristol or pastel paper to a drawing board. This is a little time consuming to set up, but it really elevates the quality of the finished artwork. Not only does it help watercolor paper lay flat after getting wet, it prevents the kids from bending or creasing their work. Use blue tape! Masking tape will tear the paper. Plus, the kids really love taking the tape off. This will leave a crisp border and will really elevate the presentation.
Art Supplies
Cordovan Art School provides a variety of art supplies for teachers and students to use during classes, camps, workshops, and other studio activities. These supplies are intended to support the curriculum and help students create successful art projects while learning a variety of artistic techniques and mediums.
Teachers should use studio supplies responsibly, help students care for materials properly, and notify the manager when supplies are running low or need to be replenished. All supplies should be cleaned, organized, and returned to their designated storage areas at the end of each class.
Ordering & Inventory
Managers should contact their Field Consultant for approved suppliers, ordering information, and current pricing.
Managers are responsible for ensuring that each classroom remains fully stocked with art supplies at all times. Backup inventory should also be maintained in the storage room to prevent supply shortages.
Managers are responsible for ordering and maintaining inventory for:
- Art supplies
- Pottery supplies
- PYOP
- Office & Cleaning supplies
- Summer Camp T-shirts
- Aprons
- Pins
- Marketing Literature
Inventory should be monitored regularly so that supplies can be reordered before they run out. When supplies arrive at the studio, they should be promptly inventoried, organized, and placed in their designated storage locations.
Managers should conduct a quick paint and frequently-used supply inventory check at least two (2) times per week. During these checks, managers should replace, refill, or reorder commonly used supplies before they run out.
Special attention should be given to the follow items because they tend to run out quickly:
- Acrylic paints
- Watercolor paints
- Watercolor paints
- Glazes
- Styrofoam paper plates
- Paper towels
Summer Camp Supply Orders
Summer camp supplies should be ordered 2–3 months before camps begin and, whenever possible, purchased in bulk. Ordering early helps ensure adequate inventory, reduces the need for frequent reordering during busy summer months, and provides time to address any supply shortages or backorders before camps start.
Off-Site Use of Supplies
If teachers need to take supplies off-site for classes, camps, workshops, parties, or special events, they are responsible for returning those supplies to the studio promptly after use. Managers are responsible for tracking studio inventory and ensuring that all supplies are returned and properly stored.
Specialty Art Supplies
Teachers may request specialty art supplies when needed for a class, camp, workshop, party, or special project. Specialty art supplies are defined as any materials that are not included on the list of standard approved studio supplies.
It is the manager’s responsibility to review and either approve or deny all specialty supply requests. When evaluating requests, managers should consider factors such as cost, educational value, safety, availability, and how the supplies support the lesson objectives.
If a specialty supply request is approved, the manager is responsible for ordering the items and paying for them using approved studio purchasing procedures. Teachers should not purchase specialty supplies without prior manager approval unless specifically authorized to do so.
DIY Boards for Clay Hand-Build
Follow these instructions to make a high-quality board for your hand-build clay classes/ camps.
Step 1: staple a canvas to a piece of drywall.
Step 2: a wooden dowel can be used to roll the clay slab evenly when placed on top of 2 stable supports
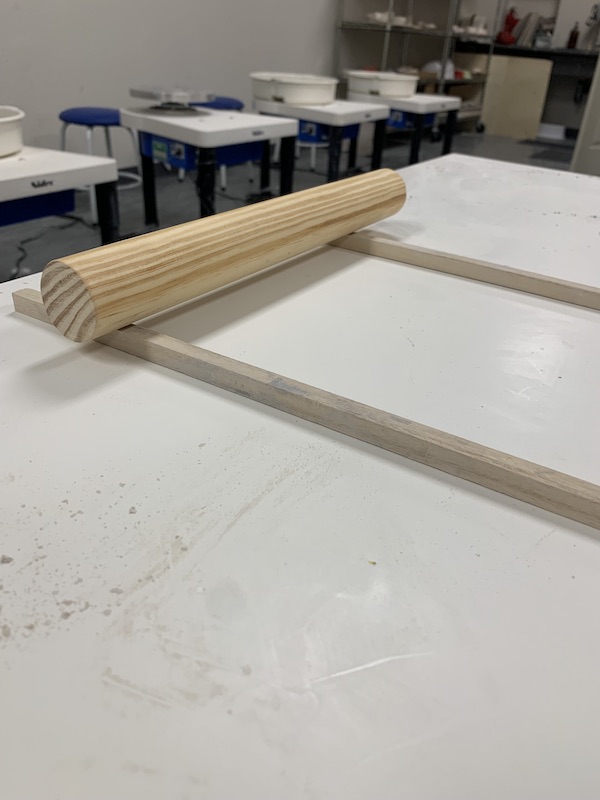
Step 3: Completed hand-build clay station
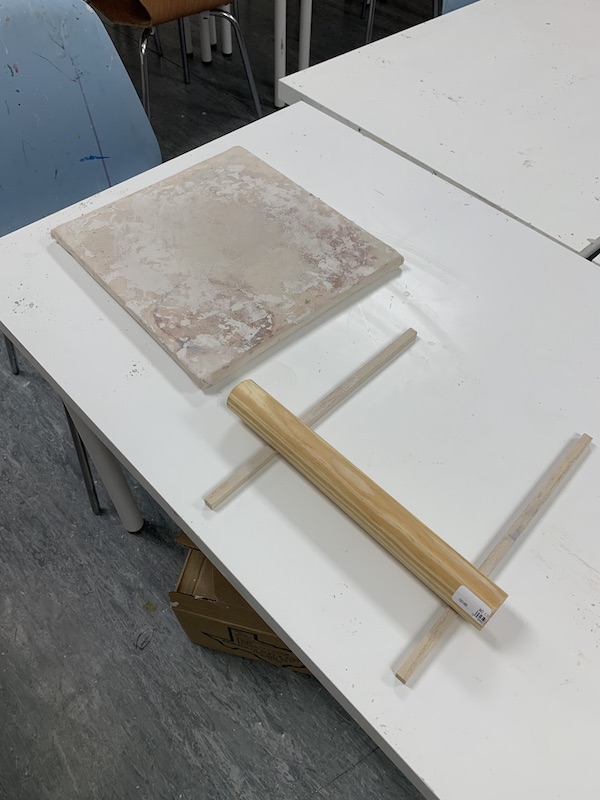
Art Supply Care
Oil Painting Supplies
Oil paints are used exclusively in classes, camps, workshops for teen and adult students where oil painting is specifically designated.
Oil Paint Safety
Do not pour oil painting materials down a sink. These items include:
- Oil paints
- Turpentine
- Mineral spirits
- Oil painting mediums
- Paint-contaminated solvents
When turpentine or other solvents need to be replaced, the used solvent should never be poured down the sink. Instead, absorb the old solvent with paper towels or other approved absorbent materials and dispose of it according to local regulations and studio safety procedures. Managers and teachers are responsible for ensuring that all oil painting materials are handled, stored, and disposed of safely and responsibly.
Oil Brushes
Each studio should maintain one classroom set of brushes designated exclusively for oil painting.
Oil painting brushes must never be mixed with watercolor or acrylic brushes. Brushes used for oil paints should only be used for oil painting and should not be used with any other medium such as watercolors or acrylics.
Managers are responsible for making sure teachers know which brushes are designated for oil painting and understand the proper procedures for their use, cleaning, and storage.
To prevent accidental use, oil painting brushes should be stored separately from watercolor and acrylic brushes, typically on a high shelf or in another clearly designated storage location away from general classroom supplies.
Oil painting brushes are intended for use by teen and adult students only and should only be used during approved oil painting classes, camps, workshops, or private lessons.
Cleaning Oil Brushes
Students should be taught to “dry clean” their brushes by wiping as much paint as possible onto a paper towel before cleaning the brush in the Silicoil container. Removing excess paint first helps keep the cleaning solvent cleaner and reduces the buildup of oil paint sludge at the bottom of the container.
Because the sludge contains organic materials, it can decompose over time and become very smelly. The Silicoil container should only be used to clean brushes that have a minimal amount of paint remaining on them.
To help preserve the quality of oil painting brushes longer, they should be cleaned with the masters brush cleaner after cleaning them in the Silicoil jar.
Turpentine/ Gamsol Containers
Turpentine, Gamsol, or odorless mineral spirit containers should be cleaned at least once per semester to prevent odor buildup and maintain a clean working environment.
Cleaning Procedure:
NEVER, NEVER, NEVER EVER dump the mineral spirits/ gamsol oil down the sink. If you do, the sinks will start to smell really, really bad, and there is no way to fix it.
- Pour the used Gamsol or odorless mineral spirits into an old glass jar or approved waste container.
- Take the used solvent to an oil change facility or other approved hazardous waste collection site for proper disposal.
- Remove the Silicoil coil from the container.
- Wipe out the residue at the bottom of the jar, commonly called “sludge,” using paper towels until the container is clean. The sludge is the primary source of unpleasant odors.
- Reinsert the Silicoil coil into the cleaned container.
- Refill the container with fresh Gamsol or odorless mineral spirits to approximately 1 inch above the coil.
- Dispose of the used paper towels in the trash.
Safety Notes:
- Paper towels containing Gamsol, mineral spirits, or sludge may be combustible if exposed to excessive heat. Store them in a safe location away from heat sources until they are disposed of.
- Wear gloves if desired while cleaning the container.
- Wash hands thoroughly with soap and water after completing the cleaning process.
Acrylic/ Watercolor Brushes
Students should thoroughly wash their paint brushes at the end of each class and place them brush-tip up in the drying container or drying rack. Teachers should inspect all brushes after student clean-up to ensure they have been properly cleaned and placed brush-tip up. Managers should regularly replace worn, damaged, or unusable brushes as needed.
Pouring Acrylic Paint and Glazes
Students under the age of 16 should not be allowed to pour acrylic paints or pottery glazes. It will cause a lot of paint to go to waste. Teachers/ assistant teachers should always pour paints and glazes.
Refilling Watercolor Paint Palettes
At the end of class, used watercolor palettes should be placed on the shelf and left open so the paint can air-dry. Watercolor paints should NEVER be washed down the sink or thrown away. Unlike many other types of paint, watercolor paints can be reactivated with water and reused repeatedly after they have dried, again and again.
Managers should inspect and refill watercolor palettes regularly to ensure they remain stocked and ready for use. After refilling a palette, allow approximately 2–3 days of drying time before placing it back into classroom use so the paint can properly set and harden.
At a minimum, refill watercolor palettes at the beginning of each semester and one week before camps begin.
Jackrabbit Class Software System
Managers will be trained on the use of Jackrabbit Class, the studio’s class management software. Jackrabbit is used to manage student records, class schedules, registrations, payments, attendance, and other important studio operations.
Managers are responsible for ensuring that all student and parent information remains accurate and up to date. This includes contact information, enrollment records, class assignments, payment information, and other account details.
Manager Responsibilities
- Maintaining accurate student and parent contact information.
- Posting payments to student accounts and collecting payments when due.
- Ensuring all students enrolled in weekly classes are set up on auto-pay.
- Entering and maintaining class, camp, workshop, and event information.
- Assigning teachers to classes, camps, workshops, and events.
- Updating enrollment records and class rosters as needed.
- Archiving classes after they have reached their end date.
- Keeping all information in Jackrabbit current and accurate.
Notes/ Record Keeping
Managers should document important conversations, concerns, complaints, and follow-up actions involving students and parents within the student’s Jackrabbit account.
These notes should be entered under the “Misc.” tab and should include:
- The date of the interaction
- A summary of the conversation
- Any actions taken or agreed upon
- Relevant follow-up information
Maintaining accurate records helps ensure consistent communication, supports customer service efforts, and provides a history of important interactions with students and families.
Events, Workshops, Fundraisers & Booths
Workshops
Workshops are 1-time specialized classes where a very specific art technique is being taught by a teacher who is an “expert” in that technique. Workshops should be scheduled and added to both the studio calendar and Jackrabbit at least three (3) months prior to the workshop date. This allows sufficient time for marketing, registration, and community outreach.
Most workshops last approximately 2–3 hours. Examples of workshops include:
- Portrait Drawing
- Comics and Character Design
- Clay and Pottery
- PYOP Santa Plate
- Acrylic Paint Pour
- Etc.
Workshop Scheduling Guidelines
Workshops are not considered one of the four primary revenue streams of Cordovan Art School. Instead, they should be viewed as occasional specialty events that provide additional learning opportunities and community engagement.
Because one-time events require significant marketing and promotional effort, workshops should be scheduled selectively and thoughtfully. It can be difficult to consistently generate strong enrollment for workshops, so managers should avoid overloading the calendar with too many workshop offerings.
Workshops should be used as occasional special events that create excitement, highlight teacher expertise, and provide unique artistic experiences for students and the local community.
Events
Events are one-time annual or seasonal occurrences that help build community involvement, celebrate student achievements, and create memorable experiences for families. Managers should look for ways to participate in community events, summer camp fairs, art festivals, school carnivals, and school STEAM fairs. At these types of events, the manager should set up a vendor booth and promote their Cordovan Art School camps and classes.
Events should be scheduled and added to both the studio calendar and Jackrabbit as soon as it is booked in order to allow sufficient time for marketing, registration, planning, and community outreach.
Most events last approximately 2-24 hours, although the duration may vary depending on the type of event.
Examples of events include:
- Annual Art Shows
- Fall and Spring Open Houses
- STEAM Fairs
- Elementary School Carnivals
- Daddy-Daughter Valentine’s Day Art Date
- Mother’s Day PYOP Handprint Plate
- Holiday-Themed Events
Setting up a Booth at an Event
The organization hosting the event should provide details regarding booth setup requirements. For example, some events provide tables, chairs, tents, or electricity, while others require vendors to bring their own equipment.
Managers should communicate with the event organizer in advance to understand what will be provided and what materials the studio will need to bring.
The list below provides suggestions for items that may be useful when setting up a booth at an event. The specific items needed will vary depending on the type of event, booth size, location, and expected attendance. Managers should select the materials that best fit the event and promotional goals.
What to bring to set up a booth at an event |
ALWAYS bring these Items:
|
Other items that might be useful:
|
Below are some photos that show a booth display. A few pro tips to remember:
- When you are transporting delicate artwork, please keep it protected. You don’t want any art to get folded or have any dog-ear corners because presentation matters—especially in the field of visual arts! One way to protect delicate artwork is to place the artwork between 2 sheets of thick cardboard. You can even tape the cardboard edges, so the artwork doesn’t fall out. The cardboard will protect 2-D artwork from bending. Framed artwork should be wrapped in bubble wrap.
- If you are doing an outside event, it is good to place artwork that is inside of a frame, so it doesn’t blow away in the wind.
- Carefully wrap pottery/ ceramics pieces so they don’t get broken while in transit
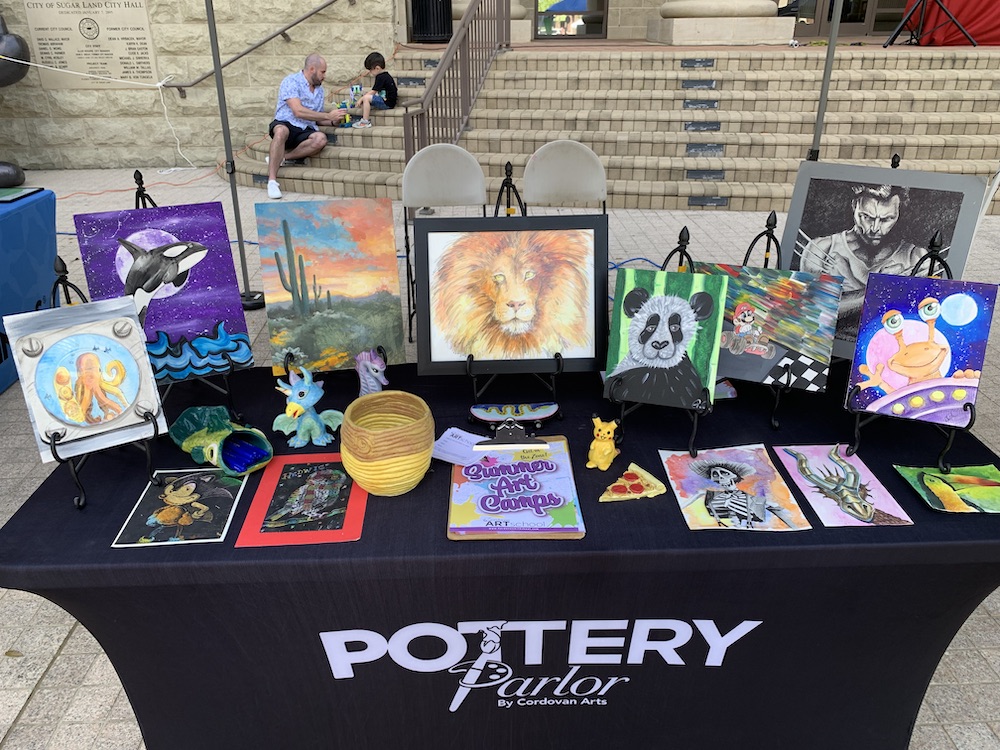
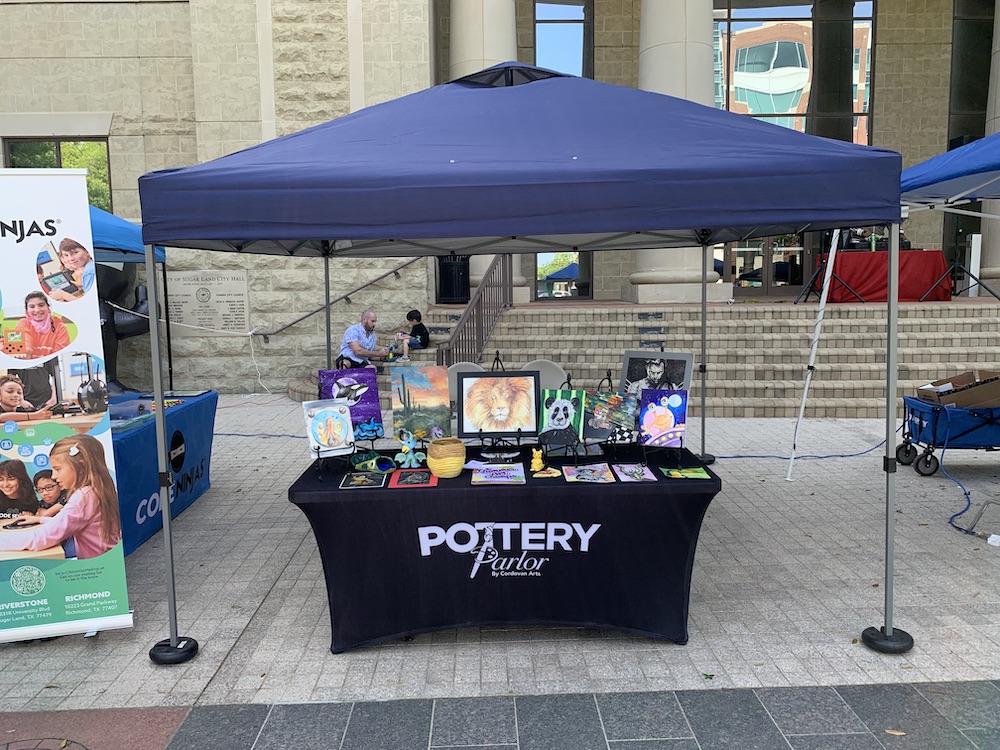
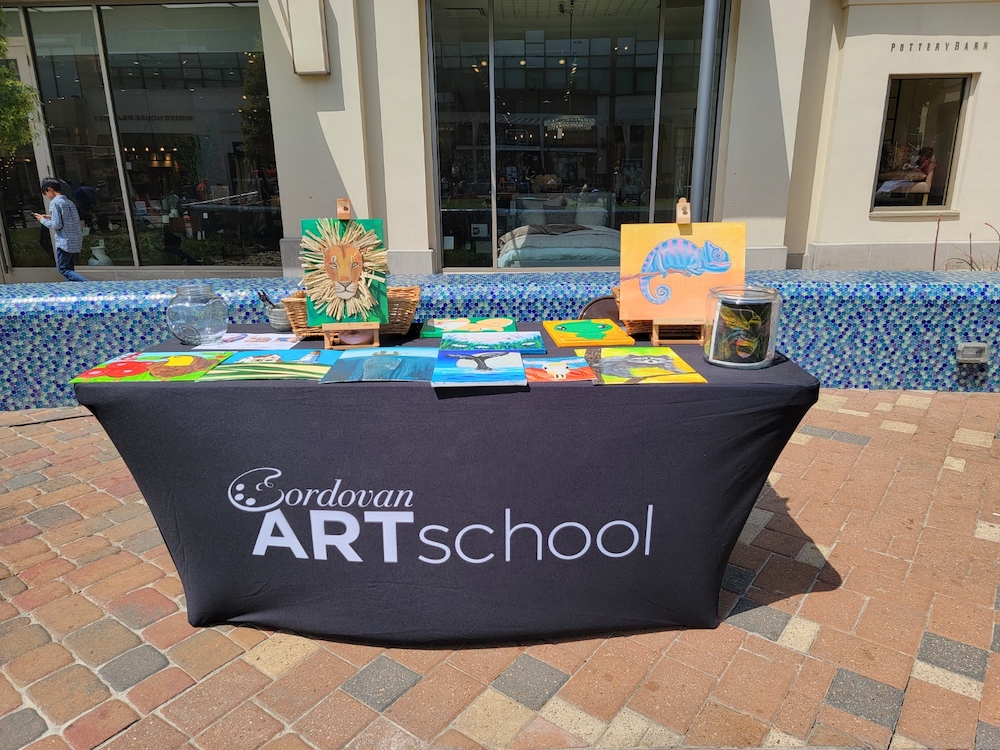
Grand Opening
Franchisees will work alongside the Corporate Office for setting up a “Grand Opening” for each territory in which a Cordovan Art School franchise is launched. The grand opening event will include launch of a marketing campaign localized and geo targeted on the market in which the franchise business is launching.
The manager is in charge of organizing the Grand Opening event. The manager can work together with the Cordovan Art School marketing team to make sure the Grand Opening is planned and promoted.
The grand opening should be pre-marketed by the franchisee to business contacts, family, friends, the local community and local government officials.
The franchisee will distribute promotional materials to help people remember Cordovan Art School and understand our services.
Here is a list of guidelines to follow for the grand opening:

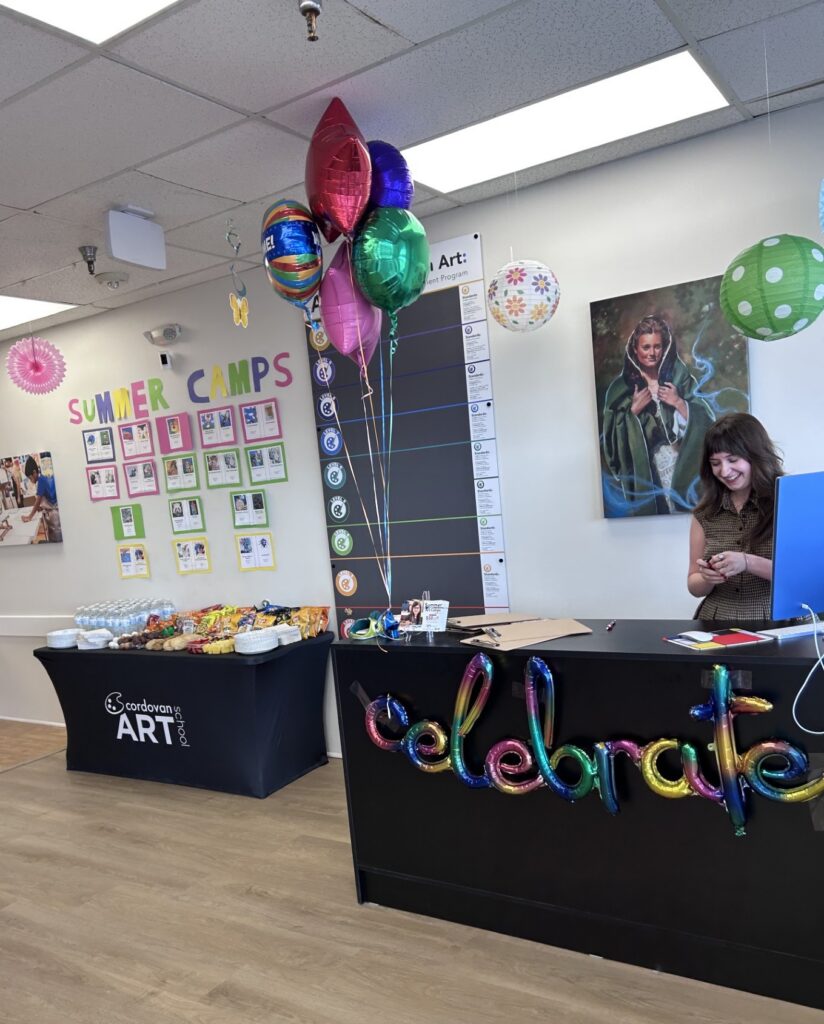
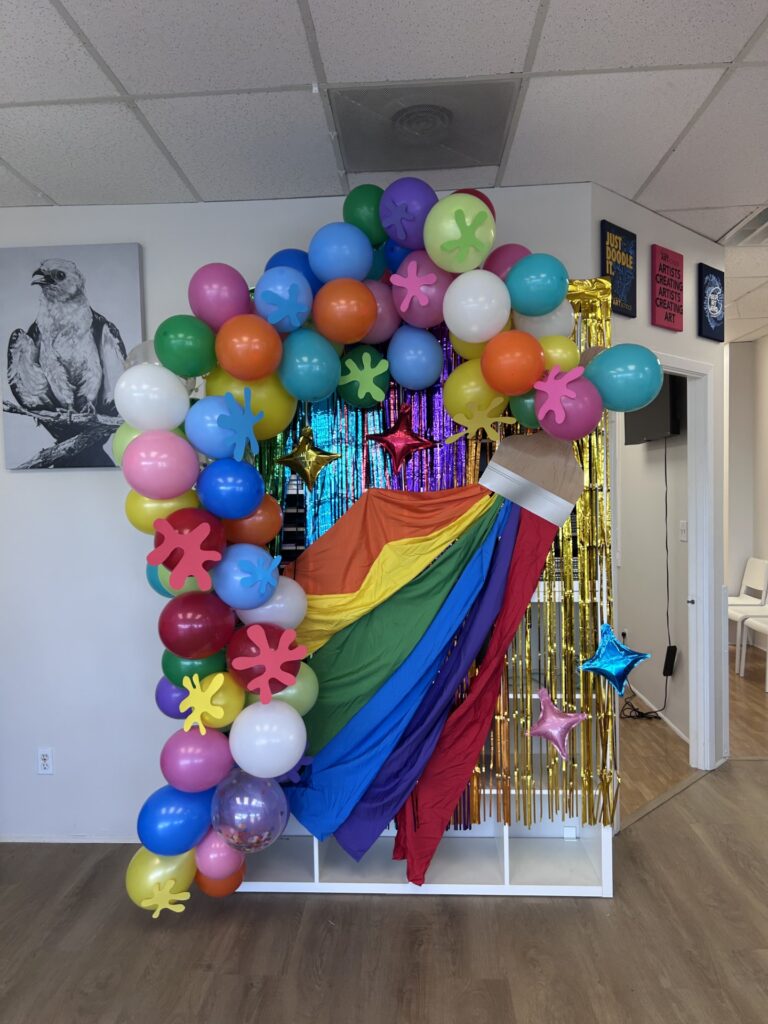
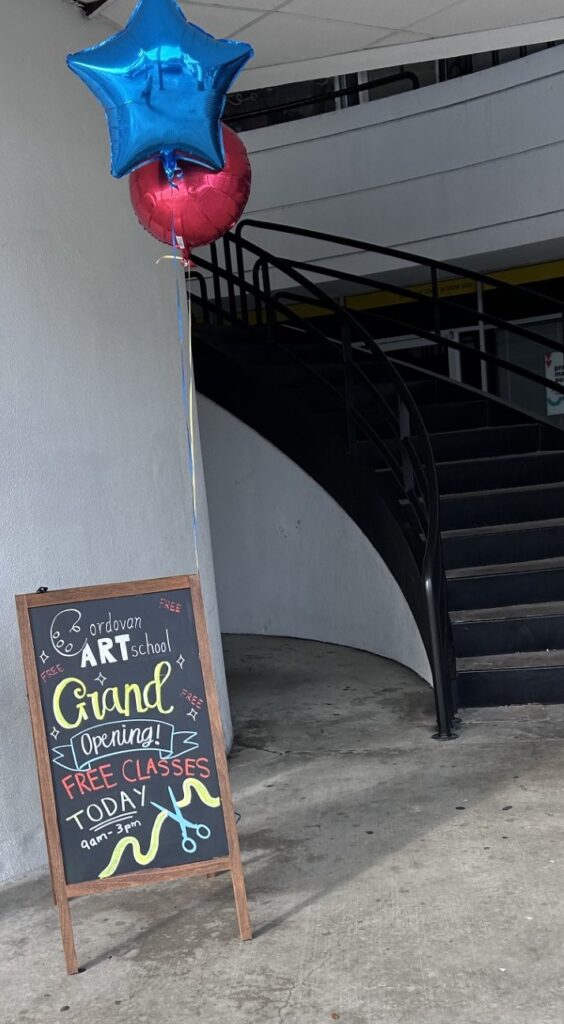
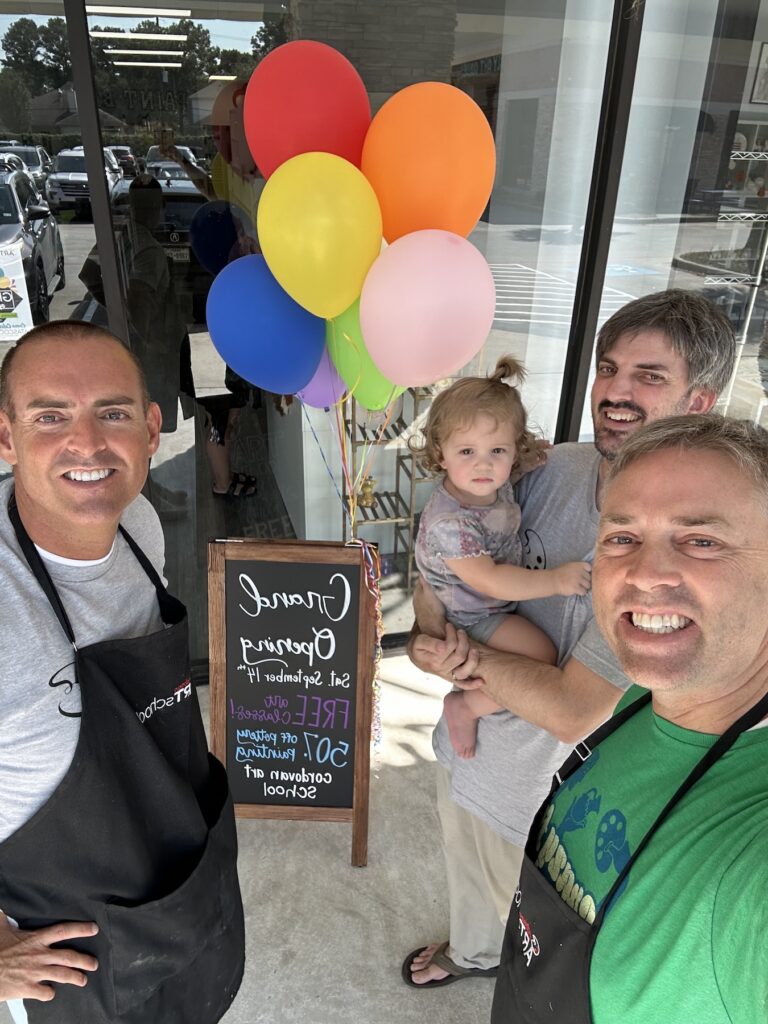
Fundraisers
Fundraisers are a great way to build community relationships, support local organizations, and introduce new families to Cordovan Art School. Managers are encouraged to reach out to PTAs, PTOs, schools, churches, sports teams, scouting groups, and other community organizations to explore fundraising opportunities.
Fundraisers can help increase community awareness, generate new student leads, and provide meaningful support to local causes while creating a fun art experience for participants.
Managers should work with participating organizations to determine the fundraiser format, promotional plan, dates, and revenue-sharing arrangements.
The following is an example of a fundraiser invitation email that can be sent to a PTA, PTO, school, or community organization:
Fundraiser Invitation Email |
Email Subject Line: PTA Fundraising Opportunity with Cordovan Art School Body of Email: Are you looking for a creative & fresh fundraising opportunity for your PTA? Cordovan Art School & Pottery Parlor has fundraising events Option #1: Step-by-Step acrylic painting on a canvas: Parents and students can paint together. (30% of receipts donated to your school or PTA) Option #2: Paint Your Own Pottery (PYOP—only if your studio offers PYOP): Select from over 100 pre-made ceramic pieces. Parents and students can paint together. (30% of receipts donated to your school or PTA) FAQs: How does the fundraiser work? It’s simple! Your organization will select a date and time for the fundraising event. You’ll send out the invites, and we take care of the rest! Your organization will get 30% of the proceeds brought in by all guests who show a copy of your event flyer or mention your organization at checkout. Where are you located? [Write in name and address of your studio] How can I promote my Spirit Night? We will create a digital flyer and send it to you to distribute. You can send it out via social media or email. We will also provide a pdf you can print and distribute. How far in advance do we need to book a Spirit Night? You must book at least 1 months prior to the date of the event. (The sooner the better, because it takes time to get the word out!) How much does it cost to do an Acrylic Canvas Painting? $35 per guest [change price if it is different] How much does it cost to paint your own pottery (PYOP)? – only if your studio offers PYOP) We have a single $6 Studio Day Pass that covers all of your paint supplies, brushes, kiln firing, and support by our trained crew of artists. In addition, each ceramic piece has its own price – ranging from $12 and up. You choose whatever piece you want to paint. How long will it take to receive your fundraising check? We will contact your organization within one week of your event to arrange payment. |
Once a fundraiser has been scheduled, the manager should send a follow-up email to the organizer to provide more details. Here is an example of an email that can be sent:
Email to confirm Fundraiser booking |
Thank you for partnering with the Cordovan Art School & Pottery Parlor for your upcoming fundraiser. We look forward to working with you! Here are some easy ways to get the word out about your fundraiser: -Post the flyer on your organization’s social media account -Invite other people to post it on their personal social media accounts -Print and distribute a hard copy of the flyer to your students. -Send an invitation by email to parents -Add this fundraiser to your school calendar -Place a sign in front of the school -Send a reminder out 1-2 days before the event The day of the fundraiser we will take care of EVERYTHING…and we will make sure everyone is having a great time! At the end of the fundraiser, we will tally the receipts and send 30% of the sales receipts to your organization. |
Annual Student Art Show
Overview
Cordovan Art School hosts an Annual Student Art Show each year, typically held at the conclusion of the Fall–Spring semester in May. The Annual Student Art Show is an event that celebrates the artistic achievements of Cordovan students and teachers.
Students may submit two (2) to three (3) pieces of artwork, depending on available exhibition space. Teachers are also encouraged to submit one (1) piece of artwork for display to help inspire their students.
Ribbons, awards, and special recognitions should be presented to students for outstanding artwork.
Because students develop strong relationships with their teachers, it is highly encouraged that teachers attend the Annual Student Art Show. Teacher attendance demonstrates support for students and helps strengthen the sense of community within the studio.
Managers and studio owners should also recognize teachers during the event for their efforts throughout the year. Teachers play a vital role in helping students develop their artistic abilities, and their contributions should be acknowledged and celebrated.
To create a positive and encouraging experience for all participants:
- Ribbons and awards are presented to students
- If a student does not receive a Best of Show, 1st, 2nd, or 3rd place ribbon, they must receive one (1) Honorable Mention Award for at least one of their submitted entries.
- Special pins can be awared
- The event should celebrate the student’s creativity, effort, learning, and artistic achievement for all skill levels.
The Annual Student Art Show is an important opportunity to showcase student artwork, strengthen community connections, recognize teacher contributions, and celebrate the mission of Cordovan Art School: “We Create Artists.”
Timeline & Planning
Annual Student Art Show–Timeline |
6-12 months prior to Art Show
1-2 months prior to Art Show
1-2 weeks prior to Art Show
Setting Up
Responsibilities during art show:
Clean Up
|
Student Artwork Drop-Off
When the students drop off their artwork to be entered into the student art show, they must fill out the Student’s Artwork Label (see example below). This label must be taped to the BACK side of the student’s artwork.
Title of Artwork__________________________________ Medium (pastel, pencil, watercolor, etc.) _______________ Artist name: _____________________________________ Artist Age—not needed for 18 & older ________________ Entry # (assigned by the manager) ____________________ |
Student’s Artwork Label: The information written on the Student Artwork Label MUST also be entered into a excel sheet for sorting purposes. A link to this form is below:
See Form: Student Art Show Entries click here
Artwork Title Cards: Artwork Title Cards should be created several days before the art show, based on the information inputted into Student Art Show Entries. During the art show set-up, the Artwork Title Cards should be placed directly beneath each art show entry, to identify an artist and their artwork. You can print the title cards using an Avery label, and mount them to black cardstock for a nice-looking black border.
Sunset on the Rivera Watercolor Jane Doe, Age 6-8 503 |
Artwork Title Card (sample)
Student Name Tags: Upon arriving at the Student Art Show, the art students should be invited to write their name on a name tag, so that they can be recognized as a participating artist in the show. The name tag should have the Cordovan Art School logo (small) at the top. The student should write their name with a marker in the center of the name tag. Name tags with a sticky back-side should be printed several days before the art show, and should be provided to the artists as they enter the art show.
⚠️ Image placeholder: Please download and re-upload this image to the WordPress media library. Source: images/image28.png |
Student Name Tag (sample)
Handling & Transporting Artwork
Cordovan employees should not transport artwork. However, when it is necessary to transport artwork (I.e. for an art show), please follow these instructions
- Place framed artwork standing up vertically, not lying flat. If a glass frame is flat, and you hit a bump in the road, it can break.
- Place a blanket, or something soft under the artwork, so the frames don’t get scratched on anything in your car.
- Place a piece of cardboard, or blankets between 2 frames so the frames don’t bang against each other and get scratched.
- Place the front of the frame against the front of the other frame/ and the back of the frame against the back of the other frame. That way you won’t have any wires scratch the front of the frames or the paintings. Even if you put cardboard or blankets between the art, still follow this rule to avoid any potential damage.
- Make sure all artwork is tight and secure and won’t topple on top of each other
- All 3-D pieces must be bubble wrapped very well–don’t take any chances with 3-D, as it can easily break. After wrapping each piece, you should also put it in a cardboard box with newsprint to keep it safe.
- All matted art, and “flimsy” non-framed art should be placed in a cardboard box and should lay flat, so it doesn’t get wrinkled, or bent
- All non-framed stretched canvases should be placed front to front and back-to-back–so that the staples don’t scratch the artwork.
Returning Artwork to Students
Students should take home their artwork and ribbons at the end of the show.
Managers are responsible to make sure all artwork is returned safely to the artists, and that the student artists receive their ribbons and awards.
Make it Your Own!
All art shows have their own personality. Have fun, and make it yours!
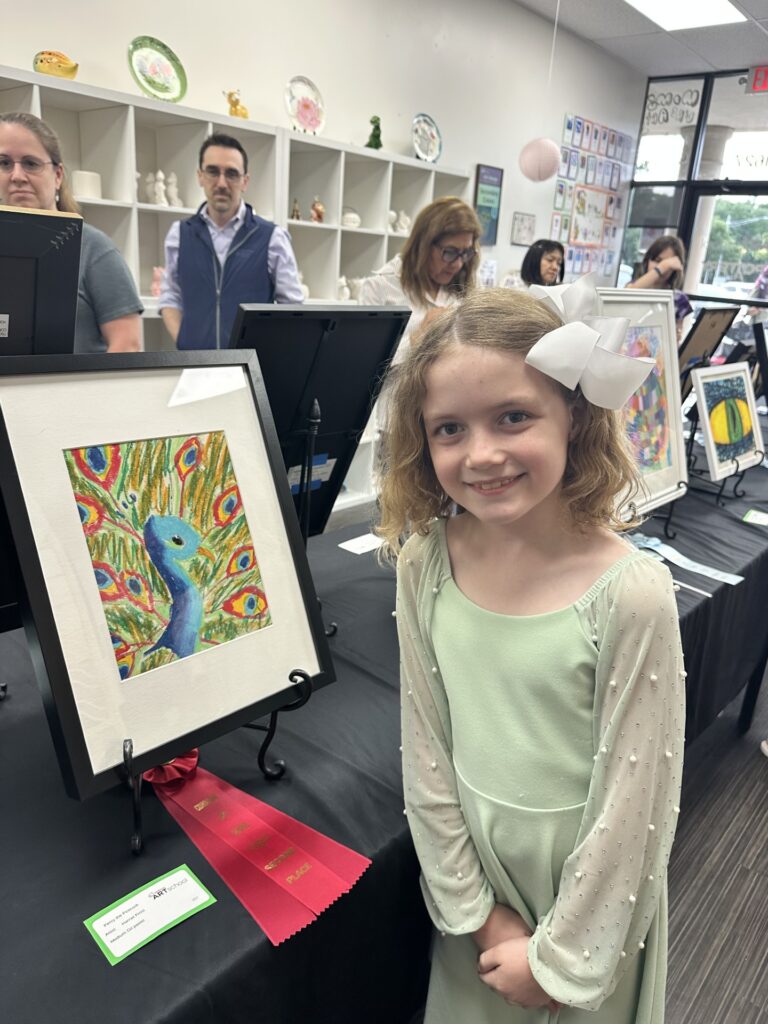


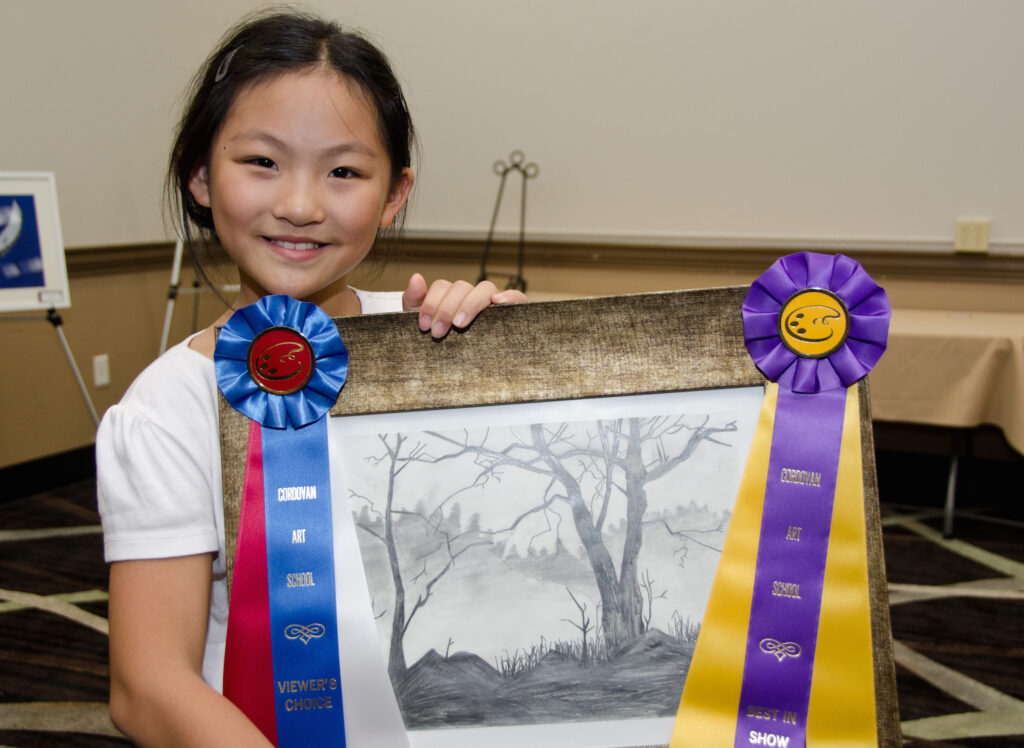
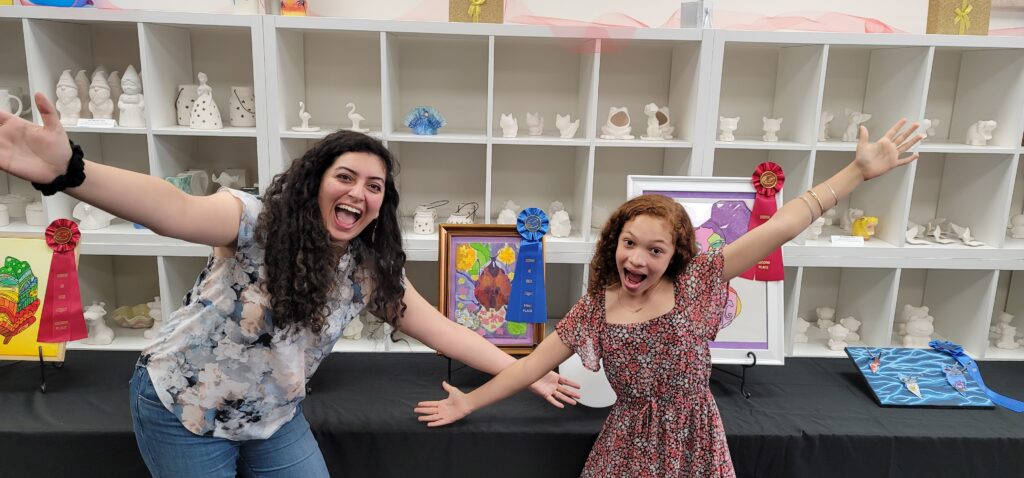
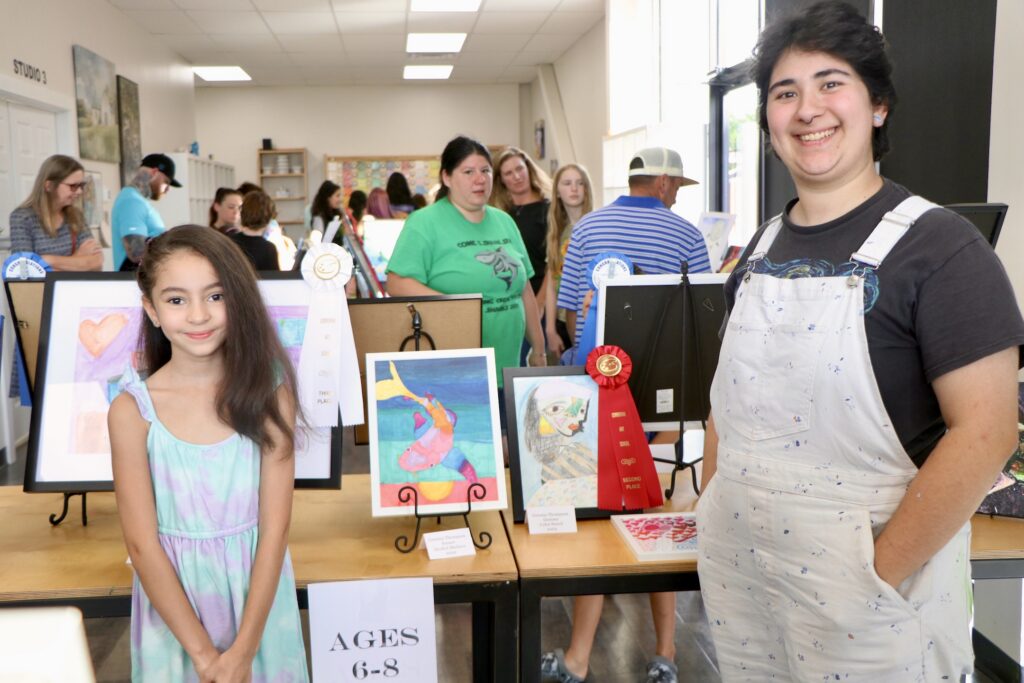
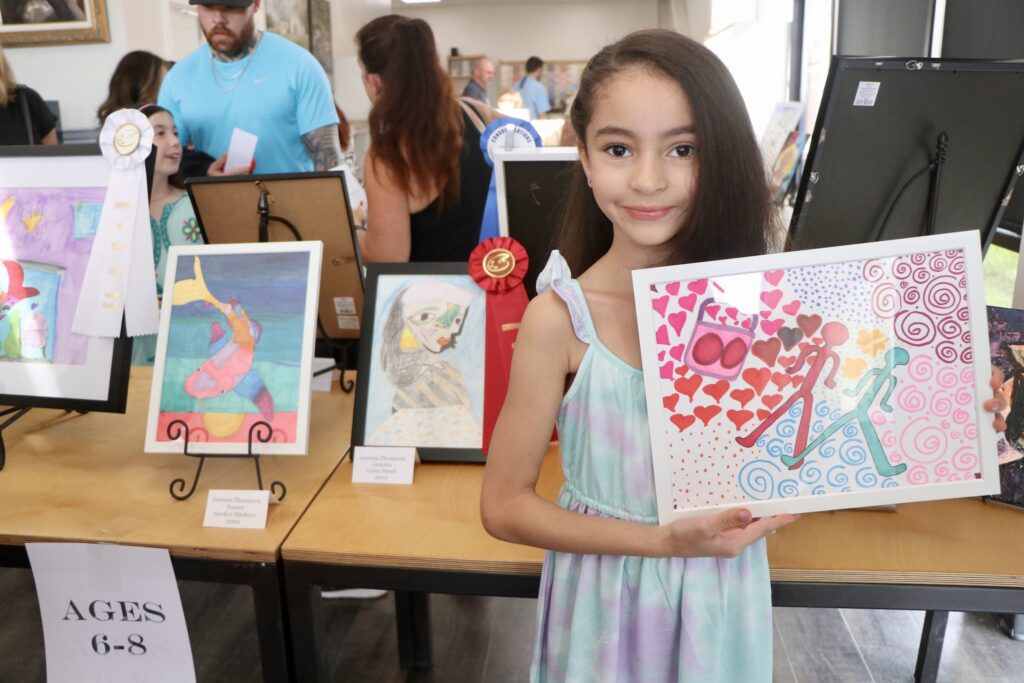
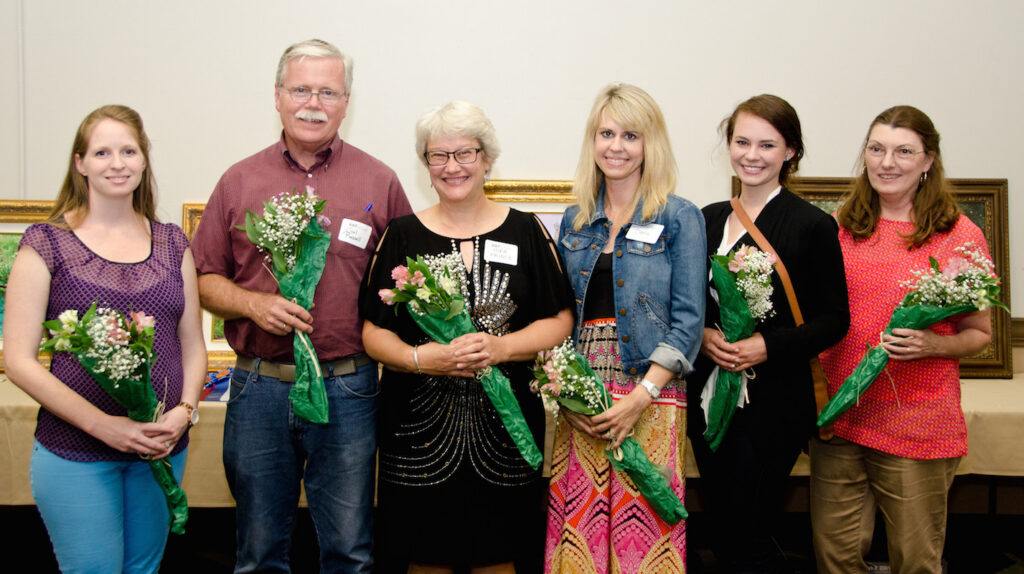

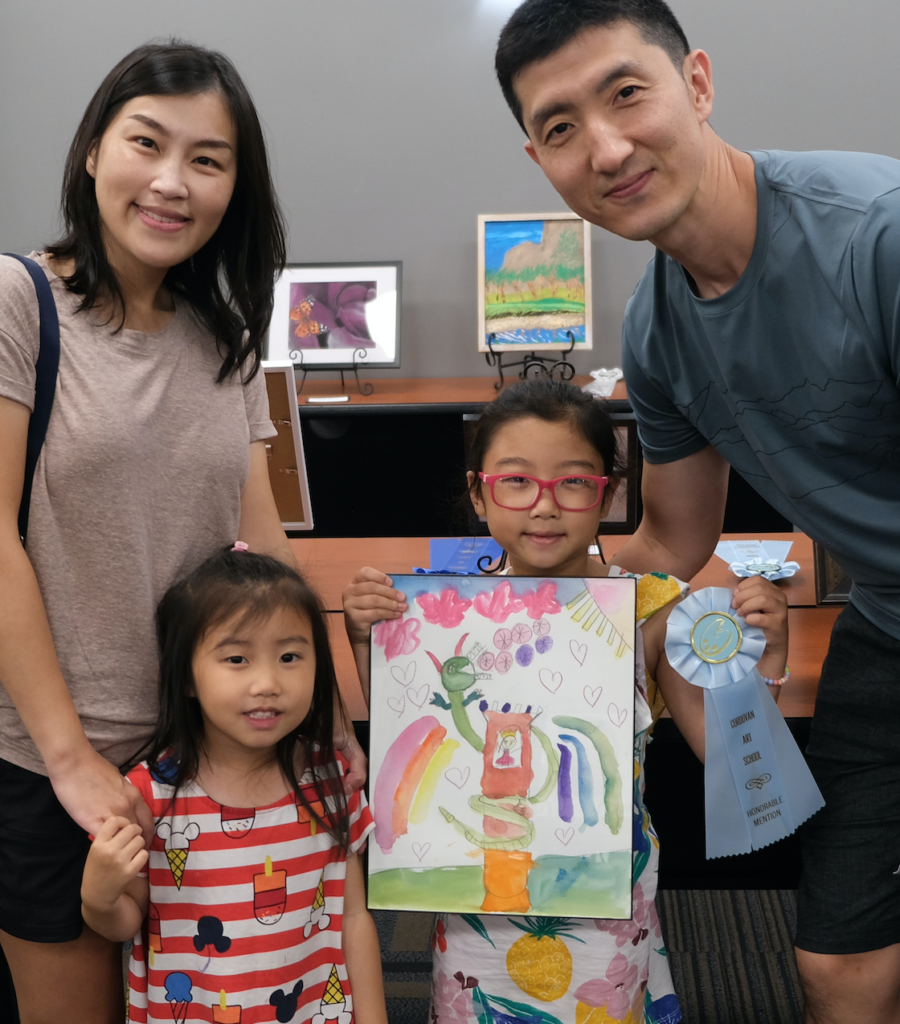
Health and Safety
Student Safety
Classroom Supervision
Students must NEVER be left in a classroom without adult supervision. At all times, a teacher, assistant teacher, manager, or other authorized staff member must be present with the students.
If a teacher needs to leave the classroom for any reason, even briefly, another staff member must cover the class until the teacher returns. If the class or camp does not have an assistant teacher assigned, the manager should have a plan in place to provide coverage whenever needed.
If an emergency arises: In smaller studios, a teacher may be able to step to the classroom doorway and notify the manager that coverage is needed. In larger studios, teachers should call, radio, or otherwise communicate with the manager or another staff member to come supervise the class before leaving the room.
Lobby Supervision
Security Cameras
A security camera may be installed in the lobby area to help promote student safety, security, and general studio oversight.
When installed, the camera should be positioned to monitor:
- The main entry and exit door
- The lobby and reception area
- Customer check-in and check-out areas
Cameras should be placed in a manner that respects the privacy of students, parents, teachers, and staff while providing appropriate visibility of public areas within the studio.
Security camera use must complies with applicable laws, regulations, and company policies regarding privacy and video recording.
Door Chime
A door chime may be installed to notify staff whenever someone enters or exits the studio. This can be especially helpful when the manager or staff members are assisting customers in classrooms, storage areas, kiln rooms, or other areas away from the front desk.
Manager’s Role
For student safety, managers should NEVER leave the lobby area unattended while classes or camps are in session. Tasks such as kiln loading, pottery dipping, organizing storage rooms, inventory work, and other back-of-house projects should be performed by a staff member or performed by the manager during times when classes or camps are not in session.
As the primary representative of the studio, the manager should be present in the lobby to greet visitors, answer questions, assist customers, and provide excellent customer service. The manager must also monitor who comes in and out of the studio for the safety of the students.
Managers should always have a plan in place to assist teachers when support is needed. During classes, camps, workshops, and other studio activities, managers should remain accessible and ready to help with classroom needs, student concerns, parent questions, supplies, emergencies, or other issues that may arise.
While classes or camps are in session, and the lobby is secure, managers should take time to walk around and check on teachers to see how their art projects are going and how the students in the class are doing. By checking on teachers and classes frequently it will also help teachers know they have support, and their art projects will tend to go more smoothly
Before/ After Care
During camp before and after care, the manager must always have a 2nd person like a staff member or an assistant teacher in the studio. Having 2-deep leadership/ supervision will protect the children and the manager in case something happens.
If parents have not picked up their child after class is over, the office manager must remain with the student until the student’s parents come to pick up the child.
Camp Check-In/ Check-Out
All students must check in and check out each day of camp.
Check-In:
- Students should check in at the front desk upon arrival.
- The parent or authorized guardian should initial the camp attendance sheet during check-in.
Check-Out:
- Students should be checked out by a parent or authorized guardian at the end of camp.
- The teacher should have a copy of the camp roll and obtain the parent or guardian’s initials during check-out.
Authorized Pick-Up Procedures
Student safety is a top priority.
Students may only be released to a parent, guardian, or other individual who is listed as an authorized pick-up contact in the student’s Jackrabbit account.
If an individual arrives to pick up a student and is not listed as an authorized contact in Jackrabbit Class, the manager should contact the parent or guardian before releasing the student. When necessary, identification may be requested to verify the identity of the person picking up the student.
If there is any uncertainty regarding who is authorized to pick up a student, the manager should contact the parent or guardian before releasing the child. Student safety should always take priority.
Uber, Lyft, and Taxi’s
For safety reasons, students may not be released to an Uber, Lyft, taxi driver, or other transportation service unless a parent or guardian is physically present and authorizes the release at that time.
Student Behavior Issues
If a student is causing a disruption, harming another student, or creating a safety concern, it is the manager’s responsibility to take the lead in resolving the situation.
Remove the Student from the Situation:
If appropriate, invite the student to step into the lobby or another supervised area to take a break and calm down. Most of the time, a short break and a quiet, positive-energy conversation can help the student reset and return to class successfully.
Managers, teachers, assistant teachers, and staff members should never physically restrain or touch a student, and should never take personal photos or videos of students.
If a student refuses to leave the classroom, focus first on maintaining the safety of all students and staff. If necessary, contact the student’s parent or guardian for assistance.
Show Kindness and Stay Calm
Remain calm, patient, and respectful. Listen to the student, give them time to calm down, and avoid escalating the situation. Many behavior issues can be resolved through kindness, consistency, and clear communication.
Call the Student’s Parents
Whenever a student is removed from class for behavioral reasons, illness, injury, or any other significant concern, the manager should contact the parent or guardian as soon as possible. Over communication is always best!
Do not wait until the end of the week to discuss ongoing behavior concerns. The parents may wonder why you didn’t say something sooner. And it is very likely that the child has already told them and made them think the situation is much worse than it really is. Early communication helps build trust and prevents misunderstandings with parents.
It is important that the manager initiates the phone call to the parent (not the child). The parents needs to know that the manager is in control of the situation.
When speaking with parents:
- Remain Calm. Explain the situation clearly and professionally.
- Share the facts of what occurred.
- Allow the parent to speak with their child if appropriate.
- Talk to the parent and be sure to clear up any misinformation that the child may have said.
Documentation
Managers should document significant behavior incidents, injuries, parent communications, and follow-up actions in the student’s Jackrabbit account.
If you have an assistant manager, please make sure you are passing along this information to them so they will know what to do when you are gone.
Prevention
The best way to handle behavior issues is to prevent them whenever possible. Managers and teachers should address concerns early, maintain a positive classroom environment, and intervene before minor issues become larger problems.
Strong leadership, communication, and consistency help make Cordovan Art School a safe, positive, and welcoming place for all students.
Medications and Emergencies
Managers, teachers, and staff members should never give medication to a student. This includes pills, liquid medications, ointments, creams, eye drops, cough drops, or any other form of medication.
Without parent involvement, staff should limit care to basic first aid measures such as:
- Soap and water
- Band-Aids
- Ice packs or cold compresses
- Wet paper towels
It is the responsibility of the parent or guardian to administer any medication to their child.
Medications
Parents should disclose any significant medical conditions, allergies, medications, EpiPens, or other special medical needs during registration. Managers should review registration information and be aware of students who may require special attention in an emergency.
If a student has an EpiPen or other emergency medication, the manager should discuss a plan with the parent or guardian before the student attends class or camp.
Emergency Situations
In any life-threatening emergency, staff should call 9-1-1 immediately.
If a parent has provided an EpiPen and authorized staff to assist during an emergency, staff should follow the agreed-upon emergency plan while emergency services are being contacted. Student safety should always be the highest priority.
Food Allergies
Managers, teachers, and staff should be aware of student allergies, especially during snack and lunch times.
To reduce the risk of allergic reactions, Cordovan Art School employees should not provide food, candy, treats, or beverages to students unless specifically authorized by the parent and approved by the manager. Parents should be responsible for providing any food or snacks for their children.
First Aid
Teachers should notify the manager immediately anytime a student is sick, injured, or involved in an incident, and the teacher should send the student to the lobby. For minor injuries, the manager may provide basic first aid using the studio’s first aid kit. If the injury appears serious or requires medical attention, the manager should contact the parent or guardian immediately.
Injuries and Health Concerns
If a student is injured in any way or reports feeling unwell, always call the parent and let them know immediately when it occurs. Examples include:
- Falls or minor injuries
- Headaches
- Stomachaches
- Hair Pulling
- Stepped-on toes
- Pencil pokes
- Accidental cuts, bruises, or bumps
- Any other injury, illness or health-related concern
Parent Communication: The manager should notify the parent or guardian whenever a significant incident involving their child occurs. Prompt communication helps ensure parents receive accurate information directly from the studio and demonstrates that the situation was addressed appropriately. When in doubt, it is better to communicate with the parent than to remain silent. Proactive communication helps build trust, prevent misunderstandings, and show that the studio cares about the well-being of every student.
It may seem excessive but a manager should make sure they have done everything they can if a parent comes to you with a question or complaint.
Maxi Pads: The manager should have a few maxi pads (no Tampons) on hand for emergency purposes. We have at least 1 girl ask every summer.
Conflicts and Hurt Feelings
If a student is being picked on, repeatedly has hurt feelings, or becomes involved in an argument or conflict with another student, the teacher should notify the manager. It needs to be taken care of on the same day as the incident occurred.
The manager should address the issue promptly and discuss the situation with the parent or guardian during student pick-up. If the manager doesn’t talk to the parent on the same day, the student might go home and make the incident appear to be much worse than it actually was. Concerns should not be delayed until a later date, as misunderstandings can grow when parents hear only one side of the story.
Respectful Communication
Managers, teachers, and staff should treat all students and families with kindness, courtesy, and respect.
Staff should not proactively ask students to identify or share personal information regarding gender identity, pronouns, or similar topics as part of classroom discussions or activities. Such conversations can be personal in nature, and students should not feel pressured to discuss them in a classroom setting.
If a student or parent voluntarily shares this information, Cordovan representatives should listen respectfully and respond in a professional and considerate manner.
When a student or parent requests that a specific name or pronouns be used, managers, teachers, and staff should make an effort to honor that request as a matter of courtesy, respect, and professionalism. All conversations regarding personal matters should be handled privately and respectfully.
Inclusive Environment
Cordovan Art School is committed to creating an atmosphere of acceptance, kindness, and respect for all students, parents, teachers, staff, and guests. We strive to maintain a welcoming environment where everyone feels safe, valued, and comfortable participating in our programs.
To help foster a positive studio culture, managers, teachers, staff, students, and guests should avoid engaging in discussions about politics, religion, or other potentially divisive or emotionally charged topics while participating in Cordovan Art School activities.
The focus of the studio should remain on art education, creativity, personal growth, and building positive relationships within the community. By treating one another with courtesy and respect, we can help ensure that Cordovan Art School remains a welcoming place for everyone.
Photo Release Requests
If a parent requests that photos not be taken of their child, the manager must document this request immediately in Jackrabbit and ensure that all teachers and staff members are aware of the restriction.
Jackrabbit Procedure:
- Open the student’s account.
- Navigate to the Misc. tab.
- Enter “NO PHOTOS” in the Roll Notes section.
Once entered, the words “NO PHOTOS” will automatically appear next to the student’s name whenever a class roll is printed. This provides a clear visual reminder to managers, teachers, and staff that the student does not have permission to be photographed.
In addition to updating Jackrabbit, the manager should verbally remind the teacher before classes, camps, workshops, or events begin to ensure the request is followed.
Managers, teachers, and staff are responsible for honoring all photo restrictions and taking reasonable precautions to ensure that students marked “NO PHOTOS” are not included in photographs, videos, social media posts, marketing materials, or other promotional content.
Job Safety
Franchisees must document and report all accidents/incidents resulting in injury, illness, or damage to their insurance company immediately. This should be done to protect from potential liability that may arise from situations involving an injured employee while a project is underway. Franchisees are highly encouraged to investigate the methods for processing a claim or contacting an agent at the time the insurance policy is purchased.
Emergency Medical Treatment
If a crewmember sustains a severe injury requiring emergency medical treatment:
- Call 911
- Call for local help and seek assistance until the paramedics arrive
- Use the victim’s emergency contact numbers to reach out to their family
Emergency Phone Numbers
The following phone numbers MUST always be readily available:
- Fire Department
- Ambulance/EMS
- Police
- Medical Clinic/Hospital (and address)
Minor Wounds
Wash the wound using soap and water. Cover the wound using clean dressing.
Major Wounds
Apply pressure directly to the wound using a bandage or cloth. If blood seeps through the applied bandage, add an additional bandage on top of the existing bandage. Keep direct pressure on the wound and elevate above heart, if possible, until medical help arrives.
Broken Bones
Do not move unless it is necessary. If the victim must be moved, “splint” the injured area. Use a board, cardboard, or rolled newspaper as a splint. If the crewmember is unsure how to accomplish this, wait for medical personnel to arrive.
Burns
Rinse the burned area, without scrubbing it, and immerse it in cool water; DO NOT USE ICE WATER. Blot-dry the area and cover it, using sterile gauze or a clean cloth.
Eye Injury
Do not rub your eyes. Use the corner of a soft clean cloth to draw particles out or hold the eyelids open and flush the eyes continuously with water. Seek medical attention for large particles in the eye.
Occupational Safety and Health Administration (OSHA)
Additional information on workplace safety and health hazards can be found via the primary webpage of the Occupational Safety and Health Administration (OSHA).
Link: https://www.osha.gov/
Website
Keeping Information Current
Franchisees and managers are responsible for ensuring that all information related to their studio location is accurate and up to date on the website at all times.
This includes:
- Weekly art classes
- Camps
- Workshops
- Events
- Teacher profiles
- Photos and images
- Links
- Studio information
- Any other content specific to their location
Because website content changes frequently, website maintenance is an ongoing responsibility throughout the year.
Whenever a manager creates a new class, camp, workshop, or event in Jackrabbit, they should verify that the information is displaying correctly on the website. Information entered into Jackrabbit does not always appear automatically correctly on the website, as additional web development processing may be needed.
If a manager discovers missing information, incorrect details, broken links, or other website errors, they should notify the Cordovan Art School support team immediately so the issue can be corrected as quickly as possible.
Programming Ahead
Classes, camps, workshops, events, parties, and other studio programming should be scheduled and posted on the website at least three (3) months in advance whenever possible. Advance planning provides adequate time for marketing, registration, staffing, supply ordering, and customer awareness. Summer Camps should be posted by December for camps taking place the following year.
Managers are responsible for ensuring that programming is entered into Jackrabbit and communicated to the appropriate marketing and website teams in a timely manner. Posting programming early helps maximize enrollment, improve planning, and increase the effectiveness of marketing efforts.
Setting Prices
Studio owners are responsible for setting pricing for their studio location. Owners may consult with the Cordovan Management Team when determining pricing strategies and rates.
Managers should ensure that all prices are approved by the studio owner before they are entered into Jackrabbit. This includes pricing for weekly classes, camps, workshops, events, PYOP, parties, retail merchandise, and any other product or service.
Managers should verify that pricing is accurate in Jackrabbit, on the website, and in any marketing materials before registrations begin. Any pricing changes should be approved by the studio owner prior to implementation.
Registration and Supply Fee (Weekly Classes Only)
Weekly art classes include a one-time Registration and Supply Fee that must be manually posted to the student’s account by the manager when a new student enrolls.
The Registration and Supply Fee helps cover:
- Student enrollment and onboarding
- Art supplies used throughout the year
- Student aprons
- Awards and recognition programs
- Administrative support and account setup
The Registration and Supply Fee renews annually at the beginning of each Fall–Spring semester on September 1.
Managers are responsible for manually posting the fee:
- When a new student enrolls after September 1
- At the beginning of each new Fall–Spring semester for returning students
Managers should ensure that all Registration and Supply Fees are posted accurately and consistently in accordance with studio pricing policies.
FAQ’s
Emergencies
Call 9-1-1 for immediate safety or life-threatening emergencies.
Make up classes
Tuition reserves a student’s spot in the class and covers the ongoing costs of operating the program, regardless of attendance. Cordovan Art School does not offer make-up classes for students who miss class for any reason, including illness, vacations, scheduling conflicts, extracurricular activities, or inclement weather.
Weather Closures
Cordovan Art School follows the weather closure guidance of the nearest public school district located within the studio’s service area. If the school district cancels classes due to severe weather or hazardous conditions, the studio will generally follow the same closure recommendation.
In the event of a weather-related closure or other unforeseen cancellation, classes will not be rescheduled unless otherwise determined by the studio owner. Managers should communicate closures promptly and clearly to affected families.
Students transferring between locations
If a student transfers from one Cordovan Art School location to another, the student should be dropped from the original location and issued a full refund for any applicable fees paid to that location.
The student should then register separately at the new location and pay the applicable tuition and fees required by that studio.
Funds should not be transferred between Cordovan Art School locations. Each studio is responsible for collecting and managing its own registrations, payments, refunds, and customer accounts. Managers should process the withdrawal and new enrollment as two separate transactions.
Refunds
All camp sales are final. Camp registrations are non-refundable once a reservation has been made.
Because camps require advance planning, staffing, supply purchases, and reserved classroom space, refunds, credits, make-up days, or transfers are not provided for missed camp days, schedule changes, illness, vacations, or other circumstances.
Any exceptions to this policy must be approved by the studio owner.
Scholarships
The availability of scholarships is determined by the studio owner. Each studio may establish its own scholarship policies and budget.
Cordovan Art School recommends giving scholarships on a case-by-case basis. When a scholarship is granted, the student or family should be asked to contribute whatever portion of the tuition they are reasonably able to afford. Scholarship recipients should also demonstrate a genuine interest in art by sharing an art portfolio, submitting a drawing or painting, or completing another approved art-related activity as part of the application process. When the student or family puts forth effort to gain the scholarship, the scholarship has more value to them than if it is given to them for free.
For established studios, no more than three (3) half-day summer camp scholarships should be awarded each year without approval from the studio owner.
For newer studios (Years 1–3), owners may choose to offer additional scholarships to increase community awareness, introduce new families to the studio, and support enrollment growth. Some studios have awarded as many as fifty (50) scholarships during their first year to help build awareness. When awarding scholarships, make an effort to reach a variety of families and friend groups so the studio gains exposure across multiple communities.
All class scholarships must receive approval from the studio owner before being awarded. Managers should maintain records of all scholarship recipients and any approved scholarship amounts.
Donations
Cordovan Art School loves to support worthwhile causes in the community. Donations are typically provided for silent auctions, school fundraisers, nonprofit events, and other charitable causes.
Common donation items may include:
- One (1) free month of weekly art classes
- One (1) free 3-hour camp session
- One (1) free half-day summer camp
Managers should consult with their Field Consultant or studio owner if they have questions about what type of donation is appropriate for a specific event or organization, or how many donations to offer.
Bank Deposits
If a studio accepts cash payments, the owner or manager should make bank deposits at least every two (2) weeks, or more frequently as needed.
Studios should avoid keeping large amounts of cash on-site. Regular deposits help improve security, reduce risk, and ensure that studio funds are properly accounted for and protected.
Managers should follow any cash-handling procedures established by the studio owner and maintain accurate records of all cash transactions and deposits.
Pets/ Animals in Studio
Students, teachers, staff, and guests should not bring pets or personal animals into the studio during classes, camps, workshops, parties, or other studio activities.
The only exception is for service animals that are permitted by law.
This policy helps maintain a safe, clean, and comfortable environment for all students and staff, including those who may have allergies, sensitivities, or concerns around animals.
Touch-up Paint
Managers should keep a small bucket of matching touch-up paint on hand for routine wall maintenance. Walls can become marked, scuffed, or stained through normal studio use, especially during busy camps and events.
Touching up walls regularly helps keep the studio looking clean, professional, and well-maintained. Managers should inspect walls periodically and touch up any areas that need attention.
After summer camps, wall touch-ups are often necessary due to increased studio traffic and activity. Regular maintenance helps ensure the studio remains fresh, welcoming, and visually appealing for students, parents, and visitors.